"It was at the great concert given by the Queen of Hearts, and I had to sing:"Twinkle, twinkle, little bat! How I wonder what you're at!" You know the song, perhaps?' `I've heard something like it,' said Alice. `It goes on, you know,' the Hatter continued, `in this way: "Up above the world you fly, Like a tea-tray in the sky. Twinkle, twinkle--"'-Mad Tea Party
There is nothing more exciting to me then re-visiting favorite childhood stories and adventures, one of those is the story of Alice in Wonderland. When I was first born my Aunt Noel, gifted me with a red leather hard bound copy of Alice in Wonderland, she took one look at me as a newborn and declared this would be my favorite story, she was more then right, I'm obsessed with it, lol.
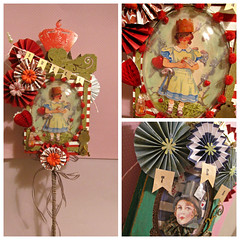
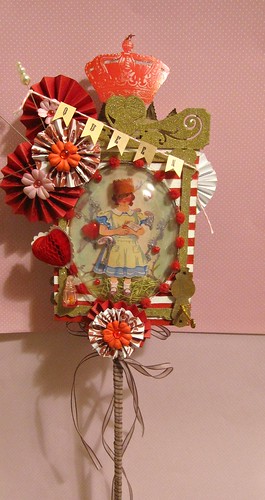
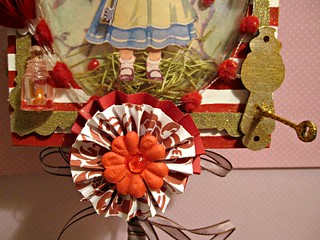
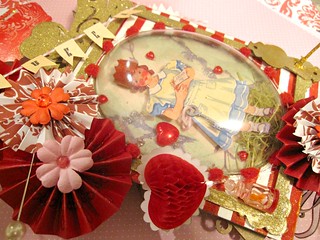
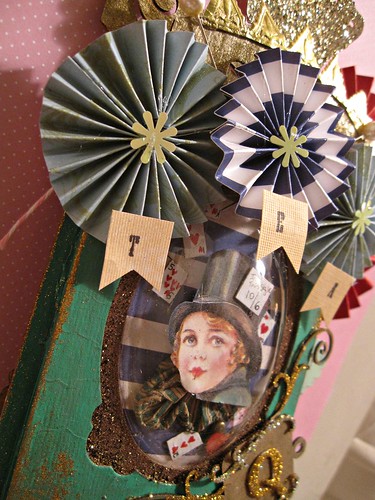
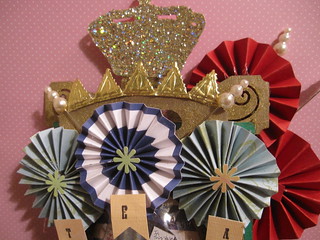
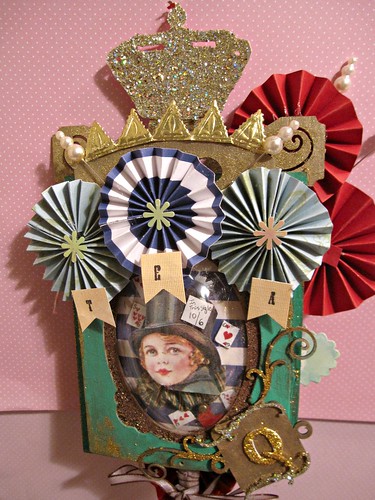
Everything I dream up is inspired by a fairytale or story, this project was inspired by the Victorian Age when Alice in Wonderland was written, its odd characters, tea time and a game of Croquet in the Garden, the result a double sided vignette wand with each side capturing a page out of Alice in Wonderland through the use of Globecrafts clear frame bubbles, piccolo's, charms, powders and finishing glazes.
Materials
-2 Little Fancy Rectangle Bubble Frame's
-Piccolo's: Card Decor Set # 4
-Piccolo's: Card Decor Set #11
-Piccolo's: Key Charm Set
-Powders: Mermaid Tears, 24K Gold
-Glitters: Pure Sparkle Gold
-Glastique Gloss Finishing Glaze
-Glue: Hot Glue, Acid Free Glue Stick
-Mixed Media Inks, Emboss/Pigment Inks: Clear, Gold, Frost Smooches, Clearsnap
-Acrylic Paints: Red, White, Aqua, Green
-Chipboard
-Scrapbook Papers: Robins Nest, Trinity Papers and Lisa Kettell Designs
-Collage Images: Storybook Collage CD, Lisa Kettell Designs
-Wooden Dowel
-3 Small 1/2 inch wood block or spool
-Ribbon, Pom Pom Trim
-Bakery Twine, Hemptique
-Tools: Scissors, Glue Gun, Paint Brushes, Heat Gun
-Other: Floral Excelsior Moss, 3D Embellishments, Dresden Trims, Ephemera/Coin Wrappers, Paper Rosettes, Tiny Bottles
1. Re-size and print wonderland style images of from collage cd, cut, glue to chipboard with glue stick and cut out again. This will give durability to the image, set aside
2. Open one package of the Little Fancy Rectangle Bubble Frame's, paint the 2 bottom frames with red and white acrylic paint in a striped pattern, next using an clear emboss ink pad coat the top thin frame in the Little Fancy Rectangle Bubble Frame pack, sprinkle 24K gold emboss powder on it, shake off excess and heat set.
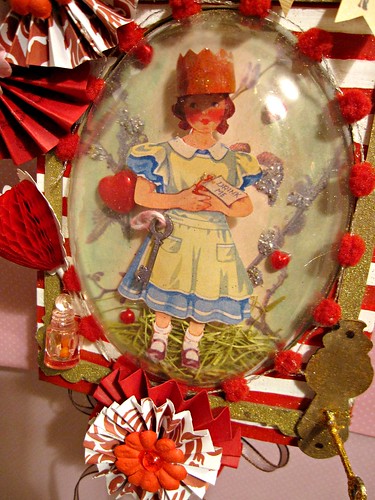
3. Layer the inside of the bottom base frame with vintage images, ephemera, moss, next attach 2 small 1/2 inch wood blocks to the back of the cutout chipboard image of Alice using hot glue, then attach to the center of the bottom base frame. ( See project pictures)
4. Add a red paper crown to Alice's head, coat with glastique finishing gloss glaze for an enamel shiny look. Decorate Alice with a key charm, embellishments and bakery twine. Finish off the images with mixed media inks and frost smooches.
5. Attach the clear plastic bubble, followed by the rest of the frames, glue in place.
6. Next hot glue a wooden dowel to the back of the finished framed piece, set aside.
Mad Hatter Side Directions
1. Re-size and print wonderland style images of from collage cd, cut, glue to chipboard with glue stick and cut out again. This will give durability to the image, set aside
2. Open the next package of the Little Fancy Rectangle Bubble Frame's, paint all the frames with a mix of green and aqua acrylic paints, accent with gold color ink pad.
3. Layer the inside of the bottom base frame with vintage images, ephemera, tiny playing cards, next attach 1 small 1/2 inch wood blocks to the back of the cutout chipboard image of the mad hatter using hot glue, then attach to the center of the bottom base frame. ( See project pictures)
4. Paper pleat a coin wrapper and attach to the mad hatter images. Finish off the images with mixed media inks and frost smooches.
5. Attach the clear plastic bubble, followed by the rest of the frames, glue in place.
6. Next hot glue the 2 finished frames together.
Final Directions
1. Decorate your entire wand with piccolo's and accents. I used the key and key holder parts from the piccolo card decor set 4, I embossed them with a mix of 24K and mermaid tears embossing powders, then coated with glastique gloss finishing glaze. I then inserted the key into the key holder for a 3D dimensional effect.
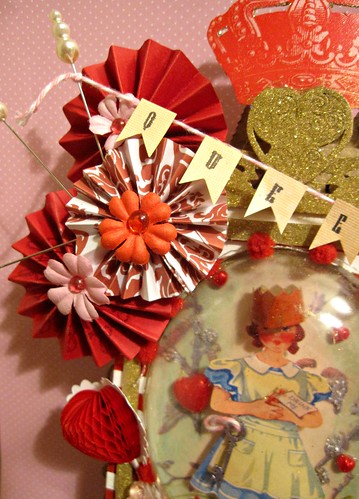
2. I paper pleated scraps of paper, attached end with glue, pushed edges in to form rosettes, then hot glued all over the wand.
3. I added mini flag banners to the wand using scrapbook paper, inks and bakery twine.
4. Next I inserted pearl topped push pins into parts of the wand, more piccolo's, Dresden trims and embellishments.
5. Now comes the fun part, adding the glitter. I used pure sparkle gold glitter all over the wand, using glastique gloss finishing glaze, after it dried, I wrapped the ribbon up the wooden dowel and tied 2 bows at wand center.
This is such a fun project, the possibilities are endless.
Tips/Tricks
-Use Wonderland stamps and stamped images in place of collage images
-Take images of your loved ones and use in place of the collage images
-Mix and match the bubble frame kits and sizes.
-Turn the wand into an ornament or use 4 to 5 of the smaller kits and create a banner.
-Try mixing your embossing powders for more fun effects.
-Use all piccolo's in place of the images.
I hope my project has inspired you to create a fun wand of your own!
xoxo




No comments:
Post a Comment