
I am so excited to share my first G&P project with you today! Please excuse all the exclamation points... I have been playing with the Enamel Powders...and let me tell you! They are absolutely gorgeous and do not disappoint.
Want texture? You've got it!
Want smooth? You've got that, too!
And the colors?! You've got to see them to believe just how wonderful they really are!
Let me stop gushing and I'll show you how I made a bit of raw chipboard mah-velous!

Things to put on your shopping list (a.k.a. the Globecraft & Piccolo supply list):
Vintage Gears A130 (or any of the Piccolos with a frame)
Enamel Powders:
Aged White
Here we have the raw chipboard frame.

don't you love this picture?
the way the paper plate frames the frame just makes me want to say 'ta-da!'
First thing to do is dab the Enamel & Embossing Powder Adhesive Fluid all over the frame. Then pour Bahama Aqua over half the chipboard. Carefully, tap off the excess powder and pour it back into the container.

Do the same with the Deep Blue Sky enamel. (if the Enamel fluid has already evaporated, go ahead and dab on some more.)

Time to get out the heat gun! I just love the magic of the Enamel Powders...see the dramatic change?

After I melted the first layer I decided to add a second layer of of the Bahama Aqua. Just dab on some more of the fluid, add powder and melt!

After the second layer...

Here's a good picture of the different textures you can achieve...Heat the powder just until it melts for more texture (the frame), heat longer to make it smooth (the cardstock)
.
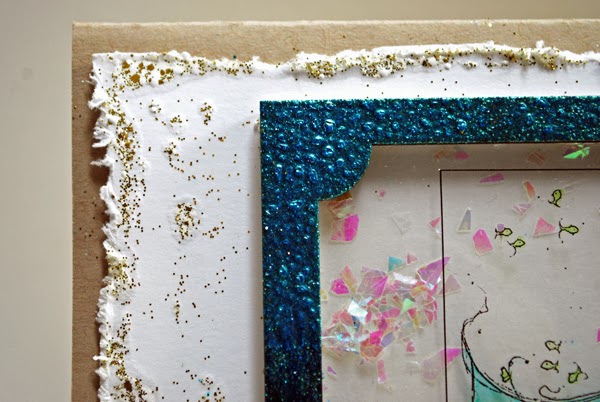
The Glastique made a great adhesive for the acetate on the chipboard. Took just a smidge, but make sure to press it together for a few seconds and then let it finish drying.

I used Aged White Enamel Powder on the distressed white cardstock. By using a paintbrush to pick up the Enamel fluid, I could dab it on 'randomly', add powder and melt. Love the texture and interest it added to my finished piece!

Okay...that's it for today! Thanks for stopping by the G&P blog. Be sure to come by again tomorrow to see what other crafty goodness the Design Team has in store for you!
Inky hugs,


