Hello, Josette here. I thought I would bring you another card colored with Copics. I did little to the image, except size and print.
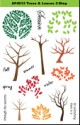
Autumn House Digital Image
This is an A6 Card, measuring: 6.25 X 5 inches. The Card base in a dark brown Card Stock. The second layer measures 4.75 X 6 and is a orange chevron patterned card stock. It came from a 6 x 6 card pack and I lost the identifying manufacturers information. But any cardstock would have worked, even a solid orange. The tag: is 3 X 3.75 inches and the corners were notched.
The Sentiment was stamped in Brown using a Pigment Ink and was then embossed using a Clear embossing powder. After stamping and cutting out the sentiment, it was inked with Distress in Gathered Twig and then splattered with water. This give it a rustic distressed feel. The Card Stock used was Kraft colored.
The scene measured 3.75 inches square and was Colored with a bunch of Copic markers. The only marker that was matched to the paper was the oranges for the pumpkin. Everything else used were natural blending families. The full list of copics will be in the description.
Close up of the house. After all the coloring was completed, the edges were inked with Distress: Tumbled Glass and Chipped Sapphire. A white Gelly Roll Pen was used to ink the snow. Wink of Stella, Clear, added glimmer to the moon and stars.
The image was adhered without any dimension. The sentiment was popped up using fun foam.
Score tape seems the best solution to adhere fun foam to a project. The bond is firm and permanent.
Finishing touch, a ribbon and bow and it is ready to send to someone needing a pick me up.
Until Next time,
Happy Crafting
Josette
Supplies and links:
Autumn House Digital Image
My Blog
YouTube: My Channel, videos about copics and other "bits of inspiration"
Copics
B: 21,45,97,99
BG: 10,53
G: 07,21,85,94
Y: 17,19,32,35
YG: 21,25,63,97
R: 24,39
YR: 07,09,14,15,16,23,24
E: 08,15,23,27,40,47,55,57,59,99
C: 0.01,02,03,
N: 01,03
Wink of Stella
Scor-Tape
Gelly-Roll-White-Pen
Paper: Neenah Solar White for Image, Neenah Desert Storm Sentiment. Brown Card stock, Orange Patterned Paper
Ink: Distress: Gathered Twigs, Chipped Sapphire, Tumbled Glass
Archival: Potters Soil
Embossing Powder: Clear, Hero Arts
Fun Foam, ATG