Hey stampers, it's Saturday again and time for anoher guest designer post. The challenge this week is Anything Goes and I have another floral card for you! Remember a few weeks ago when I shared how I became a SweetStamps customer? Well, I was drawn to their Parchment Craft products and have been playing with them over the last few years. I have various parchment projects completed but I never turned them into cards until now!
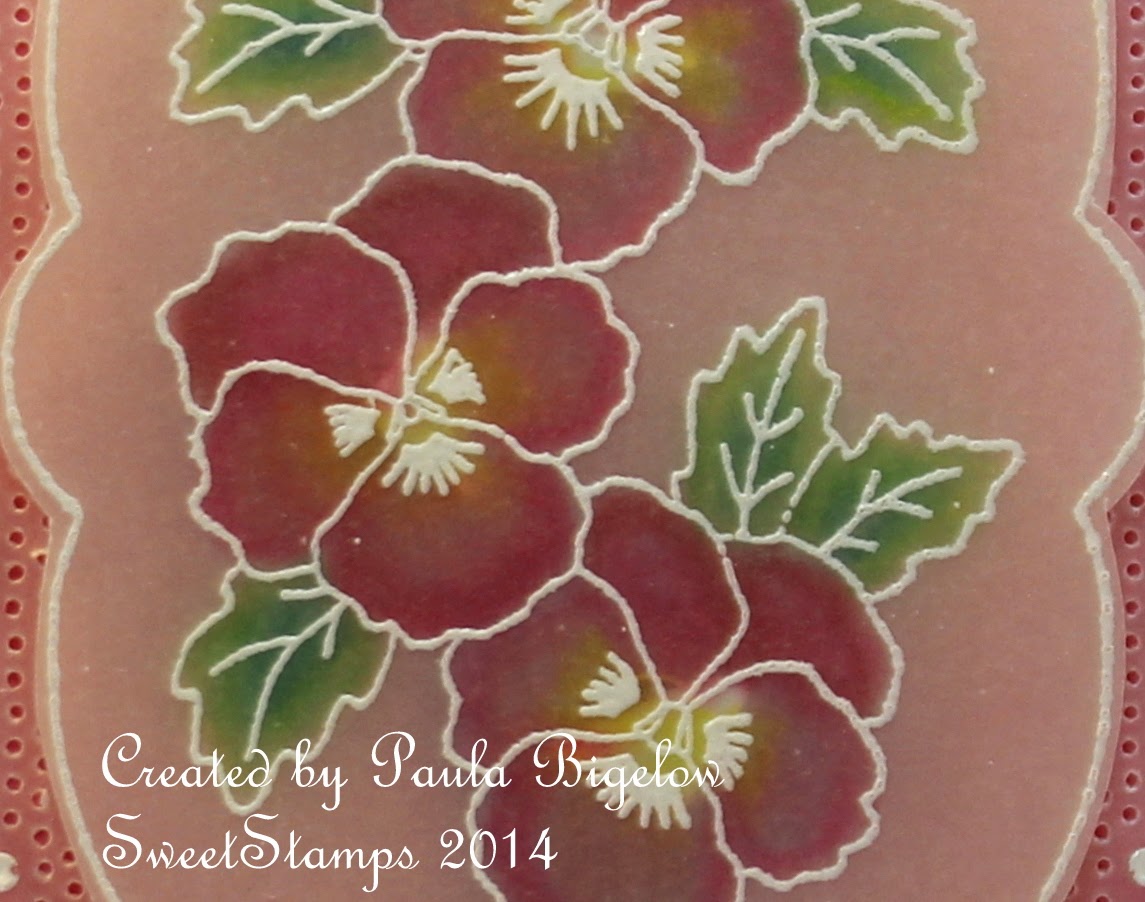
I started with two images of the
Pansy Layers Frame which I heat embossed onto
vellum with
fine white detail powder. I turned one of the images over and started coloring with various colored pencils using the Gamsol Technique and then I cut out the central part of the image which I layered onto the other image.
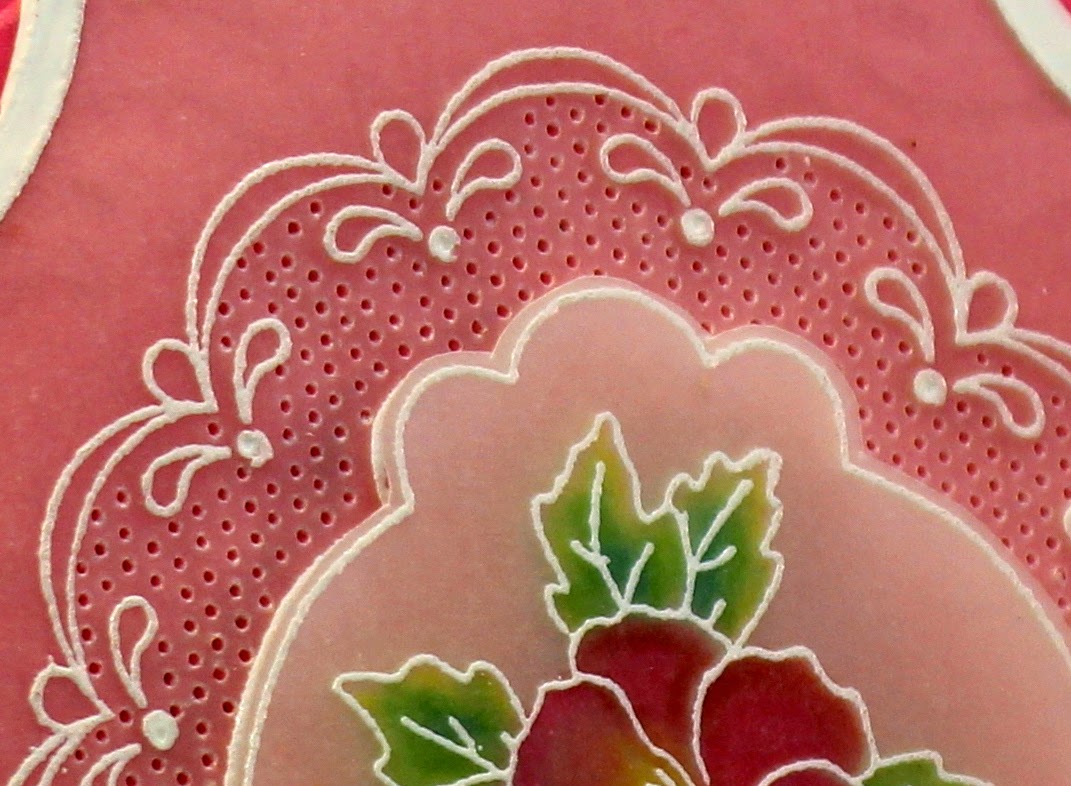
First I took the second image and pierced the lacey edge using a
two needle tool, staggered magnetic grid and the
piercing/perforating pad. The next thing I did was to take a white gel pen and color in the solid white edge line and fill the center dot on the fleur de lis motif. The center section was layered with dimensional foam dots to add depth and dimension. I strategically placed the foam under the center of the pansy so it wouldn't show through the parchment paper. I took the two layers of parchemnt and layered them onto an embossed piece of card stock. The card stock was then layered onto white designer paper. The whole thing was mounted onto a green card stock A2 base. Then the pearls, trim and ribbon were added to finish things off. I hope you like this project and were inspired to try some Parchement Craft! Be sure to enter the
Anything Goes 183 Challenge. For a detailed materials list, visit
my blog.
Paula


.jpg)