This is my last post as a Design Team member for Globecraft and Piccolo. It has been a wonderful experience to work with these products and all the creative people around this product. This however, is not a sad farewell, as I have been asked to join the other designers on the SweetStamps Design Team. SweetStamps is the sister company of GlobeCraft and Piccolo so you will still be seeing lots of these products.
For my farewell design, I have made a cute little note holder. Again a very easy project.
I used the following SweetStamps and Globecraft & Piccolo Products
- Large Stemmed Rose Accent
- Ruby Red Slippers Embossing Powder
- Mossy Glen Embossing Powder
- Enamel Powder Adhesive
- Framed Fancy Words Clear Stamps
- Micro White Embossing Powder
Miscellaneous items
- spool
- hairclip (bobby pin)
- Glue (ultimate glue is great)
- chalkboard paint (black acrylic will work just as well)
Paint the spool with the black paint. Set aside to dry.
Emboss both sides of the Rose Shape using the Ruby Red Slippers for the flower head and the Mossy Glen for the leaves and stems.
Stamp the word "thanks" onto the spool and them emboss with the MicroWhite Powder. I left a bit of the loose powder on mine to imitate the chalkboard - just the effect I was after.
Glue the clip to the back of the Rose (I slipped a small piece of plastic into the clip to prevent gluing it closed.)
Glue the rose into the spool.
Leave a loved one a note saying thank you .
There are so many available shapes on the G&P site, you can customize these for any occasion. They would also be beautiful place card holders as well.
Thank you again for visiting me here. Please follow me on over to the SweetStamps blog. Those designers are amazing as well.
Life is Beautiful -- Teresa
Showing posts with label Teresa Atkinson. Show all posts
Thursday, October 30, 2014
Thursday, October 16, 2014
INSPIRED BY A SONG
We all have things we want to keep. Especially memory things. This is a Memory Box. Ready for beach photos, maybe a ticket to the pavilion amusement park, even a few seashells. Every time I heard this song, I knew I wanted to use the imagery from it for a project.
It started with a kraft paper recipe box. And this wonderful soft toned "beach- washed" wood scrapbook paper.
To that I added the following items
From GlobeCraft and Piccolo
- 3d Enamel Gel
- Embossing Enamel Powders
Piccolos
From SweetStamps
I used the Sticky Tape to adhere the paper to the box.
The orange and green flower is glued to the top only and does not interfere with opening and closing the box at all.
I trimmed down the "sand" below the palm trees.
This was a really fun little memory box to complete.
The Mossy Glen is PERFECT for those palm tree fronds. I used a tiny paintbrush and the Embossing adhesive to use the different powders in these detailed accents.
Please. If you create a project "inspired by a song" leave me a comment so I can go take a look.
Have a wonderful Thursday --- Teresa
Thursday, October 2, 2014
GIFTS ----
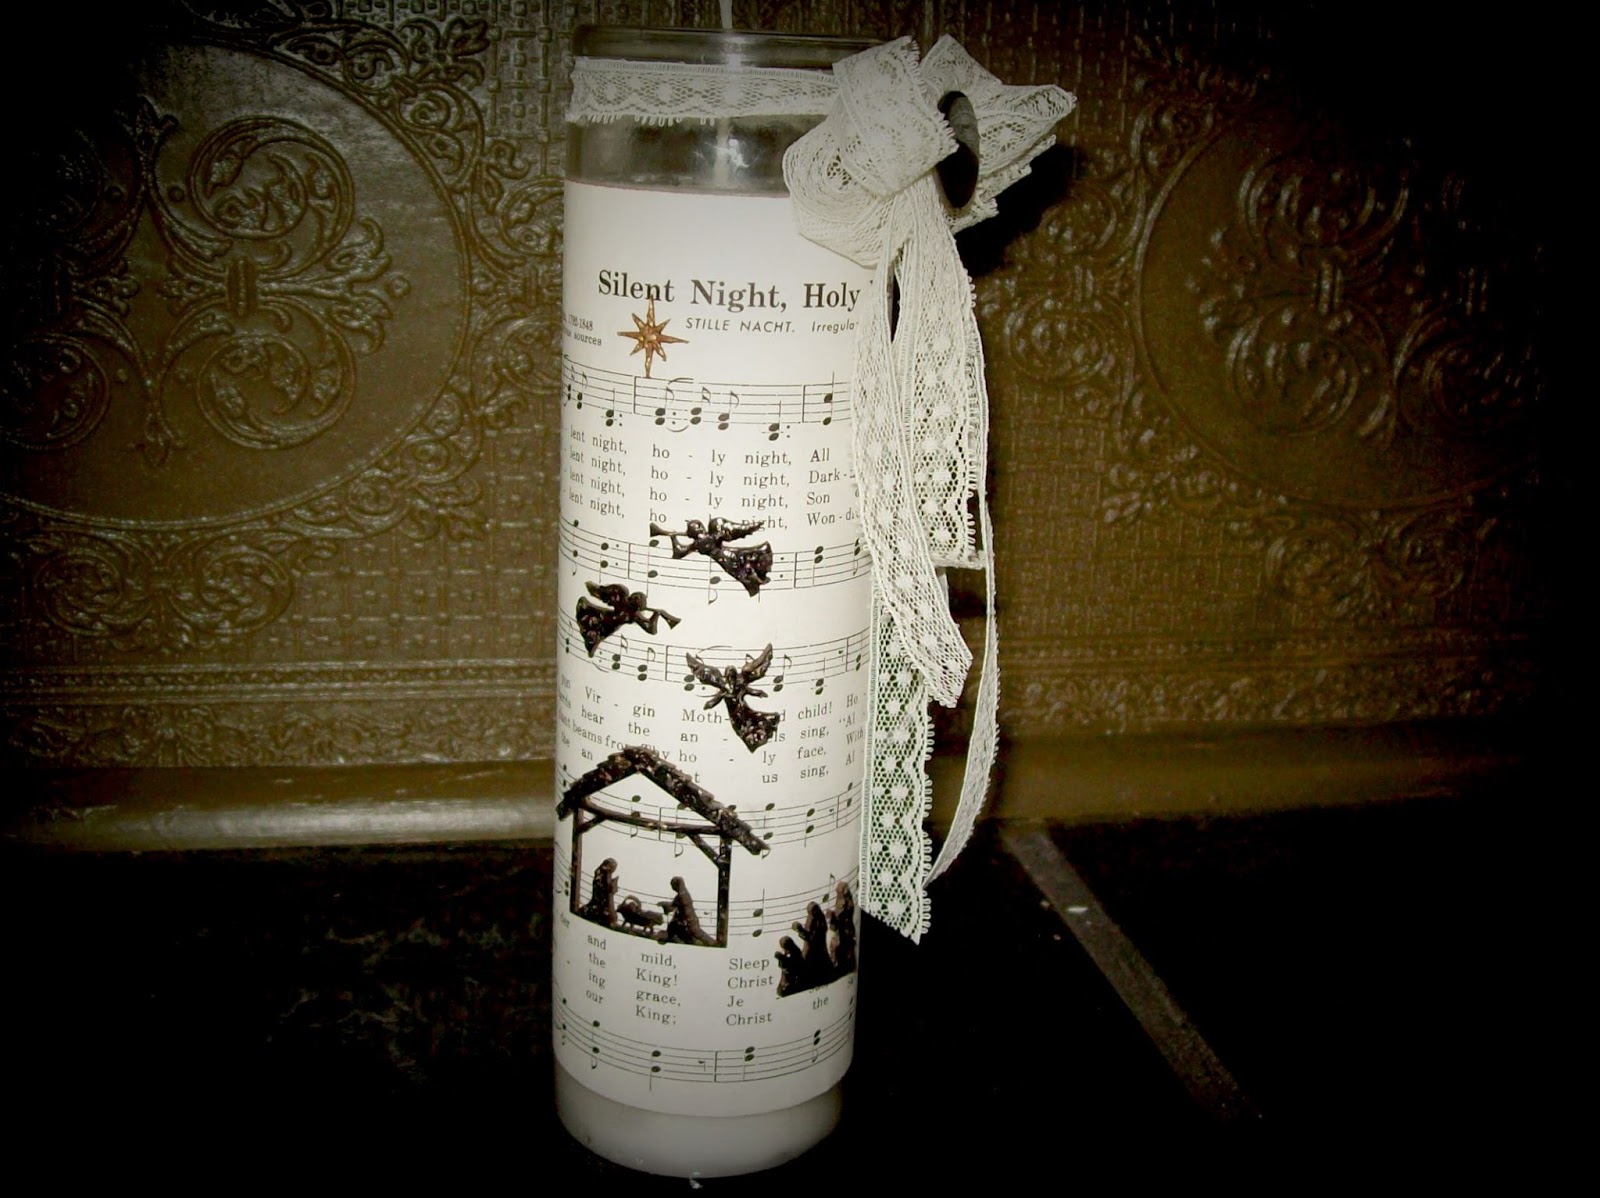
Happy Thursday. Teresa here with a great gift idea. Mine is Christmas themed, but with the assortment of Piccolos available from Globecraft and Piccolo, you can customize this for anyone.
This began as a tall prayer candle in a glass from the Dollar Tree.
I used the following items from Globecraft and Piccolo
- The Christmas Story Piccolo Accent
- Embossing Enamel Adhesive
- Starry Sky Embossing Powder
- Gilded Rose Gold Embossing Powder
I pulled lace, a button, and a copy of vintage sheet music from my stash.
Easy to do. Emboss the Piccolo with you chosen powders. I used the Starry Sky on everything except the star and the was done with the Gilded Rose Gold.
Adhere the sheet music to the glass using spray adhesive.
Attach the shapes to the music using a heavy bodied glue . (I use elastic ponytail holders to hold the shapes in place against the curve of the glass until it dries completely)
Tie on a fluffy lace bow. Add a button accent.
Ready to gift.
Have a wonderful day.
Thursday, September 18, 2014
dragonfly dreams
Good Morning everyone. Wow time flies and it's Thursday again. Teresa here to share another easy to create tag using several of the Globecraft and Piccolo products.
Enamel Powder Adhesive
Ultra Thick Clear Embossing Powder
Micro Copper Embossing Powder
Mardi Gras Embossing Powder
Dragonflies Piccolo Set
Burnt Umber 3d Gel
Glastique
Other items
Manilla Tag Base
Craft Mat
Walnut Inks - I used a leaf green, gold, and red maple
Note Sweet Stamps keeps a stock of Distress Inks in many colors.
micro gold Glitter
flower stamp
**** **** **** **** **** ****
Let's get started.
I used a tried and true stamping trick for this. I used the EMBOSSING ADHESIVE to ink my stamp directly onto my manilla tag base. Sprinkle with the CLEAR EMBOSSING POWDER and emboss.
Spritz the craft mat with the inks in a random pattern. Place the tag into the inks and pick it up. I use my fingertips but you can use a sponge for this next part. Smear the ink around into the tag background blending areas and leaving some as the original full color. The clear embossing using the clear EMBOSSING ADHESIVE leaves a "resist" area for the flower stamps. Loving this.
Let the tag fully dry.
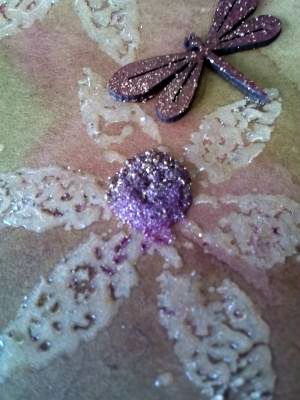
I then added a dot to the center of each flower using the BURNT UMBER 3D GEL. I sprinkled one with the MICRO COPPER POWDER and the other with the MARDI GRAS POWDER. Let this dry over night. (I did not emboss these at all) I like seeing all the little particles with the Brown peeking through.
Take two of the DRAGONFLIES and ink them with the walnut ink -- I used the leafy green and the red maple. Let these dry completely.
Using my fingertip again (my favorite tool) I smeared the dragon flies with GLASTIQUE and lightly sprinkled with the fine glitter.
After that dried, I shook of the excess glitter and then adhered the DRAGONFLIES to the tag using the GLASTIQUE.
Ready to attach to a gift.
Thursday, September 4, 2014
Christmas is Coming....
Happy Thursday everyone. Teresa here and, as much as it freaks me out to remind you, there are only 111 days until Christmas. I know that sounds like PLENTY of time. But I know myself quite well and I don't want to be scurrying around at the last minute AGAIN - trying to put a personal touch on my gifts.
So today we are making a gift tag.
Let's gather our materials.
From Globecraft and Piccolo
Embossing Enamel Adhesive
Glastique Gloss
Aged White Embossing Powder
Micro White Embossing Powder
Pure Platinum Embossing Powder
Bahama Aqua Embossing Powder
Siam Silver Embossing Powder
Clear Ultra Thick Embossing Powder
Fancy Labels and Roses Piccolo Set
Bejeweled Snowflake Piccolo Set
And from our sister company, SweetStamps
Snowflower Art Stencil (the art stencils are a new release item for SweetStamps and they are wonderful)
You will also need
- self adhesive glitter dots (you can also use the Glastique and fine glitter)
- a large tag base
- a light blue color spray
- Ribbon for the hanger
Now let's get started.
First - spritz the tag with the light blue color spray - giving that pale blue back ground to work with. I dry mine with the heat gun.
Now for the stencil back ground.
Lay the tag flat and center your stencil over the tag.
I wanted a "hint" of snowflakes in the background so I lightly sponged on the Enamel Adhesive through
the stencil. Keeping in mind my final layout, I applied the adhesive more heavily in some areas.
Emboss the tag with the Aged White Powder --- this powder has a lot of glittery sparkle. A wonderful wintry feel is emerging. Set your tag base aside.
I then embossed the rectangular label from the Fancy Labels set. I used the Bahama Aqua on the center of the medallion and the Siam Silver as a "frame" around it. I embossed one of the large snowflakes with the Micro White Powder and the smaller on with the Pure Platinum Powder.
I dry fit the Piccolos on the tag to decide which areas would get a tiny glitter dot accent. And because the Ultra Thick Clear Powder enhances the coloration behind it, I used that to emboss those areas.
Glastique was used to attach every thing. After the tag dried, I added a bit of bright blue tulle ribbon as a hanger.
The first thing a little buddy said to me when he saw it was "It's a Frozen tag". I'm taking that as a major accomplishment - when you can impress a 5 year old - you got it going on.
Thursday, August 28, 2014
You're Invited
It's a Barbeque. Kinda. It's actually a barbeque invitation kind of day.
The set I used is one of the new items over at the Globecraft and Piccolo shop.
Here's the rundown on the items I used.
- Mossy Glen Embossing Powder (the grass)
-Pure Platinum Embossing Powder (the utensils and the grill rack area)
- Deep Blue Sky Embossing Powder (the words)
- Micro Black Embossing Powder (the grill)
- Honey Mustard 3D Gel (flames)
- Deep Red 3D Gel (flames)
- Orange 3D Gel (flames)
- A tiny Paint Brush
- medium Green stamp pad (This one from SweetStamps is similar in shade)
- a blue Stamp Pad (this one is very similar)
- an Invitation Stamp
- Card Stock
I used a paint brush to make grass shaped lines with the Embossing Powder Adhesive and embossed the grass using the Mossy Glen Powder. Then I used my favorite tool (my finger) and smeared the green in to fill in the grassy area. Using a torn sponge, light tap a blue toned background for the sky.
Emboss the utensils and the grill rack area with the platinum - I painted these in with the paintbrush and the Embossing Powder Adhesive.
Add "handles" to the utensils with the Deep Red 3D Gel. and set aside to dry.
Emboss your words from the Set with the Deep Blue Sky Embossing Powder. Stamp the You're Invited Image at an angle on the card. Align and glue the wording below the stamp.
Now the grill itself - I used three layers of the MicroBlack Embossing powder. It gives a nice texture to the grill parts.
The flame was done by dotting the Honey Mustard and Orange 3D Gel and running a toothpick through it to mix the colors.
Adhere everything down using Glastique - I used gloss, but it also comes in a Matte Finish.
Add the details inside - Mail and enjoy the great food and great company of friends.
Thursday, August 14, 2014
Love is a many splendored thing.
Happy Thursday. Teresa here with a word canvas that would be a great gift for a special friend. There are some fun techniques in this too.
So let's gather the things we need. (links at end of post)
A small canvas
Enamel Adhesive
Small paintbrush
Heat gun
Various Enamel Powders
I used Deep Blue Sky, Ruby Red Slippers, Mermaid Tears, Cranberry Wine,
Siam Silver, Victorian Bronze, Gilded Rose Gold, Royal Sterling, Mardi Gras, Bahama
Aqua, Turquoise Lagoon, Shamrock Dreams.
"Love" Piccolo
Glue
Latex Paint (I used my favorite pale grey)
Now for the fun.
Paint your canvas with latex paint and let dry completely. I spritzed mine with a bit of watered down charcoal as well.
Trace or freehand a heart shape on the canvas.
Using the Enamel Adhesive and Bahama Aqua Embossing Powder, coat the word and emboss. set aside.
Also set aside the Ruby Red Slippers and Mermaid Tears Powder.
Using a small paintbrush and the Enamel Adhesive, paint an area of your choice. Cover with the powder and emboss. Once the powder has cooled, you can layer other colors on or alongside it. Keep adding small sections of the colors, until you have filled the heart shape.
I found the colors to be a bit strong for my liking, and decided to "Blend" them using a layer of Mermaid Tears Powder. To keep this layer lighter and not completely cover the other colors, I dipped my finger in the Embossing adhesive and spread it all aver the heart shape. This left a lighter, random feel to the embossing.
See those speckles? they may be my favorite part of this. I truly wanted sprinkles on my canvas. Using the adhesive left me with too thick of a background, so I experimented a bit. (latex paint is the trick here since it gets sticky when you heat it)
Pour a small amount of Mermaid Tears and Ruby Red Slippers Powder in your hand, mix well. sprinkle around the heart using your fingers (much like adding a pinch of salt when cooking).
Lift your canvas and start heating from underneath the canvas with your heat gun. As you see the powder start to melt, bring the heat to the front of the canvas and emboss to your liking.
This will complete the background.
Add your word to the canvas. Glue down with a heavy bodied, clear drying glue.
Now that was easy wasn't it?
Here are your links.....
Enamel Powder Adhesive
Enamel Powders of your choice
"Love" word piccolo
Have a wonderful weekend.
Thursday, July 31, 2014
flight of fancy
Good morning everyone. Teresa here, actually not, I am at the beach, enjoying a little sand and salt water. I am however enjoying the advice of today's project.
A little airship advising to "Dream a little dream"
Note, the links to the supplies are at the bottom of this post.
Unpack and carefully punch out the components of the airship. (there is also an accessory package available) I also used a few of the "waste" parts from other kits as extra embellishments.
Using a piece of clear acetate and a stamp of your choice, stamp and emboss an encouraging quote. I used the Embossing Adhesive and Micro Gold Embossing Powder. I allowed the static of the acetate to "keep" the fine dusting of the powder without the adhesive. By heating from the backside of the acetate, this left a faint dusting of the gold looking like a scattering of fairy dust.
Now lay the center of the airship over the stamped image. Mark this and trim to fit.
Now, using a paintbrush, carefully paint the Embossing Adhesive on the gears and emboss, them one at a time, using assorted Steampunk style colors of enamel. I used Copper Kettle and Vintage Black on these. Emboss both sides.
Emboss the remainder of the center piece of the Airship with Starry Sky Enamel. This is a great space color. Dark blues, blacks gold's, and silver tones.
Go ahead click that next photo for a close up of the enamels.
Now the trim rings. I used Siam Silver for the base layer and since these are glued down, I only did one side. Then using my favorite and most versatile tool, my finger, I smeared the adhesive around the rings and sprinkled with Micro Black. I smeared off the excess and then embossed this, leaving a splotched, textured finish.
For the embellishments, I used the smallest stars from the Star Charms kit, along with those "spare" bits that I keep. I coated these with the Metallic Gold 3D Enamel Gel and sprinkled them with glitter. The gel acts as an adhesive for the glitter.
Glue the stamped acetate behind the center piece. Add the stars to the acetate front using Matte Glastique.
I did not want to be able to see through the ship, so I took the Metallic Gold 3D Enamel Gel and, again using my finger, smeared it all over the back of the acetate piece. Glue all the layers together using the Glastique. And for a tiny bit of sparkle accent, I rubbed the plastic globes on some yarn, creating static and sprinkled with the glitter, then shook these off. This left just a dusting of the glitter and created a very dreamy effect.
Stack the layers, clamp and let dry overnight. Add the Embellishments to the nose and tail of the ship. let dry and it is ready to add a hanger and display.
Links
Micro Gold Embossing Powder
Enamel Embossing Adhesive
Vintage Black Embossing Powder
Copper Kettle Embossing Powder
Starry Sky Embossing Powder
Siam Silver Embossing Powder
Micro Black Embossing Powder
This link goes to the main page for the powders. There are many to choose from .
Embossing Powders
star charms CA126
Matte Glastique
Satin Gold 3D Enamel Gel
Clear acetate sheet
Stamp of your liking
copper extra fine glitter
Now have a little Steampunk fantasy of your own.
star charms CA126
Matte Glastique
Satin Gold 3D Enamel Gel
Clear acetate sheet
Stamp of your liking
copper extra fine glitter
Now have a little Steampunk fantasy of your own.
Thursday, July 24, 2014
oh deer
It's summertime and a storm took out the WiFi at home, a reason for the late hour of my normal Thursday post. Teresa here and I have a very quick birthday card. After all it is summer and we are all busy busy.
It is very masculine, but I have several female friends who would be amused by this too.
Easy shopping list
- on the hunt accent kit
- Brownstone Enamel Powder
- Enamel Adhesive
- a blank card
- decorative paper
- glue stick
- glue
Emboss the Large stag head from the set using the brownstone enamel. I stopped halfway down the deer for this picture so you can see the way the finished powder compares to how it looks straight from the jar. This one becomes much lighter.
After the deer head is embossed, simply glue up your stack of papers and then add the deer. A Happy Birthday sentiment completes this one.
Finished completely in less than five minutes. Now that's an enDEERing quick card.
Life is beautiful.
Thursday, July 10, 2014
button button ...
Good morning, Teresa here again with another easy easy pendant assembly tutorial.
I love buttons - I have thousands. Literally. And they are inexpensive to obtain. I wanted to incorporate some wonderful mother-of-pearl buttons and here is my lovely little pendant, which also make a great little ornament as well.
Let's shop
Aged Pink Enamel a wonderful mix of pale pink, gold, and white particles
Additional items
Mother of Pearl buttons (mine are vintage)
A jump ring
Now let's get started
NOTE: There is a great VIDEO here on the process of embossing these Piccolo Shapes.
Emboss both sides of the Circle Bezel with the Aged Pink Powder.
Look how pretty this is .... I can see a tiny little princess enjoying this sweet color.
Select buttons and decide on a pattern for adding them.
I am working on a scrap of cardboard. This allows me to move and handle the piece without disturbing my layouts and then move it into the UV source as well.
Honestly the next few steps are the most difficult for me - waiting for the glue to dry. Luckily the Glastique works to seal, protect, AND adhere. It also sets up quickly.
Add the bottom layer of buttons using the Glastique.
Dry.
Add the next layer to the stack.
See that "hole" in the center? I chose a shanked button for my center and needed the space there for the shank to fit into.
Glue the center button as well.
Now add your UV Resin. It comes in a squeeze bottle and is fairly thick so I had no trouble with the resin staying on the shape. Squeeze the Resin in and around each button.
Then cure. The resin will cure in direct sunlight. I do a LOT of my studio work at night, so I invested in a UV light.
After the resin is cured, add a layer of gloss Glastique to the back side of the pendant. This is a protective and strengthening layer.
I added this next picture to show you how the Glastique starts very "milky" in the liquid form. As it dries it becomes a clear, non-yellowing protective coat.
The UV Resin gives a wonderful smooth finish and make this a nicely dimensional pendant.
Once everything is nice and dry (I wait 24 or more), add your jump ring and you are ready to wear and collect compliments.
Simply beautiful -----
Please come back regularly - there are lots of new ideas presented here and the archives have wonderful techniques and design ideas as well.
Have a wonderful day.
Thursday, July 3, 2014
just a note ....
Good Morning all. Teresa here with a quick and easy card design.
My friend MaryAnn is so good about written mail --- me --- not so much. But I really appreciate a handwritten note. And I ALWAYS notice the details of the card artwork.
This is a simple design, and it is very easy to accomplish.
Lets Shop
- Package of Rectangle Bezels (there are four in the pack and my card used three)
Card Blank
Assorted Papers to fit your theme
Glue (I used tacky glue)
Scissors
Emery Board
First - Coat the Cherchio key with the enamel gel and let it dry. I only did one side since I was planning to glue this down.
While that dries, prep the remainder of the items.
I trimmed the rings off the bezels, leaving me with these great rectangles.
Coat two of the rectangles with Glastique.
NOTE - the glastique does not cause the paper to ripple and distort like some glues can.
Adhere the paper to your rectangle. Wait for that to dry.
For the third rectangle, emboss it with two layers of the STARRY SKY enamel powder. Again - just one side will be fine, since we will glue these down.
Once the papers have dried, trim them closely to the rectangle shape.
Then using the emery board, slightly distress the edges.
Now - decide a pleasing arrangement and glue your rectangles down -- I love the 3d "pop" that slight raised gives -- yet it is still flat enough to fit the envelope and won't add extra postage.
Now add embellishing as desired. I chose some coordinating strips of paper.
Finally - add the key to the embossed rectangle.
Ready to send a quick note to a friend.
Please - come back to see all of the inspiration in the blog. I took time to go back through the archives one evening and discovered that there is a ton of inspiration and advice in them.
Have a great weekend.
Thursday, June 26, 2014
FLY ---
Good Morning. Teresa here again with another fun mixed media pendant -----
I LOVE the versatility of the Enamel Powders -- and the Enamel Adhesive makes it so easy to use these in unconventional ways. Even on metals - I've used another spoon bowl for this, but you could use it on many other pendant blank forms -
So let's shop -
Fine Feathers Necklace Set
Enamel Adhesive
Enamel Powders (link goes to the main category - I have used Royal Sterling and Turquoise Lagoon)
UV Resin - this will cure in sunlight, but I used a UV light that I purchased at a salon supply (Sally).
Here we go.
See the damaged spoon. I make bracelets from the handles, as well as pendants and ornaments from the bowls. I embellish these in a collage manner, but some are too damaged for a transparent finish. Enamel Powder Colors are perfect for this.
I took the dauber from the enamel powder adhesive and poured a bit in another container.
Dip a small paintbrush in a coat the interior of the spoon bowl.
Using a heat gun - emboss this layer.
Just an FYI - a toaster oven works for this too and it doesn't blow ANY loose powder around. Just line the tray with foil if you will be using it for food prep as well and watch it carefully.
I used two coats of Royal Sterling Enamel Powder on this one.
Now for the special effects stuff.
Emboss a single feather with the Turquoise Lagoon Powder. This is a blue and aqua and silver and sparkly combination - simply wonderful.
Add a thin layer of resin to the spoon bowl and place the feather into position. Place under UV light (or in the sun) to cure (takes about 3-5 minutes).
add another layer of resin to adhere some tiny rhinestones -
Repeat curing process.
I love that the resin continues to add depth to the collage elements.
Now that I have a WONDERFUL way to cover the damage from years of use, I'll be making even more pendants and ornaments.
Have a wonderful Thursday -
Subscribe to:
Posts (Atom)