Pages

Showing posts with label Instant UV Resin. Show all posts

Thursday, August 21, 2014

calm ----


Happy Thursday. Teresa here again with a wonderful altered pendant. I love the way the enamels adhere to practically everything, giving us a ton of options for surface embellishing. 

Then adding the UV cure resin to seal it all gives us even more options. 


I actually made two of these - one to send to GlobeCraft and Piccolo and one that is hanging on a large lighthouse in my home.

Here is the shopping list.

real rust enamel powder
Enamel Adhesive
Instant UV Resin
Glastique Gloss 

There is full tutorial of the process for enameling the metals here and here. All it takes is time and patience for this process.

Another really great item is a toaster oven. Line the sheet with foil to protect the cooking surface and place the items under the broiler.

The Real Rust Powder is my current favorite - using the toaster oven allowed me to watch it carefully and stop the process of the melt with a lot of texture left so that the metal keeps a rust color AND texture. This powder mixes are amazing especially if you are covering a fairly large and smooth surface. This pendant has three layers of the powders on it.

While the pendant is cooling, make your accent. This one features an image from a lighthouse themed postage stamp. I took a clear glass flat backed marble (floral marble) and traced the shape on the image, then cut it out. The marble magnifies the image a bit.

I then used the Glastique to adhere the image to the marble and let it dry. Glastique is a wonderful paper adhesive. There is no wrinkling of the paper at all and it dries completely clear. Perfect for adhering images behind glass.

After the image dried, I again used the Glastique as an adhesive, attaching the image and the words (cut from a magazine article) to the pendant. I allowed all of this to cure overnight.

After everything cured overnight, coat everything but the marble with a thin layer of the Instant UV Resin and cure that in the sun or under a UV lamp. Adding the UV Resin to the pendant both seals and adds even more security to the image under the stone.

Hang your ornament with pride.

here are some more ideas for using the Glastique to mount images behind glass.
- pendant bezels
- photo frames
- magnets
- memory jars.
- Christmas Ornaments

Have a wonderful afternoon.


Wednesday, August 20, 2014

Dragonfly Thank You


My card today showcases the new Piccolo Dragonfly Accents as well as one of the new Fancy Labels.   I heat embossed my large Dragonfly's wings with Turquoise Lagoon enamel then added a light layer of Mermaid Tears enamel for some opalescence.  For the body, I used Deep Blue Sky enamel then added a good layer of Instant UV Resin for a glass-like finish.   For the smaller Dragonfly, I heat embossed just with Mermaid Tears.  I used Aged White enamel on the ATC Bubble Background. 


For my label, I began with Deep Blue Sky enamel and then gave it a coat of Mermaid Tears.  It is a wonderful shimmery dusky blue.  These enamels combine so beautifully.  The last step was the Thank You from Sweet Stamps.  Finished size is 4.25 x 5.5 inches.

Wednesday, August 6, 2014

Resin Watch Necklace


When I cleaned out my Mom's house after her passing I found a drawer full of broken wrist watches, I don't think she ever threw one away.  So I decided to preserve one of them in a necklace with my Piccolo Instant UV Resin.  I began with a Rectangle Acrylic Charm; gluing some cool watch collage paper on the back.  I disassembled the watch and glued some pieces onto my acrylic.  You can see gears in the upper left as well as the lower left corners.  The face is in the upper right and the actual spring from the watch is in the center.  Once I got them placed I began to add my UV Resin.  You want to build this up slowly, curing it either in sunshine for 3 minutes or under a UV lamp for 3 minutes.  Do this between layers to avoid any pockets that won't cure.  


You can see in the photo above the wonderful depth you get from the resin and yet overall it is only about 1/4 of an inch high.  I added a nice Bail and a Silk Cord Necklace and then sponged Walnut Brown 3D Stamp Paint on the back and edges for a finished look.  What a fabulous way to preserve a family treasure.  It has an amazing glass like finish.

Wednesday, July 30, 2014

Heirloom Pro Stamp Show, Novi Mi


Globecraft Piccolo will be at the Heirloom Pro Stamp Show this weekend, Aug 2nd and 3rd with our parent company, Sweet Stamps in Novi, Michigan.  Stop by our booth and join the fun with this great make and take featuring a few new Piccolo's, embossing powder, Instant UV resin and a wonderful background technique (designed by owner Stacey Richardson).  Hope to see you there!


Thursday, July 10, 2014

button button ...


Good morning, Teresa here again with another easy easy pendant assembly tutorial. 


I love buttons - I have thousands. Literally. And they are inexpensive to obtain. I wanted to incorporate some wonderful mother-of-pearl buttons and here is my lovely little pendant, which also make a great little ornament as well.

Let's shop

Aged Pink Enamel a wonderful mix of pale pink, gold, and white particles

Additional items

Mother of Pearl buttons (mine are vintage)
A jump ring

Now let's get started

NOTE: There is a great VIDEO here on the process of embossing these Piccolo Shapes. 

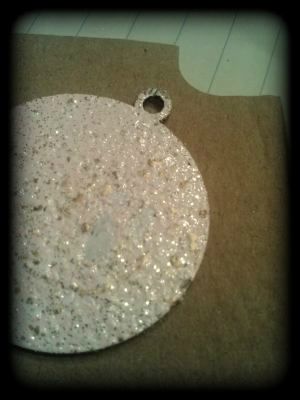
Emboss both sides of the Circle Bezel with the Aged Pink Powder. 


Look how pretty this is .... I can see a tiny little princess enjoying this sweet color.


Select buttons and decide on a pattern for adding them. 

I am working on a scrap of cardboard. This allows me to move and handle the piece without disturbing my layouts and then move it into the UV source as well.


Honestly the next few steps are the most difficult for me - waiting for the glue to dry. Luckily the Glastique works to seal, protect, AND adhere. It also sets up quickly.

Add the bottom layer of buttons using the Glastique.

Dry.


Add the next layer to the stack.

See that "hole" in the center? I chose a shanked button for my center and needed the space there for the shank to fit into.

Glue the center button as well.


Now add your UV Resin. It comes in a squeeze bottle and is fairly thick so I had no trouble with the resin staying on the shape. Squeeze the Resin in and around each button.

Then cure. The resin will cure in direct sunlight. I do a LOT of my studio work at night, so I invested in a UV light.


After the resin is cured, add a layer of gloss Glastique to the back side of the pendant. This is a protective and strengthening layer.


I added this next picture to show you how the Glastique starts very "milky" in the liquid form. As it dries it becomes a clear, non-yellowing protective coat.


The UV Resin gives a wonderful smooth finish and make this a nicely dimensional pendant.


Once everything is nice and dry (I wait 24 or more), add your jump ring and you are ready to wear and collect compliments.


Simply beautiful -----

Please come back regularly - there are lots of new ideas presented here and the archives have wonderful techniques and design ideas as well. 

Have a wonderful day. 


Monday, July 7, 2014

Piccolo Vintage Clock Necklace Set


Sandy with you today and I have created a lovely pendant using my Piccolo Vintage Clock Necklace Set.  This is a fun set and I think it would make a good key chain fob as well.


I began by coating the base with Enamel Powder Adhesive Fluid and then heat embossing with Deep Blue Sky Enamel Powder.  I did this on both sides, holding it with tweezers when I heated the back so I did not mess up the front embossing.  I used Micro Gold for the clock face and the pendulum.  I wanted the round center in the face of the clock to look like glass, so I added a few layers of Instant UV Resin.  You can't see this in the photo, but it really is a cool effect.  Thanks for stopping by.

Thursday, June 26, 2014

FLY ---


Good Morning. Teresa here again with another fun mixed media pendant ----- 


I LOVE the versatility of the Enamel Powders -- and the Enamel Adhesive makes it so easy to use these in unconventional ways. Even on metals - I've used another spoon bowl for this, but you could use it on many other pendant blank forms -

So let's shop -

Fine Feathers Necklace Set
Enamel Adhesive
Enamel Powders (link goes to the main category - I have used Royal Sterling and Turquoise Lagoon)
UV Resin  - this will cure in sunlight, but I used a UV light that I purchased at a salon supply (Sally).

Here we go.

See the damaged spoon. I make bracelets from the handles, as well as pendants and ornaments from the bowls. I embellish these in a collage manner, but some are too damaged for a transparent finish. Enamel Powder Colors are perfect for this.


I took the dauber from the enamel powder adhesive and poured a bit in another container.

Dip a small paintbrush in a coat the interior of the spoon bowl.


Using a heat gun - emboss this layer.

Just an FYI - a toaster oven works for this too and it doesn't blow ANY loose powder around. Just line the tray with foil if you will be using it for food prep as well and watch it carefully.


I used two coats of Royal Sterling Enamel Powder on this one.

Now for the special effects stuff.

Emboss a single feather with the Turquoise Lagoon Powder. This is a blue and aqua and silver and sparkly combination - simply wonderful.


Add a thin layer of resin to the spoon bowl and place the feather into position. Place under UV light (or in the sun) to cure (takes about 3-5 minutes).


add another layer of resin to adhere some tiny rhinestones -

Repeat curing process.

I love that the resin continues to add depth to the collage elements.

Now that I have a WONDERFUL way to cover the damage from years of use, I'll be making even more pendants and ornaments.


Have a wonderful Thursday -

Tuesday, March 18, 2014

Acrylic Charm using Alcohol markers

Morning Everyone :) 
I wanted to share with you a fun and different charm I made using Acrylic Bezel. 

I think this is one of my favorite projects, and it was so much fun to do. 
Here is how I created it- 

Firstly items needed are: 
Piccolo of your choice
Spectrum Noir Markers & Blender ink refil 
Stazon ink pad 
Script Stamp
Chain or fixing of choice 
Fine Paintbrush
Meltpot

1. Take your Acrylic Bezel and randomly colour the Acrylic Bezel on one size....you do not have to be neat at all with this stage. 

2. Take your paintbrush and drop 1-2drops of your blending ink refill onto the bristles, Then "flick" this across the bezel, you will then get a mottled effect...if you want more use more ink, if you want less recolour and start again. 

3. Stamp using your Stazon and script stamp, I overstamped but this is totally upto you. 

4. Melt some UTEE in your meltpot and dip your Piccolo to give it a nice even coating....If you do not have a meltpot just use your Enamel powder Adhesive and give your Piccolo 2-3 coats with the UTEE. 

5. Stick into place on your Bezel and allow to dry. 

6. Once Dry give it a nice thick layer of UV Resin and allow to set either in a sunny window, or using a UV lamp. 

7. Once the uv resin has set finish off with your fixing of choice. 

The brilliant thing about this no item will ever be the same due to the refill ink ! 
There is lots of different shapes and sizes of Acrylic Bezel, as well as lots of  Piccolo so you could produce so many different looks with this....Have fun ! 
Happy Crafting 
x 

Sunday, February 9, 2014

Heart Trio Love card


I have a card loaded with hearts for you today.  I was playing around with the Piccolo 3D Gels the other day and wondered if they would react the same as icing on a cake.  Well, I am happy to say they do.   For both hearts, I put down a base of 3D Gel,  Deep Red for the top heart and Pink Rose (on clearance) for the bottom heart.  Then I just dotted the other colors onto the heart and pulled the color around with a toothpick.  You can get some really cool effects. I finished them off with a coat of Instant UV Resin to give them a glass like finish. 


For the center heart, I die cut the smaller of the hearts from the Cheery Lynn Designs Two of Hearts.   Using Ruby Red Slippers Enamel, I heat embossed the filligree heart from the Piccolo Love with all my Heart Charms set adding the Love which I heat embossed with 24kt Gold Enamel.   Then I just centered it onto my die cut heart.  Be sure to click on the pic above to see the beauty of these enamels.  I used my Cheery Lynn Designs Hearts and Rose Leaves embossing plate for the white and gold panel.  I added Shades Valentine dye ink to the plate before embossing the white panel so the ink transferred over.  Finished size is 4.25 x 5.5 inches. 

Check back later for the winners of last week's $10 Globecraft Piccolo store credit.  We will have 7 winners to announce.

Wednesday, January 29, 2014

A Vintage Time Piece


 Happy Wednesday everyone! leslierahye here with another necklace project! Globecraft and Piccolo has so many wonderful bezels and charms to alter into wonderful jewelry! The Vintage Clock Necklace set is FANTASTIC! I LOVE how this turned out!!

I began by embossing the clock face and the "dangles" with the Victorian Bronze and the back of the clock with Micro Black. I embossed both sizes of the back of the clock a couple of times--using a tweezers to hold the chipboard while it cooled. Once the pieces were prepped [embossed several times] I adhered the clock face to the clock back with the glossy Glastique. I held my pieces into place with clothespins.

Once dry I filled the face of the timepiece with Instant UV Resin. While you can cure this product in the comforts of your home in the dark using a special UV heat lamp, I tested curing it outside with the sun--it's amazing how quickly this product hardens! It created a nice dome where a dome on the glass of a clock would be. for the remaining clock face, I filled in with a touch of gloss Glastique--leaving a ledge around the rest of the chipboard.

To assemble this piece I used some very small black link chain that would fit through my larger jump rings. I added a dangle to each end of the chain after threading it through it's rings. I like the look of triple jump rings with this piece and repeated it when adding the last piece and the neck chain. 

Globecraft & Piccolo Products used
Vintage Clock Necklace Set C114


I really love how this piece turned out and will definitely be playing with the UV resin again! Such a fun product!!!  Thank you for stopping by!!
*****


Tuesday, January 14, 2014

He who has the key....

Hiya everyone, Tracy here sharing another of my projects. 

Now as Valentines day is creeping up I decided to spread a little bit of love and make a Vintage style Pendant using one of the awesome Acrylic Craft Charms
I am really happy how this turned out. Here is how I made it...

1. I made my own backing paper (It reads he who holds the key to my heart) and crumpled it up and then distressed it and rubber some gold wax around the edges, this was then glued onto the Bezel. 

2. I then took one of the hearts from Keys to my Heart Piccolo set and gave it two layers of Ruby Red Slippers Enamel Powder...The below picture shows just how beautiful this Enamel powder is. 


3. I also used one of the keys from Keys to my heart Piccolo Set and used Copper Kettle Enamel Powder...I only gave this one rough layer as I wanted it to have an old look to it


4. I then took Instant UV resin and put a fine layer down and placed the heart and key into it, I then left it on my window sil for a few mins to set, i then gave it another coat and again left on window sil to set....I love this product ! A definite must have, I wanted a old look to this whole thing so was very "rough" with how i applied the resin, I also wanted to create a look like you get with Amber and you have items floating and bubbles etc...I was very wary about doing it but I think it has work just how i pictured it would. 
This picture shows just how fab the shine is on the resin. I simply then added some vintage ribbon to finish it off. 

 Now between me and you I have seen there is some new items over on the website so make sure you check them out.
Also don't forget we have some brilliant inspiration from the rest of the team post regularly so make sure you keep checking back. 
Happy Crafting :) 

Sunday, January 12, 2014

Froggy's Foliage Accents


One of this month's new releases is the Piccolo Froggy's Foliage Accents.  I love frogs, they were some of my best friends when I was a kid.  So I just had to make a pendant with this cute little guy.  I began with an Acrylic Teardrop and it's matching frame.  There are blue plastic protective sheets on both sides of the acrylic that need to be removed.  Just work at it with your fingernail and you can peel them off.  I embossed the frame with Gilded Rose Gold enamel powder and glued it down to the teardrop.  Using a mix of Kiwi and Luscious Lime Smooch Inks I colored the Foliage Accents and then glued them down on to the teardrop.


Next came a layer of Instant UV Resin, 3 minutes under a UV lamp or sunlight and it hardens to a beautiful glass like finish.  For my Froggy, I used Mossy Glen enamel powder, adding a bit of green cardstock behind his mouth and white behind his eyes.  I coated my frog with Glastique Gloss Finishing Glaze for a lovely shine.  The last step was to color the back of the acrylic with Light Blue 3D stamp paint.  Love the sparkle from this paint.   Be sure to stop by tomorrow for more inspiration from the team. 

Monday, December 9, 2013

More Snowflakes and Instant UV Resin


This weekend I was up at the open house hosted by the Globecraft & Piccolo parent company, Sweet Stamps.  This is one of the make and takes we created.  A beautiful winter card showcasing Piccolo Siam Silver embossing powder and Snowflakes.  We used Blue Sky 3D Enamel Gel for the accents on the snowflakes.  For the sparkly edge around the white panel, we applied a thin bead of Glastique and then some Pure Sparkle Silver Glitter.  There are 3 sizes of glitter in this mix which gives it fabulous shine.
Sweet Stamps products used:
I also got a chance to play with Piccolo Instant UV Resin.  I started with a thin rectangle acrylic piece (coming to the store soon).  I stamped snowflakes with white Staz-On then coated the piece with UV Resin.  Three minutes under the UV light and I was ready for layer two.  I added two Holly Clusters that I colored with Smooch ink, coating with another layer of UV Resin.  Three minutes later, I stamped more white snowflakes and added the final layer of UV Resin.  I added a layer of Light Blue 3D stamp paint to the back of the acrylic (love the glittery shine), then sealed it with a layer of Glastique.  Each layer can be seen as you look into the piece, it has so much depth.  I am going to use it as a zipper pull! 
Sweet Stamps products used:

Thursday, July 25, 2013

An artsy wall hanging

It's so much fun to get crafty when you make items to hang on your wall, don't you think?
Hi, I'm Diana and I'm going to show you how I created a beautiful set of wall hangings!


You'll need some Aleen's Glue, Craft frames, and vintage text pages, to start.


Glue the textbook page onto the back of the frame.


Take two more sheets of textbook paper, and rub a couple of colors of oil pastels onto the page. In layering colors, you'll see how they naturally blend together. Nice, right? Now, spray it with workable fixative, and let it dry.


You can certainly use your own art, but being pressed for time, I opted for a rubber stamp. Use a nice dark color. Let it dry, then cut out the stamped image.


Now you can glue the stamped image onto the middle of your frame. At this point, think of what you want to go around the image. I decided on seed beads and gold sparkle glitter by Globecraft & Piccolo.

Also, I used a little heart shaped bead that I sculpted.
After glueing the beads, I went and used UV Resin, to ensure that they don't go anywhere.


Now, get a sturdy piece of cardstock, and some yarn for hanging, and glue it, sandwiching the yarn in between the cardstock and the frame, and let dry.

You can also use some Glastique finishing glaze around the rest of the piece.
And that's that! Once it's dry, you've got something that looks like this:


You can do a lot with something like this! Even use pictures of your kiddos, if you want.
Happy Crafting! Visit my blog for more ideas: Diana Gonzalez

Tuesday, July 23, 2013

A Turtle Pendant--Metals and Enamel Gels


It's Laura here.  Today, I am sharing a turtle pendant with you.  It features Globecraft 3D Enamel Gels and Instant UV Resin.  Let me explain how it is done.

Materials:
Globecraft Acrylic Tag Bezels
Globecraft 3D Enamel Gels in Ultramarine Blue
Globecraft 3D Enamel Gels in Deep Blue Sky
Globecraft 3D Enamel Gels in Blue Green
Globecraft 3D Enamel Gels in Dark Green
Globecraft 3D Enamel Gels in Avocado
Piccolo Instant UV Resin
Piccolo Easy Grip Tweezers
Manicurist UV Light or Direct Sunlight
Large Round Earring
Metal Turtle Chain Link
Bail
Chain
Sharpie
Wire Cutters
Craft Knife
Sandpaper
Pin
Paper Towel

Directions:


 1)  Remove the earring finding from the hoop.


 2)  Chose the bezel that is at least as large and closest in size to your metal piece.


3)  Use a Sharpie to trace around the metal.


4)  Cut on or just inside the Sharpie line.  You will either need patience (which I have none) or scissors (fortunately, I have these) to remove the excess acrylic.


5)  Rub and rotate the edges of the acrylic on the sandpaper.  You are trying to make the acrylic the same size or slightly smaller than the metal.

6)  Remove the blue plastic, wipe and set aside.


6)  Use the wire cutters to remove the "eye" ends from the turtle.


7)  Squeeze the blue Enamel gels onto the acrylic.  You may wish to make the trails "swirly."


 8)  Use a pin to swirl the colors together.


9)  While the enamel is still wet, place the metal on the acrylic and set aside.


10)  Squeeze the Dark Green Enamel Gel over the turtle.


11)  Use a little paper towel to gently rub off some of the Enamel Gel.


12)  Squeeze some of the Avocado over parts of the turtle and blend a little with the pin.


13)  Use the tweezers to place the turtle onto the project while the blue gel is still wet.


14)  Let dry completely.


15)  Squeeze Instant UV Resin over the project and cure under UV Light or in the sun.

16)  Repeat step 15 a few times, alternating between the front and back of the project until you are satisfied.  I used two coats on each side.


17)  Use the bail to attach the project to the chain and wear!


Thanks for stopping by today.  Come check out my blog at www.rememberinglifesmoments.blogspot.com any time!

Laura Drahozal
Remembering Life's Moments