Pages

Showing posts with label Jewelry. Show all posts

Monday, October 6, 2014

A Key Pendant


  Happy Monday everyone! leslierahye here sharing a jewelry piece that I made using the new release from September of Key Accents...there are some nice BIG keys in this release and they are perfect for jewelry making projects. I used the biggest keys in the 6×6" matrix of keys. I embossed opposite sides and then glued the 2 pieces together. I went around the edges with a black pen. Once dry, I wrapped black wire with beads around the key making a few loops and adding a decorative loop to the bottom and a bail to the top. This made it easy to add to the silk cord necklace! A few matching beads and charms were added to the end loop to finish off the piece


I hope you enjoyed my project! Thank you for stopping by today!


Sunday, September 21, 2014

Snowflake Pin


  Happy Monday everyone! leslierahye here with a wintery pin. I used the labels and frames from the new release Fancy Labels & Roses Accents and embossed the label with Royal Sterling and the Frame of the Rose Accent with Bahama Aqua. I layered these together to form the base of my pin.
Next I embossed snowflakes in Siam Silver, Bahama Aqua and Royal Sterling and layered then onto the pin base. I added some bling on the frame and in a few of the snowflakes to complete the front of the pin. A pin back was added to the back so that it could be worn on a jacket, hat, scarf or sweater!

I hope you enjoyed my project! Thank you for stopping by today!


Friday, September 12, 2014

Halloween "Believe" Pendant & Earrings

T.G.I.F. (Thank Goodness It's Fun day!)

The holiday season is coming up fast...before you know it Halloween will be here and we will be working our way through to Christmas and New Year's! 


Today I have a FUN jewelry set using a package of Piccolo Accents and a few Embossing Enamel Powders.

To make the earrings and pendant, you will need a few items from the G&P shop:
enamel Powder Adhesive Fluid
3D Enamel Gel: Mars Black
Glastique, Gloss

scrap of paper, copy/patterned/plain - your choice


The key to this project is to be patient when building the layers. You don't want finger prints or peaks in your melted enamels!

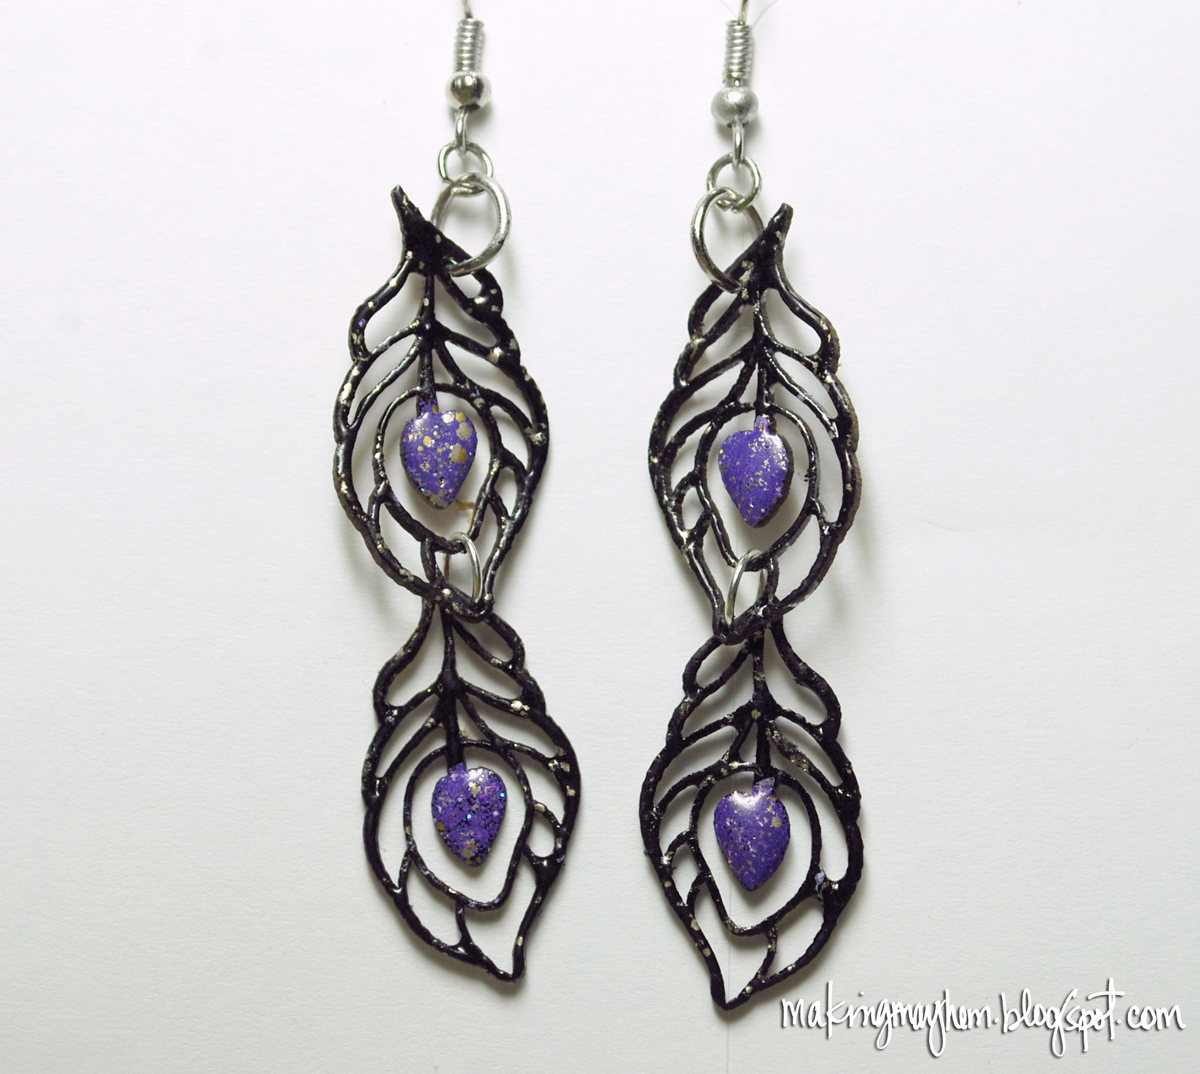
Begin by covering the peacock feathers with the Starry Sky. When cool, use a small paintbrush to to coat just the 'eye' portion of the feather. Using a small scoop (slushee straws work great for this!) add the Royal Sterling just to the middle. When cool, attach earring hoops and rings to connect the feathers.


The pendant was made by building several layers of Starry Sky (I did 3 layers.) Now add the Royal Sterling randomly, covering a majority of the circle. Don't worry if the Royal Sterling seems too solid after it melts. Just stick with me! Do NOT clip off the hanging circle, yet. It comes in handy as a handle when you are melting the powders and adding things. Clip it AFTER you are finished with the enamel powders. You're welcome.

When you add the Ultra Thick Clear, the magic starts...it will start to move the other colors around as you heat the powders. Keep repeating the layers until you are happy with the results.

When you are finished, write (or stamp) the sentiment on sticker paper, scrap of patterned paper, copy paper...whatever you prefer. Heat up the pendant and when it's warm, use the side of the tip of the tweezers to very gently push the sentiment into the melted enamel.  I LOVE how the paper turned transulcent.

Just for fun I used the Mars Black on the tiny bat (click on the picture for a better look!)

Thanks for stopping by today! Be sure to follow and 'like' the G&P Facebook page to stay up to date with new releases and design team inspiration!

Friday, August 15, 2014

Brave Mixed Media Pendant


Today I have this sweet little pendant to share with you. It started out being a plain piece of book board, but with a few embossing enamels and embellishments it turned out to be a whole lot more!

Here's what you'll need from the G&P shop:
Fine Feathers Necklace (CA111) or a Bezel of your choice
Embossing Enamel Micro White
Embossing Powder Ultra Thick Clear
Embossing Enamel Vintage Silver
Bling on a Roll Silver
Glastique Gloss

Other Supplies:
tiny flower
scrap paper
Tim Holtz Bird & Cage Die
scrap of tissue paper
black ink
small alphabet set


This bezel is from the Fine Feathers Necklace set. Using the Embossing Enamel Adhesive, apply and heat 3 layers of Micro White. (One layer at a time.) Let cool.

Using the Glastique, apply the Bling on a Roll around the edges. I cut the Bling into 3 'stone' pieces, so I could follow the edge of the bezel, keeping the circle shape.


Using a brush apply the Embossing Enamel Adhesive the edge of the bezel. Work in small sections, one area at a time. Dip the edge into a small pile of Vintage Silver. Heat and repeat until the outside edge is covered. Let cool.

Stamp 'brave' onto the scrap tissue paper. Use a small amount of the Glastique to adhere it to the center of the bezel.

Sprinkle on the Ultra Thick Clear. (I have found that the Ranger Heat Tool works great to start the powder melting. It usually doesn't blow off any of the powder. Be patient; it does take a minute or two to heat up the power. Once it has begun to melt, I get out my regular heat tool and quickly finish.) 

Let go of perfection and watch the magic happen!


Die cut the bird. Trim to fit. Cut tiny flags out of the scrap papers.

Use the Glastique to adhere the bird, flags and flower.


I love perfectly imperfect edges and the wave in the word brave. Charming, wouldn't you say?

Thanks for stopping by today.

Inky hugs,
Angi

Wednesday, August 6, 2014

Resin Watch Necklace


When I cleaned out my Mom's house after her passing I found a drawer full of broken wrist watches, I don't think she ever threw one away.  So I decided to preserve one of them in a necklace with my Piccolo Instant UV Resin.  I began with a Rectangle Acrylic Charm; gluing some cool watch collage paper on the back.  I disassembled the watch and glued some pieces onto my acrylic.  You can see gears in the upper left as well as the lower left corners.  The face is in the upper right and the actual spring from the watch is in the center.  Once I got them placed I began to add my UV Resin.  You want to build this up slowly, curing it either in sunshine for 3 minutes or under a UV lamp for 3 minutes.  Do this between layers to avoid any pockets that won't cure.  


You can see in the photo above the wonderful depth you get from the resin and yet overall it is only about 1/4 of an inch high.  I added a nice Bail and a Silk Cord Necklace and then sponged Walnut Brown 3D Stamp Paint on the back and edges for a finished look.  What a fabulous way to preserve a family treasure.  It has an amazing glass like finish.

Monday, July 28, 2014

Alice's Wonder-Pendant


  Happy Monday everyone! leslierahye with another jewelry project today! This creation was made using royalty free Alice in Wonderland images and a variety of charms with the Piccolos, Gels and Glastique.
I printed my Alice image to fit the skinny rectangle bezel and adhered it to the background. I heat embossed my keys and steampunk airship accents with Victorian Bronze. I added emboss powders to the edges of the bezel as well. I used glastique to adhere the embossed chipboard to the bezel and then added a layer of glastique over the top of the Alice image.

The charms were colored with 3D Enamel Gels and an additional coat of glastique was added over the top.  Charms and bezel were joined with black jump rings and chains.

  I hope you enjoyed my project! Thank you for stopping by today!

Friday, July 25, 2014

DIY Glow in the Dark Galaxy Pendant

So many crafts, so little time...


It's a good thing you can make your very own Glow in the Dark Galaxy Pendant in less than an hour!


Here's what you'll need from the G&P shop:

optional items:

glow in the dark acrylic paint
old toothbrush or paint brush

This is unbelievably easy!

The basic technique is to sprinkle on small amounts of Enamel Powder and heat. Keep adding Enamel Powders while the surface is still warm, heat and repeat until the desired effect is achieved. Then cool completely and cover with your choice of finish.

It's always good to have a before and after picture of a craft, but it's GREAT to have pictures of the process...so here you go! I've included what colors I used when and any tips I learned along the way.

Start by peeling the blue liner off of only one side of the acrylic charm. (Carefully use the tip of the tweezers to lift the edge of the liner.) This will keep the backside clean until you're done.


Cover the surface of the charm with the Enamel Powder Adhesive Fluid. Sprinkle on the Micro Black. Heat. While still warm, add more Micro Black. Heat. Repeat one more time. (The picture below is after the first layer was heated.)


Using a small scoop (Trimmed slurpee/slush straws are great for this!) add bits of Vintage Copper. Heat.


Add Deep Blue Sky. Heat.


Add Royal Sterling. Heat.


Add Micro White. Heat.


Add Poodle Skirt. Heat.


Add Deep Blue Sky. Heat.


Continue to add Enamel Powders until you love what you see. Heat. Let cool.

If you want the cool glow in the dark stars (is that really a question?!), dip the toothbrush bristles into the glow in the dark paint and run your fingernail across them to splatter 'stars' on the pendant Practice on a scrap of dark paper first, so you can see what the splatter pattern looks like. Let dry.

Finish by topping off with Enamel Powder Ultra Thick Clear, Glastique or Instant UV Resin.


It will be even better in person. Trust me.


Monday, July 14, 2014

A Beaded Wedding Pendant


  Happy Monday everyone! leslierahye with another jewelry project today! I printed a vintage wedding image to fit the 1½×2½" Bezel and trimmed it out. I glued the image on to the bezel, trimming closely to the edges and sanding with a file. Once dry I added black ink around the edges of the bezel. Next I adhered a vintage bead mix to the edges, randomly picking the various sizes and styles of beads For an additional accent I placed three along side the couple. Once this is completely dry, I layered on Ultra Thick Clear emboss enamel [UTEE] adhering with Enamel Powder Adhesive. I added multiple layers until the clear molten liquid was up to the level of the shortest beads. I finished the piece by hanging it from a silver ball chain.

  I hope you enjoyed my project! Thank you for stopping by today!

Wednesday, July 9, 2014

Blingy Daisy Ear-bobs


  Happy Wednesday everyone! leslierahye sharing a SUPER easy jewelry project using Piccolo Charms and 3D Enamel Gel and Bling! With the Daisy Teardrop Earrings, I applied Daffodi enamel and Burnt Umber enamel to the flowers and edge of the teardrop. The 3D Enamel acts as a glue when applying individual bling pieces from the Bling on a Roll--cut apart with regular scissors.  Pieces of bling were also applied to the two largest flowers. A generous coat of Glossy Glastique was added to the teardrop charm and left to dry overnight. Jump rings were attached to the charm and French Loops make them simple hanging earrings to wear!

  I hope you enjoyed my project! Thank you for stopping by today!

Wednesday, July 2, 2014

GO Team!


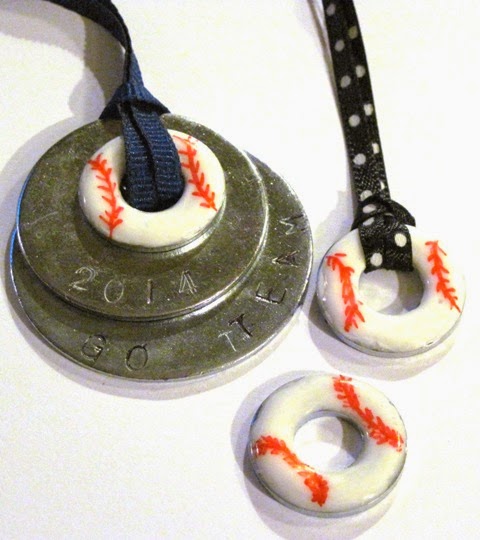
  Happy Wednesday everyone! leslierahye sharing a SUPER easy jewelry project to show your team spirit.This project is created with washers available from your local automotive or hardware stores and 3D Enamel Gel!
I have been absorbed in baseball this spring and summer and so naturally creating a ball-themed necklace to wear on game days was necessary! I used a small washer and layered Titanium White 3D Enamel Gel to make "baseballs". These could have been yellow for softballs, orange for basketballs, white for volleyballs...you get the idea! It took 2 layers to get a nice bubble on the enamel. I let each layer of enamel dry over night. Once dry I wrote with a BIC Mark-it to make the washer look like a baseball. A layer of Glastique over the doodles will help protect the pendant.


The baseball washer could be added to a ribbon. or added to larger washers to make a statement piece. Black ink or enamel can be rubbed into stamped letters to help them stand out. Again, a final coat of Glastique can protect the surface of the pendant.

  I hope you enjoyed my project! Thank you for stopping by today!

Thursday, June 12, 2014

LEATHER AND LACE


Happy Thursday. Teresa here with this week's fun design. A leather and lace themed cuff bracelet featuring one of MY favorite Piccolos


Again - I do not like projects that are difficult and this one is so very very easy. Let's gather some supplies.

Mars Black 3d Enamel Gel.
Gilded Rose Gold enamel Powder
Enamel Powder Adhesive
Gloss Glastique
Cherchio Keys Charms

Glue

Cuff bracelet form (I got mine from etsy)

Leather scrap (mine came in a scrap bundle from JoAnn's Fabrics - But you can these anywhere they feature upholstery leathers)

Awl or Punch

Large eye needle

Lace.


Here we go ---

First - mark your leather about 3/8" wider than your bracelet blank on each side and end, then trim it.

Then mark again just INSIDE each of the wire edges. This gives you a wrap over the wire for a nicer edge.


Using your awl (confession - I used an ice pick), punch holes along those lines at about 3/8" spacing apart.


Using the large eye needle and a length of the lace, whip stitch the edges around the bracelet form. The picture below shows the punched holes and one side of the bracelet finished.


Emboss the key charm with the Gilded Rose Gold Powder - I used two coats. This powder is a finer detail type of powder, making it perfect for the more detailed shapes of the key charms. There are many shapes of key available in the Piccolo line. 

I decided the color needed a little more depth, so I smeared a bit of the Mars Black 3d Gel over the key and buffed it off, leaving bits of the black in the texture areas. 


I then coated the entire key with gloss glastique. to protect it. The next step is the most difficult.......

Let the charm dry completely.


The charm is still flexible even with the glastique coating, making it easily formed to the curve of the cuff.

Find the center of the bracelet - and glue the charm in place. I find the center simply by balancing the bracelet on the table and "eyeballing" the spacing.


I love the ruggedness of the leather - the vintage look of the key - and the bit of softness the lace gives this .


Wear your new cuff and gather compliments ----

So many options for charms and colors with this kind of thing. I will definitely be making more.

See you guys next week.