Pages

Monday, October 22, 2012

A little Halloween Boo Boo

Linda here with a little something in time for Halloween. She's more cute than scary so don't be afraid to continue on! 

She has such a beautiful face and it's so haunting with those goblins surrounding her. I couldn't resist using her for a little Halloween ATC (Artist Trading Card). She's a free clip art from Red Lead Paperworks but there are several places to download free clip art on the web.

I started out with Piccolo Card Decor Set #6. The little compressed book board pieces punch out of the background which is the perfect size for ATCs! I painted the edges with Adirondack Pitch Black Acrylic Paint Dabber.
I brushed on Globecraft Memories Glossy Glastique to adhere the clip art to the ATC backing then used a brayer to ensure good contact between the paper, Glastique and ATC background.
Glastique works as an adhesive as well as a sealer, so when the backing was dry (it doesn't take long) I brushed a coat of Glossy Glastique over the front of the ATC as well.
I put a second coat on the front when the first was dry. This gives the card a really nice glossy and protective finish. I set it aside to dry while I prepared some elements that would be added to the ATC.

I cut a pumpkin from my clip art sheet, glued it to cardstock backing with Glossy Glastique (remember, it is also an adhesive) then inked the edges lightly with Black Soot Distress Ink. I adhered this to a scrap of my Card Decor leftovers for added dimension and stability, then coated it with a fairly thick layer of Glossy Glastique (it's also a clear-drying dimensional adhesive). This will give the pumpkin some pizazz when dry.
While the pumpkin is drying (I placed him under my Ott Lite for additional help in drying) I punch out a cat from Piccolo Card Decor Set #5. It's nice to have several Card Decor sets on hand so you can mix and mingle the pieces to get the look you want.

I used our new Piccolo Cool-Set Enameling Gel, Mars Black, on the cat and I must say he came out nice and very black - perfect for a Halloween cat! I added several small dots of Piccolo Cool-Set Enameling Gel, Cobalt Turquoise, for his collar. I also used our new Piccolo Cool-Set Enameling Gel, Metallic Silver, on some corners I punched out, but opted not to use them on this project.
I printed out the words 'Boo" in several sizes, cut them out and edged them with the Black Soot Distress Ink as well. When the pumpkin and the black cat were dry I adhered it all to the ATC. This is actually the first ATC I've made that I can remember and I quite enjoyed it. She turned out pretty darn cute!
In addition to being traded with a friend, she could be used as an embellishment on a scrapbook layout or punch two holes in the top, string some wire or ribbon and use her as a knob hangar.

Visit my blog for more Globecraft Memories-inspired projects: http://linda-neff.com

Friday, October 19, 2012

Dream- Found Home Decor Refinished!

Good morning friends!

Pinky here today with a refinished/renewed project. 

I am always on the hunt for a bargain as I am sure you all are, when I came across this broken wall decor plaque for only .10 cents I had to grab it! I knew I could fix it up and for .10 cents what chance am I taking?

I instantly thought of the Piccolo Enamel Powders.


(Below) This was the plaque before- see the big chip on the corner.  
Which means it is no longer $14.99 but $0.10!


 Step 1. Take wire brush or small hammer and chip all edges.

Step 2. Coat edges with Piccolo Enamel Powder Adhesive.

Step 3. Sprinkle on Piccolo Enamel Powder. If you get powder where you don't want it simply brush it off.

Step 4. Heat set edges with crafting heat gun - repeat for the raised word DREAM.

Step 5. Apply coat of Glastique on DREAM to make it pop out more and to protect the piece   Adding Glastigue Gloss will extend the life of your project and add a beautiful glass-like shine!

Step 6. Allow to dry (shouldn't take long!). 

That's it! Literally a .10 project and 1 hour of your time!

This would work with a frame and other home decor as well. 

I hope you enjoyed my "find" as much as I did and bringing it back to life. 

Until next time- Pinky Hobbs


Tuesday, October 16, 2012

Challenge #87 Stippled or Sponged

Hello crafty friends! It's time for another weekly challenge at SweetStamps.com. This week's theme is...

Stippled or Sponged
We'd love to see your stippled or sponged creation, so come join in the fun! Remember to use a SweetStamps image on your creation to get an extra chance at winning $20 of rubber stamps from SweetStamps.com. Rules are listed in the sidebar and instructions can be found at the bottom of this post.
Check out what our talented design team sweeties have created this week:


* * * * * * * * * * * * * * * * * *
WIN FREE STAMPS! 
Join our weekly challenge
You can use any stamp on your challenge entry, but if you use a SweetStamps image, you will get two entries into the giveaway! To enter the challenge, please add the URL to your actual blog post or online gallery to the InLinkz at the end of this post. Please do not link to your main blog; we want to be able to find your post to leave you comments. Also, please link back to our blog.


Remember, you can only enter the challenge one time, use a SweetStamps image to get an extra entry in the challenge. Please limit the amount of challenges to 10 (including ours).  You must link back to us in your blog post.
 * * * * * * * * * * * * * * * * * *
Next week's challenge theme is Burned Embossing...when you heat an EP for a while AFTER it has raised, burning the powder and flattening it. Try it out, it's a fun technique that creates a beautiful background you can stamp over! Our Medieval Metals and Queen's Gold EPs are two of my favorites to do this technique with. I hope you'll try your hand at this and join us in next week's challenge.

Happy Stamping! Hope your week is super sweet!

:) stacey

P.S. Have you seen our NEW RELEASE designs? Check out the post from Oct. 11th for the images and some samples. There are also some tutorials on our website featuring the new releases!
 

Altered Item Winner

The winner of SweetStamps.com's challenge #86 Altered Item is...

Leesa aka The Navy Wife
Congratulations!

Please contact me for your winning prize of a $20 shopping spree for rubber stamps at SweetStamps.com.

Thank you to everyone who joined in on the challenge, we hope you had fun and will join us again — we have a new challenge every Tuesday!

Saturday, October 13, 2012

Quick Gift For Under $5!

Need a  quick, easy, and affordable gift idea for a teacher or co-worker? 


Charm Set Featured: Beautiful Horses Charm Set

Use our Piccolos for Home Decor! 

This dollar store vase was painted with a couple of layers of Rust-Oleum's stone textured spray paint around the bottom.  Coat a Piccolo charm with enamel. Then tie around the vase with a pretty ribbon or seam binding. Voila!


Friday, October 12, 2012

Skull-tastic

It's a spooky good morning today and Steph here with project that was truly fun to create. I found this paper mache skull in my local craft store and picked it up.  I had no plan in mind, but thought it would be fun to work on at some point.


Picking it up one afternoon, I decided to see how I could transform it.  I first covered the skull with Ranger Distress Stains and Ranger Rusty Hinge Distress Ink.


I tore scrap paper into small pieces and folded them into smaller pieces, then sponged some Ranger Old Paper and Rusty Hinge across each piece. 


Using The Best Glue Ever by Scraperfect, I coated an area of the skull, smoothed the glue across the skull and then proceeded to add the paper pieces. As I finished one area, I added glue to the next area and continued until the skull was completely covered with pieces of paper.


I continued adding pieces until I was happy with the look.  Then I added some additional Ranger Rusty Hinge Distress Ink around the outside of the skull to finish the areas that did not have paper.


Next, I lightly added some Piccolo Adhesive around the skull.  I didn't want to cover the entire skull, I just wanted to add some Enamel Powders randomly across the skull.  Along the top of the skull I used Temple Stone.  Around the eye sockets, I used Gilded Rose and around the mouth I used Girl's Night Out.  After adding the powders, I heat set the areas, and added more powders as necesssary to fill in the areas I wanted.


After the skull cooled, I added a thin layer of Glastique around the skull.  I wanted to create a shiny appearance as well as create a protective layer for the skull.  I allowed it to dry overnight, then thought it needed some bling.  I selected some Want2Scrap clear rhinestones for the teeth and several black rhinestone swirls for either side of the skull to complete it's tranformation.

I coated some bats from the Haunted Accents collection with Enchanted Aubergine and applied a light layer of Glastique once they cooled.   Then I thought I'd add some beautiful Connie Crystals in the eye sockets.


Now the skull's transformation is truly complete. 

Thanks for stopping by today.


Globecraft Memories Supplies:
Enchanted Aubergine
Gilded Rose Gold
Piccolo Enamel Powder Adhesive
Halloween Graveyard Haunting Accents
Other Supplies
Paper Mache Skull: Craft Store
Pattern paper:  MME, 7Gypsies
Ink, Stain: Ranger
Adhesive: Scaperfect
Rhinestones: Want2scrap
Crystals:  Connie Crystals


Thursday, October 11, 2012

10 • 11 • 12 It's NEW RELEASE Time!

10 • 11 • 12 
YAY! IT'S NEW RELEASE DAY!
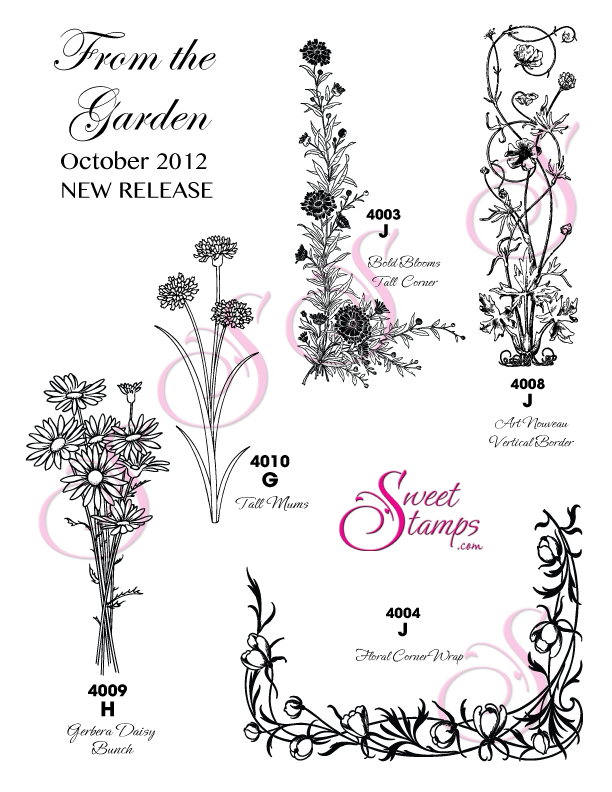
I'm very excited today to share with you SweetStamps.com's NEWEST RELEASE featuring Silhouettes, From the Garden and Decorative Elements!
These stamps are now available for purchase at our online store. We'll be giving some of the new stamps away too, so be sure to leave a little love here in the comments, let us know which image(s) you like the best! We'd love for you to become a follower of our blog too. We've got some new and exciting things coming up for November!

Take a look at some of the artwork we've created with these new images...
 
6009e Gone Fishin' Silhouette stamped in Brownie ink onto cream ATC layer and vellum ATC layer, stippled in Dandelion & Orange inks on cream ATC. The vellum was painted with CI paints (also used this as the "glue" to hold the vellum down). Added CI paint to the top of the vellum too for a shimmery reflection in the water!

6007e Robyn Birdie Silhouette was stamped in French Roast ink onto White ATC panel. Nassau Blue was brayered onto the background and edges were torn then sponged with Latte ink.  Black CS was embossed with Drink Me embossing folder, adorned with ribbon and the birdie layer was attached using pop dots.

4010g Tall Mums stamped in Gilbraltar ink onto a White ATC panel and colored with Distress Markers. Background was stamped with coarse pouncer in Latte ink, which was also used to sponge around the ATC panel. Scalloped Coved Rectangle was diecut from Orange CS, then embossed with Whisper embossing folder (after the White ATC panel was adhered.) Latte ink was sponged across the embossed image to make it stand out. Adhered to a layer of Persimmon CS and embellished with polka dot ribbon and Dew Drops.

Wednesday, October 10, 2012

Spooky Porcelain Pins

Pat Secrist, owner of Globecraft Memories, created these fabulous pins using our cool set enamel gel and Happy Pumpkin Accents:

Don't they look like glazed porcelain? 

We thought so too! 

Pat achieved this look by using our NEW Cool Set Enamel Gel along with our 24K Gold Enamel Powder. Aren't these pins cute?!