Pages

Tuesday, January 8, 2013

Recipe Challenge

Hello crafty friends! Welcome to another SweetStamps challenge. This week our theme is a recipe...
Die Cut + A Flower Stamp

We'd love to see what you whip up using dies and a flower stamp. Remember to use a SweetStamps image on your entry to get an extra chance at winning  $20 of rubber stamps from SweetStamps.com. Rules are listed in the sidebar and instructions can be found at the bottom of this post.

Let your eyes feast on the sweet recipe cards our Design Team sweeties have created this week:


 * * * * * * * * * * * * * * * * * *
WIN FREE STAMPS! 
Join our weekly challenge
You can use any stamp on your challenge entry, but if you use a SweetStamps image, you will get two entries into the giveaway! To enter the challenge, please add the URL to your actual blog post or online gallery to the InLinkz at the end of this post. Please do not link to your main blog; we want to be able to find your post to leave you comments. Also, please link back to our blog.

 * * * * * * * * * * * * * * * * * *
Remember, you can only enter the challenge one time, use a SweetStamps image to get an extra entry in the challenge. Please limit the amount of challenges to 10 (including ours).  You must link back to us in your blog post.

Please turn off word verification so we can leave comments on your challenge entry!

Next Tuesday is our 100th challenge and the theme will be Anything Goes! Hope you'll join us for your chance to win some Sweet Stamps!

Happy Stamping! Have a super sweet week!

P.S. Our Monthly Technique Challenge: Cracked Glass runs through January 14th and a new technique challenge will begin January 15th
 Loading InLinkz ...

Color Challenge (Pink, Green & Brown) Winner

The winner of SweetStamps.com's #98 Color Challenge: Pink, Green & Brown is...

Marianne

Congratulations!

Please contact me for your winning prize of a $20 shopping spree for rubber stamps at SweetStamps.com.

Thank you to everyone who joined in on the challenge, we hope you had fun and will join us again — we have a NEW challenge every Tuesday, and also a monthly technique challenge!

Monday, January 7, 2013

Welcome the New Year


Hi everyone welcome the New Year 2013.  I am ready for this to be a super great year too. This is my first post for 2013 and I want to share a canvas piece I made for Globecraft and Piccolo.


This was a super fun piece to make and so much easier than it looks. I took a blank canvas piece and used the Little Traditional Bubble for the frame. I used Jacquard paints and also embossed the frames for the added texture.


I also used Medal Gold Enamel Powder to the scroll piece I adhered to the frame.

Supplies Used:
  • Medal Gold Embossing Powder
  • Little Traditional Bubble Frame
  • Liquitex - Gesso, Light Mold Paste
  • Jacquard Paints
  • Petaloo Flowers

Friday, January 4, 2013

Creating 3D-effects with Glastique


Hello all! Kristie here with a design tip about Glastique Finishing Glaze.

We know that you can apply a layer of Glastique Finishing Glaze over, well ... pretty much anything!
But did you know that if you apply Glastique over 3D Enamel Gels, you get a domed effect? Yes, that's right, even more dimension!

Just wait patiently (or not so patiently) for the 3D enamel gels to dry, then apply a thick layer of the Glastique ... and TaDa!


Dimension!

Thursday, January 3, 2013

Using 3D Enamel to create opacity


Did you know that you can use 3D Enamel Gel in Titanium White behind transparent glitters, microbeads and other transparent objects to create an opacity? Well, you can.

Here is one example:


It even works on darker surfaces. Simply squeeze on the 3D Enamel Gel.


Pour glitter (or any other transparent objects) over the top.


Let it dry!

Wednesday, January 2, 2013

A Wintry Wreath


Christmas may be over, but winter is just beginning, so I made a little winter wreath. I had a ton of fun with a variety of Globecraft and Piccolo Products. Here is how it was made:


Laura Drahozal
Remembering Life's Moments


MATERIALS:
  • Piccolo Snowman from the I'm Snow in Love With You Accents
  • 3 Piccolo Acrylic Pieces
  • Piccolo 3D Gels in Titanium White, Napthol Red, Orange, Burnt Umber, Ultramarine Blue, Cobalt Turquoise and Metallic Silver
  • Piccolo Pure Sparkle Silver Glitter
  • Globecraft Glastique
  • 9" Grapevine Wreath
  • Distress ink reinkers in Walnut Stain
  • Paintbrush
  • White Acrylic Paint
  • Dreamweaver Snowflake Stencil
  • Dreamweaver White Glossy Embossing Paste
  • Removeable Tape
  • Dreamweaver Paste Spreader
  • Martha Stewart Snowflake Punch
  • White Cardstock
  • Art Glitter Faux Snow
  • Silver Ribbon
  • White Ribbon
  • Straight Pin
  • Nonstick Craft Sheet
DIRECTIONS:
1)  Paint the Distress Reinker with a little water onto the grapevine wreath to darken it. Let dry.
2)  Paint the snowman with a layer of white acrylic to use as a base under the enamel gels.


3)  Use 3D Enamel Gels directly from the bottle: red on the scarf and cap, orange on the nose and brown on the stick arms.


4)  Use silver gel directly from the bottle to create shadows on the snowman.


5)  Add dots of the ultramarine blue gel on top of the silver and blend with a paint brush.


6)  Add white gel on the remaining parts of the snowman. Blend into the edge of the shadow with a paintbrush. Let dry.


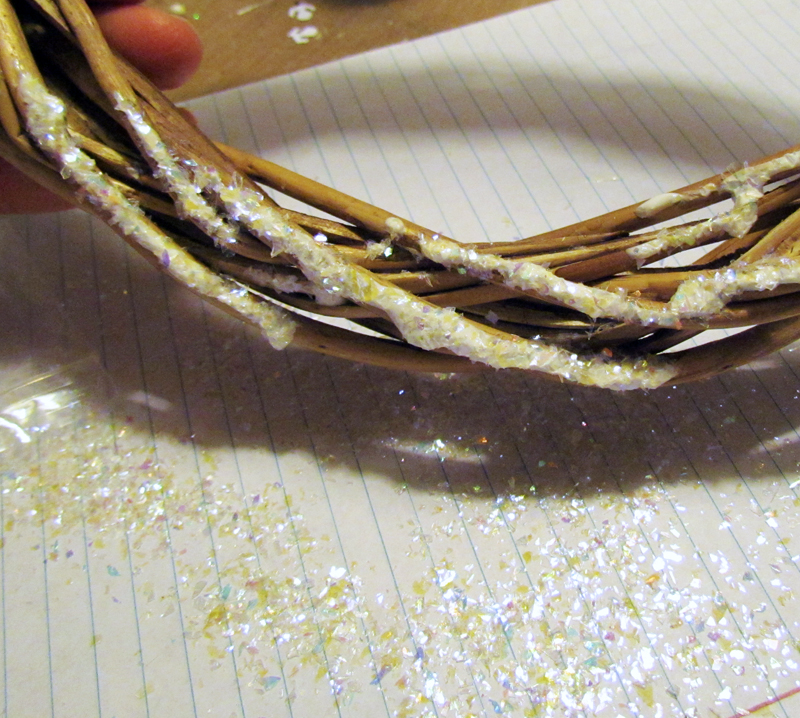
7)  Use white gel directly from the bottle on the bottom of the wreath. You don't have to be too particular about the placement.


8)  Cover the gel with faux snow. Let dry.


9)  Start with the acrylic pieces. They have a blue film on both sides. You will start by removing this film on one side only.
10)  Place the side without the film up, and tape it to your craft sheet.
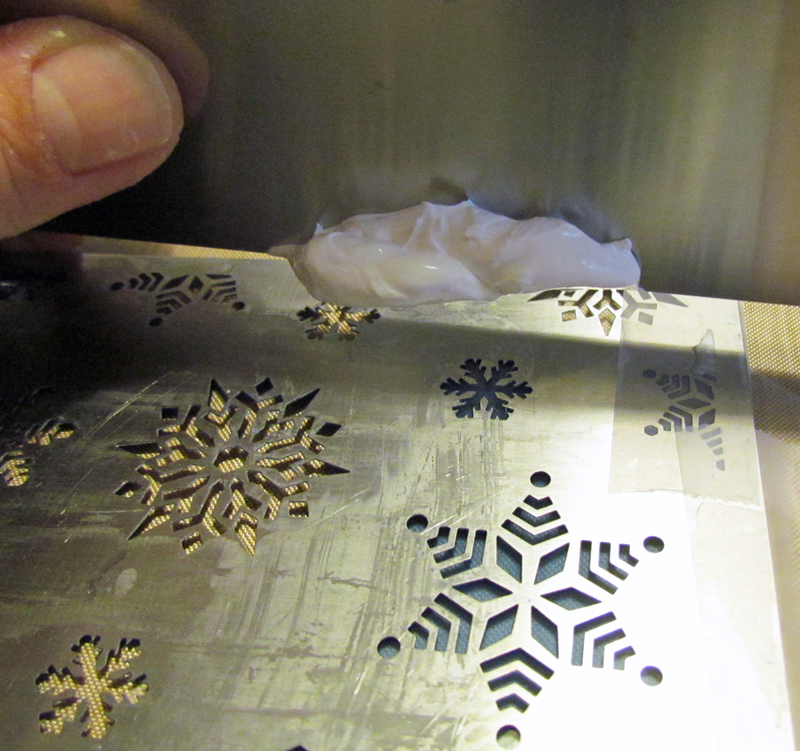
11)  Place stencil over the acrylic piece. You will not be able to get the whole stencil in, so be sure to center it the way you want it over the top. Tape down.
12)  Use paste spreader and white glossy paste over the stencil. You need to actually touch the stencil with the spreader and pull it across like a squeegeee.


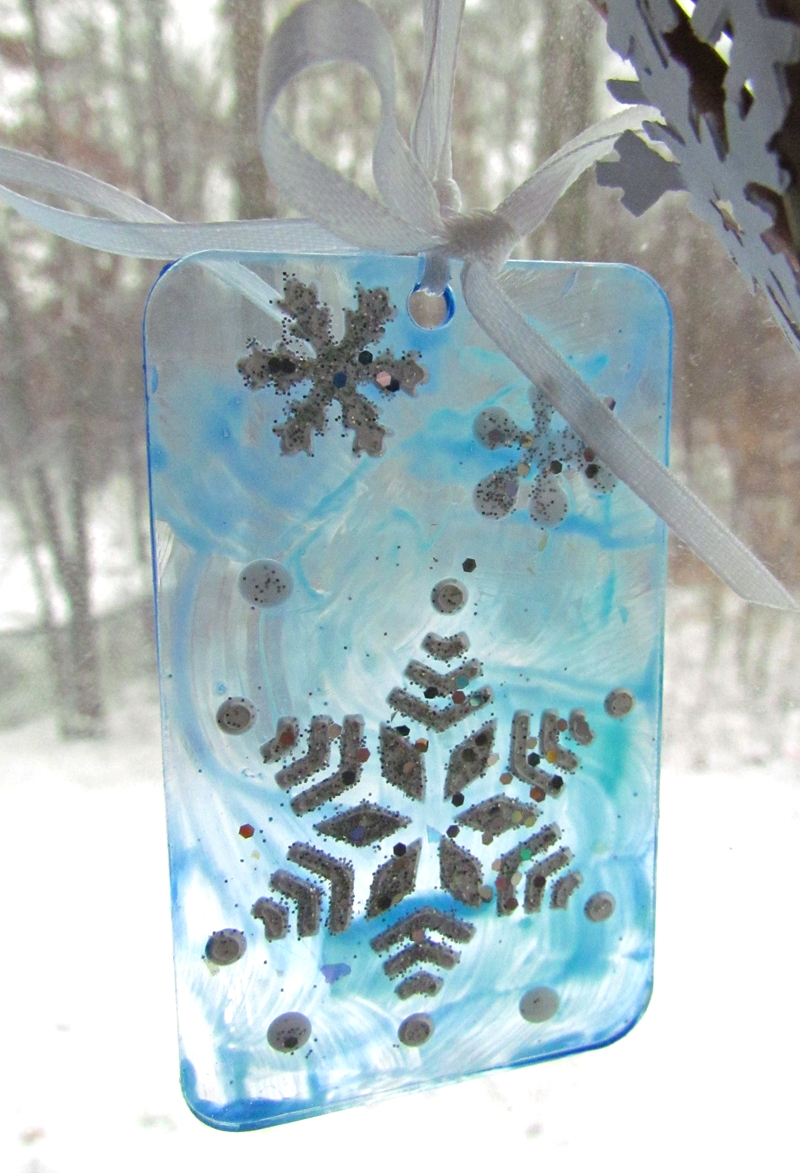
13)  Remove the stencil and cover the snowflake with Piccolo Glitter. Let dry.


14)  Squeeze on dots of white 3D Enamel Gel. Create some snowflakes, using dots of gels and a straight pin to create detail. Let dry completely.


15)  When gel is completely dry, remove the other piece of film and flip acrylic over.
16)  Squeeze blue and light blue gel over the back of the acrylic in big curves.


17)  Use paintbrush and a little water to swirl colors together. Let dry.


18)  Punch snowflake strips from the white cardstock. Punch several of them.
19)  Glue the snowflake lengths together with Glastique, matching up the snowflake shapes on top of each other and creating one long strip.
20)  Attach snowman to wreath using Glastique.
21)  Attach snowflake "ribbon" to the wreath.
22)  Make "needle" from tape on the edge of white ribbon and feed through the wreath on the top.  Be sure to go through at least two branches on each one. Thread three ribbons.
23)  Attach the acrylic pieces from the ribbons. Tie securely.


24)  Attach the silver ribbon.

That is how this snowy wreath was made. I was really fascinated by the transparency of the acrylic, so I photographed it through the window, so you could see it, too.


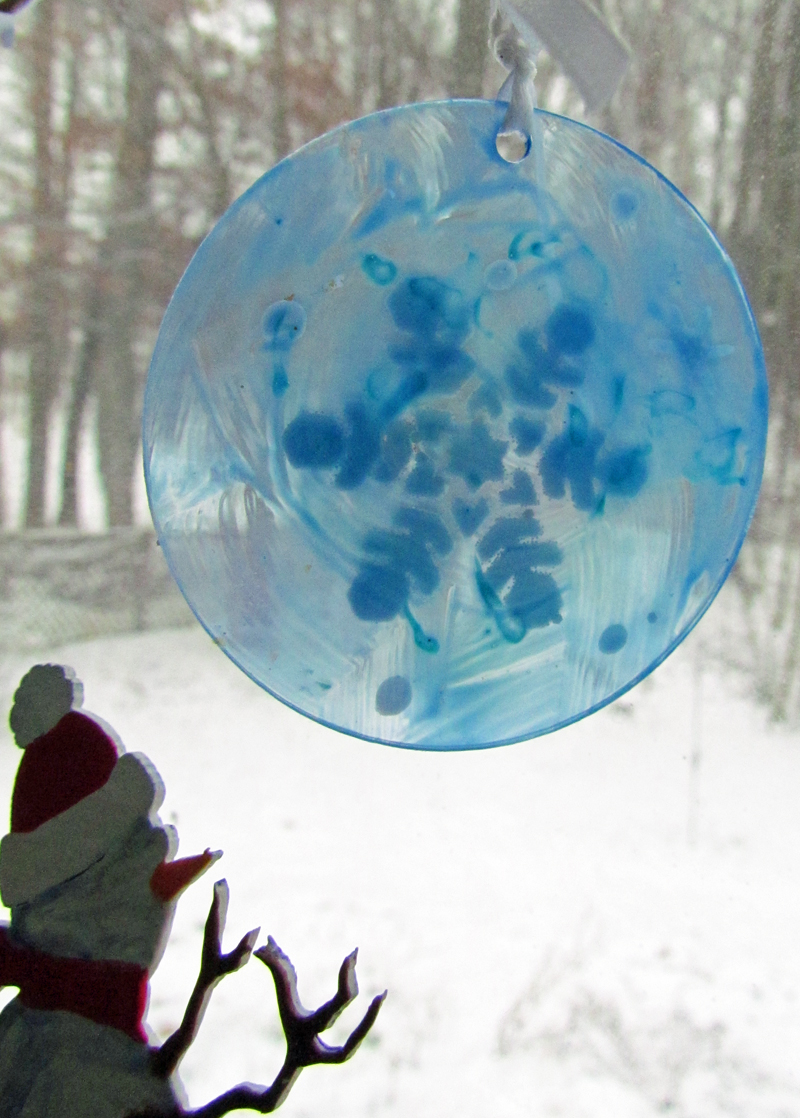
The other interesting thing? If the acrylic piece turns around, you can still see the snowflake through the back of the piece. It just isn't sparkly. See?


I really enjoyed creating this wintry wreath for you. It is something that you can enjoy all season long!


Slide on over to my blog to see what's up over there.


Tuesday, January 1, 2013

Color Challenge: Pink, Green & Brown

Happy New Year! Let's get 2013 started with a color challenge. This week's challenge theme is...
Pink, Green & Brown

We'd love to see what you create, so join in the fun! Remember to use a SweetStamps image on your entry to get an extra chance at winning  $20 of rubber stamps from SweetStamps.com. Rules are listed in the sidebar and instructions can be found at the bottom of this post.

Our Design Team sweeties have created these beautiful Pink, Green & Brown cards this week:


 * * * * * * * * * * * * * * * * * *
WIN FREE STAMPS! 
Join our weekly challenge
You can use any stamp on your challenge entry, but if you use a SweetStamps image, you will get two entries into the giveaway! To enter the challenge, please add the URL to your actual blog post or online gallery to the InLinkz at the end of this post. Please do not link to your main blog; we want to be able to find your post to leave you comments. Also, please link back to our blog.

 * * * * * * * * * * * * * * * * * *
Remember, you can only enter the challenge one time, use a SweetStamps image to get an extra entry in the challenge. Please limit the amount of challenges to 10 (including ours).  You must link back to us in your blog post.

Please turn off word verification so we can leave comments on your challenge entry!

Next Tuesday our challenge theme is Any Die Cut with a Flower Stamp! Hope you'll join us.

Happy Stamping! Hope 2013 is super sweet!

P.S. Our Monthly Technique Challenge: Cracked Glass runs through January 14th and a new technique challenge will begin January 15th

Sweet & Simple Birthday Card Winner

The winner of SweetStamps.com's challenge #97 Sweet & Simple Birthday Card is...

Helen
Congratulations!

Please contact me for your winning prize of a $20 shopping spree for rubber stamps at SweetStamps.com.

Thank you to everyone who joined in on the challenge, we hope you had fun and will join us again — we have a new challenge every Tuesday, and also a monthly technique challenge!