Pages

Showing posts with label Ryann Salamon. Show all posts

Monday, July 30, 2012

Decorate Your Cupcake!

Hey all!  Ryann here with some ways to snazzy up the Bubble Frame Kits.  I recently received the Cupcake Bubble Frame Kit and thought it was really cute!  How fun would it be to use as place cards at a birthday party labeling out the different goodies on the treat table!  So fun!!


For my project today, I assembled the Cupcake Bubble Frame Kit as directed, except for the frosting bits.  Instead of placing a picture in the the frame, I opted for a Happy Birthday sentiment instead.  It was easy to stamp the sentiment and then place into the frame.  After I had assembled the Cupcake Bubble Frame Kit I decorated it!


I started by painting the frosting a light pink using acrylic paint.  It took two coats to get good coverage.  After the paint was dry, I popped up the frosting pieces using the dimensional adhesive provided in the Cupcake Bubble Frame Kit.  You can see from my picture above the dimension in this project!  


Once the frosting was assembled and adhered down, I applied a thin layer of Glastique for some added shine.  And then once the Glastique was dry I generously applied some bling!!


I love the way this turned out!  It would be a great addition to any birthday party table you create!  I plan on using my dazzling cupcake as a tag for a birthday present.  How fun would that be?!!

Thanks for joining me today!  I hope this project has inspired you to get out your Bubble Frame Kits and have some fun!  :)


Saturday, July 7, 2012

Christmas in July

Hi all!  Ryann here with a holiday treat for you today!  Globecraft Memories is gearing up behind the scenes for a big Summer CHA in just a few more days.  I thought it would be fun to show you a little sneak peak of what's to come...

I don't know about you, but in my world, it's never too early to start thinking about Christmas gifts.  I try to do my holiday shopping all year long so it's not a big rush at the end of the year when the majority of my town is searching for the perfect presents for their loved ones.  One of my favorite things about being a crafter is it has opened up a whole new arena of gift-giving.  Not only can I buy gifts, but I can make them too!  This ornament would be a great gift for your friends, co-workers or family.


Supplies used:

  • Glastique (Globecraft Memories)
  • Enamel Powder Adhesive (Globecraft Memories)
  • Mossy Glen Enamel Powder (Globecraft Memories)
  • Brown Stone Enamel Powder (Globecraft Memories)
  • Vintage Gold Enamel Powder - coming soon! (Globecraft Memories)
  • Fine White Enamel Powder - coming soon! (Globecraft Memories)
  • Christmas Tree Ornament - coming soon!  (Globecraft Memories)
  • ribbon
  • jute twine
  • cardstock
  • stamp
  • ink
  • rhinestones
Thanks for joining me today for some early holiday gift giving ideas.  Be sure to come back tomorrow for more inspiration using some of your favorite Globecraft Memories products! 


Thursday, June 21, 2012

Card Decor Love

Hi everyone!  Ryann here with a cute, fun and simple greeting card using one of the Piccolo Card Decor sets and lots of bright enamel powders!  With just a few simple ingredients found at Globecraft Memories, you can turn your greeting cards from good to GREAT!!


Supplies Used:
  • Enamel Powder Adhesive (Globecraft Memories)
  • Glastique Finishing Glaze (Globecraft Memories)
  • Piccolo Card Decor Set #8 (Globecraft Memories)
  • Pink Elephant Enamel Powder - coming soon! (Globecraft Memories)
  • Bright Blue Sky Enamel Powder - coming soon! (Globecraft Memories)
  • Fine White Enamel Powder - coming soon! (Globecraft Memories)
  • patterned paper
  • cardstock
  • scallop border punch
  • black ink
  • stamps
  • ribbon

1.  Apply the Enamel Powder Adhesive to the Piccolo Card Decor pieces and cover with Enamel Powders.
2.  Using your heat gun, emboss the Piccolo chipboard pieces.  Set aside to until cool to touch.


3. Apply Glastique Finishing Glaze to the tops of each Piccolo chipboard piece.  Allow to dry completely.


4.  Decorate card with Piccolo Card Decor pieces and give to a loved one! 


Want to create with these products yourself? We've got an awesome coupon code to share with you!! Enter code JP25 at checkout on our website globecraftmemories.com to receive 25% off your entire order, no minimum or maximum!! Hurry,this offer expires soon so order today!  :)

Thanks for stopping by!  


Thursday, June 7, 2012

Chipboard Charm Bookmark Tutorial

Hello and happy Thursday!  Ryann here with a simple tutorial on how to turn your Piccolo Chipboard Charms into a bookmark with only a few simple steps!  I love to read and was in need of a new bookmark. How perfect the Piccolo Chipboard Charms are for bookmarks.  They are flat enough to fit between the pages of a book and are so easy to "dress up".  Let me show you how!


Supplies Used:

1.  Apply the Enamel Powder Adhesive to one side of the Piccolo Chipboard Charm and sprinkle with Girls Night Out Mixed Media Powder.  Turn Piccolo Chipboard Charm sideways and allow excess Mixed Media Powder to fall off.  Apply heat using your heat gun and allow the powder to melt.  Let cool then repeat on opposite side.


2.  Thread ribbon through top of Piccolo Chipboard Charm and apply fabric glue to end of ribbon. 


3. Fold glued end to attach to length of ribbon and allow to dry.  


4.  Once dry, decorate with pearls and tie bow at base of ribbon. 


Four simple steps and you've a gorgeous yet functional new bookmark!  I hope this has inspired you to take your Piccolo Chipboard Charms and go outside the box with them!


Sunday, May 20, 2012

Butterfly Chipboard Charms Bracelet

Hi all!  Ryann here a fun and easy bracelet made with one of the new butterfly Piccolo Card Decor and Chipboard Charms.  Now I am first and foremost a card maker, but every once in a while I like to stretch my boundaries a bit and try something new. After seeing the pictures of the Globecraft Memories booth from the Michigan International Women's Show, I felt inspired to create my own Piccolo Card Decor bracelet!
Supplies Used:
Post & project by Ryann Salamon

Monday, May 7, 2012

Cranberry Wine Piccolo Thank You Card

Hi all!  Ryann Salamon here with a simple thank you card - easy enough for beginners to create and fun enough for the pro card makers out there!
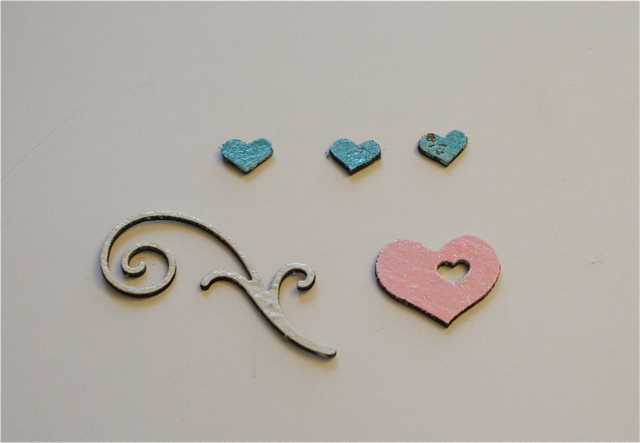
After you remove the little flowers and flourishes from the chipboard frames they come in, make sure you save the negative pieces to use on a different project!  I painted the flourishes from the Piccolo Card Decor Set #7 and set them aside to dry.  I used the Embossing Powder Adhesive to adhere the Cranberry Wine Powder to the flower Piccolo pieces.  After heat setting with a heat gun, they are ready to go!

Here are a couple close-ups of the chipboard pieces using the Piccolo Card Decor set #7 and Cranberry Wine Powder.

Supplies used:


Posted by Ryann Salamon at ryannmarin.wordpress.com


Sunday, April 22, 2012

Introducing Ryann!


We're so excited to welcome Ryann Salamon to the Globecraft Memories Design Team!!!!


Hello!  My name is Ryann (pronounced like Ryan) and I live in sunny San Diego, California with my husband of five years and 2 cats, Parker and Posey.  I started papercrafting over four years ago and just recently started teaching classes.  I've been on a few design teams over the years and am regularly published in papercrafting magazines.


Creative Outlook:   I am primarily a Clean and Simple (CAS) card maker but will play around with other types of projects from time to time.  I find myself drawn to simple patterns, bright colors and I love "white space".  When creating I make a point not to fill the entire canvas with product and try to achieve maximum effect with minimal product.  


~Ryann

View more of Ryann's artwork on her blog: http://ryannmarin.wordpress.com/
We are excited to see what she creates and shares here on the GCM blog in the coming year!