Pages

Friday, January 10, 2014

I Hope to "Inspire" You Today

Hello my lovelies! Aimee here with my very first design team project.
I do hope you like it!!
 
This itty bitty cutie would make a great gift or perfect décor for some small space in your home.
Don't let the directions fool ya, it doesn't take long to create.
 
 
What ya need:
2x2" canvas
Piece of old book paper
Mod Podge
A flower (this one is from Prima)
Heat gun
Paint (I used Rustoleum Metallic Accents in Luminous Pear)
Scrap of card stock or patterned paper
Heavy duty glue (I use Beacon 527 glue)
Epoxy sticker wit a saying or quote
Piccolo Charm- Vintage Birdcage
 
What to do:
1. Mod Podge that old book paper to the canvas. Let it dry (or blast it with your heat gun)  . *note* you could skip this step since by the time the canvas is complete, you really can't see the paper, but I like the additional texture. Rub some paint over it with your finger. Let it dry
 
2. Open up your enamel adhesive fluid and dot it all over the canvas. DO NOT SQUEEZE!! DID YA HEAR ME!?!? DO NOT SQUEEZE IT, or you WILL be sorry! Now put some Turquoise Lagoon enamel powder on there, shake off the excess, and heat it up with your heat gun. Let it cool down (won't take long) and repeat this process with each color... Let them mingle together as you heat them up.
 
3. Now get out your sweet little bird cage. We are only using one part of it for this project. Take that bird cage and coat it with the enamel adhesive, and then cover with Brownstone enamel powder. Remove the excess, and heat that baby up to melt the powder and activate the adhesive. Let it cool and flip it over. Using a toothpick or something else teeny tiny, put some glue on the back of the bird cage and adhere it to a piece of paper. Let it dry and then trim around it.
 
4. Put some glue on the back of your epoxy sticker and adhere it to the canvas. Flip it over and put a book on it for a few minutes to be sure it sticks down really well. Repeat with the sweet little bird cage. Add your flower (use the same heavy duty glue), and you're done.


A Pendant. . .well, a Keychain for Mom


This is my very first post as a Design Team Member for Globecraft & Piccolo.  I am so excited to be a part of this dynamic team! I hope you will enjoy my tutorial and please be sure to stop by the G&P blog daily to feast your eyes on more of the fabulous creations the Design Team has in store!


Let me tell you that I am not the most coordinated person, in fact, I am really clumsy.  It has gotten worse since I had my back surgery (almost 2 years ago) as my equilibrium is still trying to adjust to my “new” back – I often walk into walls, trip over my own two feet and other fun party tricks! I have always been clumsy and only recently have started to trust myself with sharp objects and other dangerous items.  I tell you this because it will make sense later on in the post.  Read on. 


My mom is my biggest fan – how could she not be? – and I love making her gifts and cards.  Unfortunately, my mom is legally blind due to glaucoma, but she does have some sight, depending on the time of day, the weather (sunny or cloudy) and how tired her eyes are.  When I saw these acrylic blanks and the adorable chipboard shapes from Globecraft & Piccolo, I knew Mom would love a pendant. 


The Items I Used:


The Fine Flower & Vines Flourishes naked :)

First thing I did was figure out my layout.  I knew I wanted the pendant to say Mom, to have flowers & hearts and be vibrant enough so she could see it.  I had colored the flower with Distress Markers first, but then I was worried that they’d run and I’d be left with a bare flower once they had contact with the Glasstique, so I recolored with a green Sharpie for the stem of the flower and LuminArte Rich Cobalt for the actual flowers.  Since LuminArte is also water soluble I knew there’d be some running of the color, but I wanted to give it a try and I felt a halo effect would almost enhance the pendant.  I colored the flower & stem quite a few times, letting it dry thoroughly in between coloring.


The beginning of the layout


Now I had to dig through my immense stash of letter stickers.  I confess, letters and fonts are another crafty addiction of mine and I had quite a bit of stickers to choose from.  And of course, the last bunch I looked at had the perfect black letters on a clear backing from Mrs. Grossman.  I stuck those on the acrylic base and then fooled with the flower and the little heart (that I had previously embossed with Mardi Gras Embossing Enamel when I was using the enamel on a card I made).  Once I was happy with the placement, I glued everything down.  Let that dry overnight, just to be sure.  I also had a hell of a time getting the blue covers off the acrylic, which was nothing new, and in hindsight, I should have left the back cover on the pendant until I was done.  But nooooo, I had to take all the covers off - my mistake!


The last step was to cover the entire design with Glasstique.  I hadn’t worked with this top coat yet, but I have worked with similar products in the past.  I bit the bullet and slowly squeezed the Glasstique in the middle of the pendant and let it flow naturally over the front.  Beautiful.  I left the pendant alone for about 8 hours.  When I went to check on it, I noticed that some of the Glasstique had flowed over the sides and went under the acrylic piece, (see why I should of left the back on?) and in my terror that I would have Glasstique stuck to the back I picked the pendant up to clean off the back before it had dried completely.  Well, in doing that I also cause a ripple and a fingerprint in the front, right were the “o” in Mom was. And then I dropped it (see, this is the clumsy part) but thankfully no more damage was done and I was able to pick the cat hairs off the pendent.  OK – not to worry – I let the piece dry completely and then I figured I’d be able to fix it somehow. 


My fix was a fiasco.  I thought if I dabbed just a bit of the Glasstique where the ripple and finger print were it would magically meld itself into the already dry coating and would be fixed.  Nope.  So now, I had a blob over the ripple and fingerprint – the good news being I couldn’t see the previous mistakes, just the blob now. 
The arrow is pointing to the blob of a mistake - I didn't take a pic of my fingerprint LOL
 I wrestled with just throwing the whole thing out and trying again, but I hate to waste products (as evidenced by my overflowing stash of scraps and doo dads) so I went to plan B – after I thought of plan B.  I have quite a collection of plastic gems so I picked through the ones I felt would work with what I’d already done and humbly asked my G&P Design Teammates which “fix” looked best.  That narrowed it down to 2 possible solutions, so I chose to use a blue plastic flower gem, which I glued right onto the Glasstique with a tiny dab of E6000 glue.   And then I put the cardstock paper on the back and that also helped a bit to camouflage the blob.  Whew!  You can still see the blob in certain light, but I think it’s a save.  Mom may not have a new pendant anymore, but she has a fabulous keychain! 


The fabulous Manny holding the keychain
And the keychain - whew!


I already have my eye on what I am going to dive into next – Mom may get a pendent after all!  I hope you enjoyed my little tutorial ~ Fondly, Christi


If you’d like more information about Globecraft & Piccolo’s products, you can go to the main webpage HERE - you’ll even find some tutorial YouTube videos! 


Thursday, January 9, 2014

SNOW PRINCESS FLOWER GIRL


HAPPY THURSDAY! I am really inspired by what the other designers have posted this week. 

I'm very excited to share my first project using the Globecraft and Piccolo products with you today. 

I'm helping a friend with some Winter Wonderland wedding ideas and who is the very next important (and sweet) bridal party member after the bride and groom? Well ---  the flower girl of course!

Here's how I made and adorable accessory for the flower girl to wear.

G & P SHOPPING LIST
- aged white enamel powder 
- tweezers (not a requirement but I love the ones I have)

other items - Links provided for SweetStamps products
- extra fine vintage colored glitter
- clear drying glue
- tulle (I used ivory)
- headband (mine is an ivory satin one)

When I opened my package from G&P - I was blown away by the detail of the laser cuts. The bookboard is not heavy or bulky, but it is very strong. 

I opened my Snowflakes and grabbed my pointy tweezers and punched all the excess bits from the laser cut. LOOK AT THAT DETAIL.
Knowing that the back of this may show I covered the front and back of the accent.

The back of the accent was covered with Vintage Silver and the front with the Aged White. (aged white is a wonderful white with sparkly bits - simply beautiful)

I watched several videos previously published before I started ------  the links to the videos are at the main website.

Here are my "QUICK TIPS"
 --- roll the container of the powder several times before each use and after adding the excess back to the jar.

--- if doing both sides - I discovered that a ceramic tile was a great nonstick surface to heat on.

--- on these fine detail shapes, a lot of my powder would blow off with the initial heating - I learned quickly to hold the shape with my tweezers and heat from the bottom until it started melting, then finish from the top.

--- the longer you heat the powder the smoother the finish. (I used the heatflash technique for the white side and heated the back to a smooth finish)

Now for the pretty pictures.


Roll the powder to prepare for pouring.

 I used the embossing adhesive all along the shape.

Sprinkle with the powder (catch the excess on a folded paper - the fold makes it easy to pour back into the container).

Want the finish thicker? Simply reapply the adhesive and powder and heat again.


Oh look --- pretty.


I wanted a bit more sparkle to these - so I used the fine applicator tip with the Glastique GLOSS and added flat backed rhinestones to the rounded areas of the snowflake and to the centers of each of the connected ones.


Let those dry and then to strengthen the shape even more, I covered it all with more of the Glastique GLOSS finishing gel.


I gathered my tulle for the headband and then, using a small flat paintbrush, I randomly stroked more Glastique on the tulle and sprinkled with extrafine glitter. The Glastique dries clear and flexible and makes a great glitter adhesive.


Then using a heavy body glue - I glued the large snowflake and some cutoff small flake accents to the headband.


All that's left to do is add one really cute flower girl. 

Be sure to come back tomorrow to see the next amazing creation.

Life is beautiful --- 

Teresa (aka MaggieGraceCreates)


Wednesday, January 8, 2014

A Steampunk Valentine Pendant


 Happy Wednesday everyone! leslierahye here with my very first post for Globecraft & Picolo. For my project today I made a pendant with the Skinny Rectangle Bezel by layering on Steampunk gears and Hearts, keys and embellishments! I love how it turned out! It's it complemented by the Silk Cord Necklace that can also be found in the online shop!

I began  by dabbing Enamel Powder Adhesive Fluid onto my bezel chipboard shape and embossing it with Mermaid Tears EP. I then did two layers of Vintage Copper on the gears and Copper Kettle on the key and swirl. The heart was coated with the 3D enamels in Dark Red and Pink Rose. The gears were then coated with the matte finish Glastique and the rest of the pieces were coated with the gloss finish Glastique. After they dried a generous coat of the gloss Glasstique was applied to the Bezel and to backs of embellishments to adhere the pendant together! The key was dangled from the heart with copper jump rings. The entire pendant was added to the Silk Cord Necklace by a copper jump ring as well.


*****

Tuesday, January 7, 2014

My first post

Hi everyone, well this is my first post as part of the G&P team, I cannot tell you how much fun I have had playing with these products and hope to share lots of different projects with you. 
But onto my first project. 

I wanted to show you just how beautiful Piccolos are when used with the fab powders, I also wanted to show that they look beautiful when used on cards. 


How gorgeous are they ? 
Recipe is as follows:
You will need- 
Kraft card blank, the one I used is 6x4
Some Matching papers
Piccolos of your choice, I used Daisy Floral Accents & Frame Set
Embossing Enamel Powder, I used Bahama Aqua
Matching Ribbon 
Sentiment stamp 

1. Take your Piccolos & using the Enamel adhesive fluid apply two layers...Piccolos are absorbent so I found two layers gives you nice even coverage. Then using the Embossing Enamel powder give a nice even coating and heat using a heat tool. Once cooled apply the 3D enamel gel to the center of the flowers. Set them aside to dry. 

2. Take your paper and cut to 5.8", apply your ribbon and fix the paper to the card blank. 

3. Cut a piece of Kraft Card to 5 x 2.5, then cut a piece of paper to 4.8 x 2.3 and fix these together to create a panel and glue to the card. 

4. Cut 3 pieces of Kraft card to 2 x 1.5 and glue your Piccolos to them, then fix these to the panel. 

5. Stamp a sentient of your choice using the Adhesive fluid and then emboss using the Enamel powder, fix this to the card and you are done ! 

Here is some close up's to show you just how beautiful they are. 


I hope you have enjoyed my first post, make sure to check back every day to see all the other talented teams creations. 
Tracy 


Kraft Paper Challenge

Happy New Year! 
Hope your new year is off to a good start. We've been getting quite the snowfall here in Michigan...great weather to stay inside and stamp right? This week our challenge is...
KRAFT PAPER
We'd love to see your Kraft Paper creation (cards, scrapbook pages, mixed media, ATCs, etc.), so come and join the fun! You could win a $20 shopping spree for goodies at SweetStamps.com's online store by playing along in our challenge! Click here for our complete Challenge Rules.
 * * * * * * * * * * * * * * * * * *
Our Monthly Technique Challenge Easel Card goes through January 14th, join us with your creation and check out what our DT Sweeties made! View ALL the monthly challenges here.

***Don't forget to check back later this week for more inspiration from our monthly Guest Designers!***

Next week our theme is WINTER BLUES. Happy Stamping! Have a super sweet week!


Monday, January 6, 2014

Ocean Dreams Embossed Frame Card

Happy Monday!

I am so excited to share my first G&P project with you today! Please excuse all the exclamation points... I have been playing with the Enamel Powders...and let me tell you! They are absolutely gorgeous and do not disappoint.

Want texture? You've got it!

Want smooth? You've got that, too!

And the colors?! You've got to see them to believe just how wonderful they really are!

Let me stop gushing and I'll show you how I made a bit of raw chipboard mah-velous! 


You can achieve a simple ombre effect by using 2 or more colors of Enamel Powders.

Things to put on your shopping list (a.k.a. the Globecraft & Piccolo supply list):

Vintage Gears A130 (or any of the Piccolos with a frame)

Enamel Powders:
Aged White

Here we have the raw chipboard frame. 

don't you love this picture?
the way the paper plate frames the frame just makes me want to say 'ta-da!'
First thing to do is dab the Enamel & Embossing Powder Adhesive Fluid all over the frame. Then pour Bahama Aqua over half the chipboard. Carefully, tap off the excess powder and pour it back into the container.

Do the same with the Deep Blue Sky enamel. (if the Enamel fluid has already evaporated, go ahead and dab on some more.)

Time to get out the heat gun! I just love the magic of the Enamel Powders...see the dramatic change?


After I melted the first layer I decided to add a second layer of of the Bahama Aqua. Just dab on some more of the fluid, add powder and melt!

After the second layer...
Here's a good picture of the different textures you can achieve...Heat the powder just until it melts for more texture (the frame), heat longer to make it smooth (the cardstock)
.

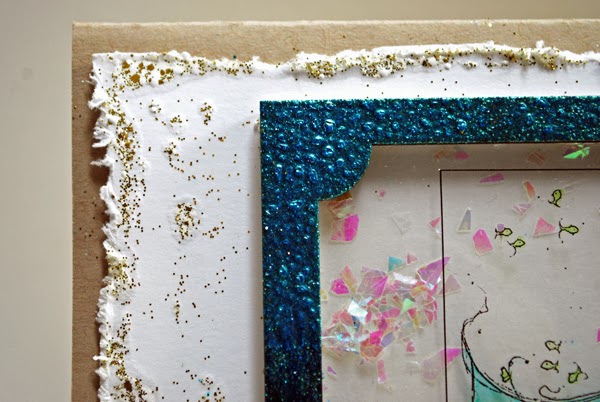
 The Glastique made a great adhesive for the acetate on the chipboard. Took just a smidge, but make sure to press it together for a few seconds and then let it finish drying.


I used Aged White Enamel Powder on the distressed white cardstock. By using a paintbrush to pick up the Enamel fluid, I could dab it on 'randomly', add powder and melt. Love the texture and interest it added to my finished piece!


Okay...that's it for today! Thanks for stopping by the G&P blog. Be sure to come by again tomorrow to see what other crafty goodness the Design Team has in store for you!

Inky hugs,

Sunday, January 5, 2014

Filigree Heart Necklace


We are releasing some new Piccolo's this month and my project today uses the new Filigree Heart Accents & Necklace charm set.  I started with the solid backing for the heart which I heat embossed with Girl's Night Out embossing powder.  It is a wonderful mix of rose, white, black and silver colors; very rich looking.  For the filigree hearts, I used Siam Silver embossing powder.  To give the pieces a more finished look, I sponged Rose and Silver 3D stamp paint on the edges and backs to cover the chipboard.  I added a few clear gems for some extra sparkle to the filigree heart.  Now for the gift box.....


For the top, I used Siam Silver for the Heart and for the small corner pieces from the new Tiny Flourishes Piccolo set.   I embossed the top of the box with Girl's Night Out.  You can see I added some more gem accents to the heart.


 I used my Rose 3D stamp paint on the sides of the top and my Silver on the bottom of the box.  The accents on the end of the top and the front (and back) of the bottom of the box are from the new Steampunk Airship Accents Piccolo set.  I added a gem to the center of the larger flourishes.  

Thank you for visiting today.  Be sure to come back each day as our new design team brings you wonderful and inspirational projects. 

Saturday, January 4, 2014

Pink Bells


Hi folks!  It's Holly with my last guest post here on the Sweet Stamps blog.  I truly appreciate this opportunity to share my Sweet Stamps creations with you during the month of December.  I've had a wonderful time playing with these beautiful stamps.  I'm leaving you with this card that I created using the gorgeous Bells with Bow stamp.

This week's Sweet Stamps challenge is Something New.  This Bells with Bow stamp is a new stamp to me, and it is such a relaxing image to color.  I created this card for my grandparents.  Their 69th anniversary is coming up in a few weeks, and I knew this stamp would be perfect!

I picked these colors specifically for my grandparents.  How can you go wrong with a pink and brown color combo??  :-)  I stamped the Bells with Tuxedo Black Memento ink and then pulled out some Copic markers to color it with - E44, E49, R81, R83, and R85.  Once I finished coloring, I sponged some Antique Linen distress ink around the edges.

For the card base, I pulled out some papers from the Pretty In Pink 6x6 paper pad (Glitz) and adhered them to a white layer.  Everything was glued down onto a brown card base.  Then I die cut some corner pieces and added a white pearl to each one.  Finally, I adhered my Bells image with foam tape in the center of the card.

Check out the Something New challenge on the Sweet Stamps blog and play along with us.  You could win a $20 shopping spree at Sweet Stamps!  Thank you for stopping by to check out my artwork here this past month.  Here's to a wonderful new year in 2014!!