I created a fun watercolor card for you today using these products from Sweet Stamps:
Antique Leaf Scroll Border stamp
Three Rose Garland stamp
Framed Handwritten Words stamp
Medieval Metals embossing powder
I enjoy making watercolor cards so much, there's just something about this medium that makes you want to play lol. And just a word about this embossing powder, it is seriously my go-to metal embossing powder. It is so gorgeous, and pictures just don't do it justice! If you would like to see more details about how I created this card, please visit my blog at Ode to Paper.
See you again next Thursday for more inspiration and fun :)
Showing posts with label Detail Embossing Powder. Show all posts
Thursday, May 26, 2016
Monday, March 28, 2016
Enjoy Your Day
This is Kim. Today I have a vintage inspired card using Sweet Stamps' Love Birds ATC set. I stamped it using Memento Tuxedo Black ink and colored in the image using Zig's Real Brush Watercolor pens.
I fussy cut the image after the watercolor was dried. The sentiment is from the Simple Greetings set. I stamped the sentiment with Versamark then used white fine embossing powder .Monday, March 21, 2016
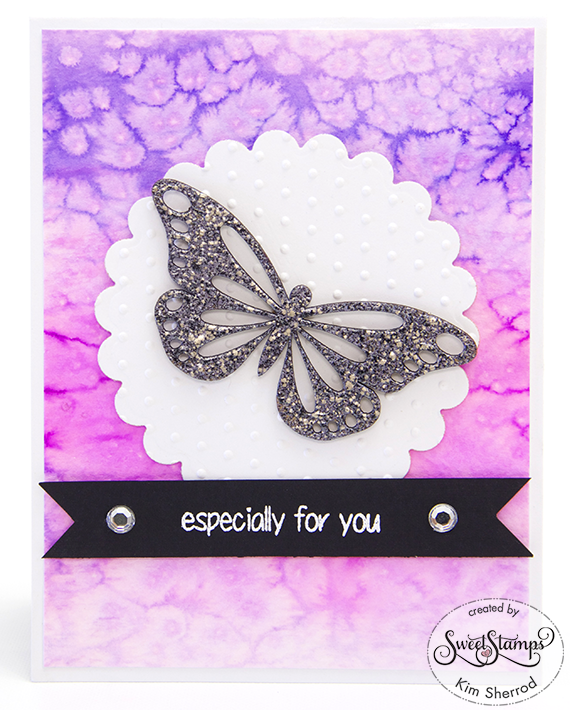
Especially For You
Hello Stampers! This is Kim her to share with you a fun watercolored card. I am using this beautiful butterfly piccolo shape from Sweet Stamps as my main focus for my card today. I used the enamel fluid to get the image wet then I sprinkled on a generous amount of the Vintage Black enamel powder.
The background was watercolored using various shades of pinks and purple Zig Clear Real Brush pens. I also added some coarse salt to the paper while it was drying to add some texture the the background. I die cut the circle and embossed it. The butterfly is adhered using 3D tape for dimension. I used the white fine detail embossing powder for the sentiment.
Monday, March 14, 2016
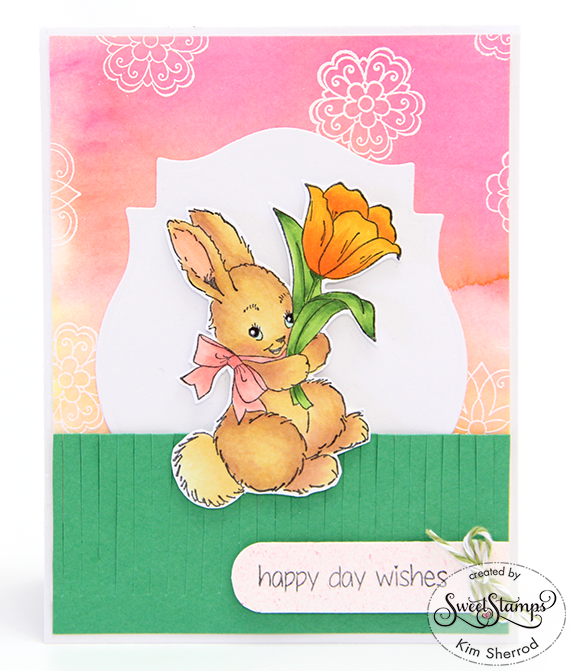
Happy Day Wishes
This is Kim. Today I have an adorable card to share with you using Sweet Stamps's Tulip Bunny set. I did some watercoloring for the background and also randomly stamped and embossed the flowers from the Fancy Flowers set using fine detailed white embossing powder.
I fussy cut the bunny and used a Spellbinder die to cut out the shape and popped up the bunny using 3D tape. The grass was cut freehand and the sentiment is stamped onto a leftover piece of watercolor paper using the Simple Greetings set.
Thursday, February 18, 2016
Medieval Metals on Kraft Happy Birthday
Hello everyone, I have a male-themed Birthday card for you today :)
This is part of my own personal challenge to create at least one male-themed card every month. I think it turned out well...what do you think? I love the elegant but manly feel to it :)
I used the following Sweet Stamps products in the creation of this project:
Checker Flowers Stencil
Framed Handwritten Words
Medieval Metals Fine Detail Embossing Powder
Elegant Leaves Sweet Cuts die
Shades Dye Ink in Brownie
You can find all of these products in the Sweet Stamps online shop and I have linked them all for you.
Come and join us for the two monthly challenges at the Sweet Stamps Challenge Blog, there is loads of inspiration and even a prize! Hope to see you there!
This is part of my own personal challenge to create at least one male-themed card every month. I think it turned out well...what do you think? I love the elegant but manly feel to it :)
I used the following Sweet Stamps products in the creation of this project:
Checker Flowers Stencil
Framed Handwritten Words
Medieval Metals Fine Detail Embossing Powder
Elegant Leaves Sweet Cuts die
Shades Dye Ink in Brownie
You can find all of these products in the Sweet Stamps online shop and I have linked them all for you.
Come and join us for the two monthly challenges at the Sweet Stamps Challenge Blog, there is loads of inspiration and even a prize! Hope to see you there!
Friday, January 8, 2016
Beautiful Day Cameo Card
Hello! Britt Bass here today to share a sweet little card with lots of die cutting and a few inking techniques.
Sweet Stamps manufactures many exceptionally good quality steel rule dies. I have used three of the ones available to create the focal cameo and floral image on this card.
First I took a blank white piece of cardstock and stamped the Antique Leaf Scroll border stamp with Versamark three times on the cardstock and embossed it using White Fine Detail embossing powder. I used two colors of distress inks and applied them to the background with a ink blending tool. The white embossed stamped image resisted the inking beautifully.
I took orange, white and green DCWV cardstock and cut using the Mini Flower die, the Cameo Lady die and the Fancy Leaf die. I also cut a label shape from a label die set from my stash. I assembled the lady and the label together to create the cameo and assembled the flowers. I used pearl paint to add pearls to the lady and pretty pearlized centers to the flowers and set both aside.
I used the Beautiful Day stamp to add a sentiment to the green strip of paper. (The original stamp says "Have a Beautiful Day" but I masked off the beginning of the phrase before I inked it in order to make it possible for me to use only the words I wanted to). I added the sentiment, a piece of polka dot mesh and a ruffled ribbon to the bottom of the card. I adhered my cameo, the flowers and the leaf die cuts onto the card and it was all done!!
Take a look at all the wonderful supplies to help you recreate this card available on Sweet Stamps' online store!
Friday, December 18, 2015
Floral Thank You
Good morning people! Britt Bass here from Pink Paper Crowns!
I'm dropping by today to bring you a little card that I made using some beautiful floral images from the ATC line in the Sweet Stamps shop!\
For this card I took the Daffodils ATC, Parrot Tulips ATC, and the Black Eyed Susans ATC red rubber stamps and stamped them with Versamark ink and heat embossed them using the White fine detail embossing powder. Then, I used several colors of Heidi Swapp color shine with a brush to lay down the colors on my background.
Once the water colors were completey dry I cut down the panel and mounted it on a 5x7 cardbase using pop dots. I used large letter stickers for my sentiment and finished off the card with sequins, a strip of gold scallop edge paper and a faux stitching line around the parameter to pull some more white into the design. I love how SUPER shiny it is and how beautiful the floral images stamped.
Don't forget to drop by the Sweet Stamps store and take a look at all of the gorgeous red rubber stamps!
Later queenies!
Monday, December 7, 2015
Merry Christmas
Hi There! Kim here with a Christmas card using the Starflake Medallion stamp. I embossed the image with white fine detailed embossing powder and fussy cut the medallion. I placed it onto the card front using 3D tape. I then cut out the flower petals using the Pretty Petals Sweet Cuts die and trimmed the outer petals to form a small snowflake. I finished it with some rhinestones and an organza ribbon.
Friday, December 4, 2015
Kitty Sweets Card!
Hello, Britt Bass here to bring you a quick little post about a quick little card I made using Sweet Stamps' Kitty Sweets clear stamp set and Embossing Powder.
First, I stamped my image with Memento Tuxedo Black ink and colored him with my Spectrum Noir alcohol markers and fussy cut him out. I wanted him to be wearing a little birthday hat, so I cut a triangle with a slightly rounded bottom out of a piece of patterned paper and outlined it with a black Memento marker to make it looked like it was stamped . I then colored around the black line with white gel pen - that gave the hat the same little white border as the cat. I attached the hat to my cat and added a button - cat complete!
I took a DCWV cardbase and three DCWV papers from the "Dots and Stripes" line and layered strips across the middle of the card, alternating colors within my color scheme. (Tip time! If you run your fingers under the edges of each layer it will give you some nice dimension without using pop dots! Just don't put adhesive all the way to the edges!)
Finally, I attached my cat to the card base and began working on my sentiment. I stamped the frame and the "Wishes for a great Birthday" sentiment and embossed them using Silver Fine Detail embossing powder and Black Fine Detail embossing powder - respectively. Once the senimtent was attached - the card was done!
I know that you all enjoyed the sketch I added to one of my posts last month, so I wanted to give you one for this card as well!
Now, don't forget to stop by Sweet Stamps for all your supplies this month!
Thanks for stopping by!
Thursday, November 19, 2015
Sweet Summer Blooms with Leah Tees
Hello everyone! Winter is unfortunately getting very close up here in the north, and I am clinging to all things summer for as long as I possible can!
And with that, I have created a card using the Summer Blooms rubber stamp. I have heat embossed with Detail White embossing powder and water-colored this image using the Shades Ink Cube dye ink in Valentine, Royal, and Envy, and included die cuts using the Fancy Leaf die.
I love to create with this medium as the results are so organic and sometimes create a very realistic looking finished product :)
If you would like more information about how I created this card, please visit my blog at Ode to Paper :)
You can find all of these products available in the online shop at Sweet Stamps :)
1005 Summer Blooms rubber stamp
Detail White embossing powder
Shades Ink Spots dye ink in Valentine
Shades Ink Spots dye ink in Royal
Shades Ink Spots dye ink in Envy
SC006 Fancy Leaf die
Don't forget to come and join us for TWO monthly challenges: the Anything Goes challenge begins every first Sunday of the month, and the Anything But A Card challenge begins every third Sunday of the month! Come and have some fun and maybe even win a prize!
And with that, I have created a card using the Summer Blooms rubber stamp. I have heat embossed with Detail White embossing powder and water-colored this image using the Shades Ink Cube dye ink in Valentine, Royal, and Envy, and included die cuts using the Fancy Leaf die.
I love to create with this medium as the results are so organic and sometimes create a very realistic looking finished product :)
If you would like more information about how I created this card, please visit my blog at Ode to Paper :)
You can find all of these products available in the online shop at Sweet Stamps :)
1005 Summer Blooms rubber stamp
Detail White embossing powder
Shades Ink Spots dye ink in Valentine
Shades Ink Spots dye ink in Royal
Shades Ink Spots dye ink in Envy
SC006 Fancy Leaf die
Don't forget to come and join us for TWO monthly challenges: the Anything Goes challenge begins every first Sunday of the month, and the Anything But A Card challenge begins every third Sunday of the month! Come and have some fun and maybe even win a prize!
Friday, May 15, 2015
Watercolor Wings...
Hello and Happy Friday!!! Lisa here with my take on this week's challenge of Things With Wings...
Supplies Used:
To create this card I started with a panel of watercolor cardstock. I then heat embossed the butterfly before wetting the whole panel with water and a brush. Next I "smooshed" some distress ink onto a craft mat and begian picking the colors up and dropping them in letting the water do the work. Once I had covered all of the butterfly I went back over to make certain areas darker. I then went in with some blue distress ink to cover the rest of the background. When it was dry I then stamped the sentiment and added the strip of patterned paper down the side.
Thanks so much for stopping by and I hope you will have time to join in our challenge!
Happy Crafting!
Lisa
Supplies Used:
To create this card I started with a panel of watercolor cardstock. I then heat embossed the butterfly before wetting the whole panel with water and a brush. Next I "smooshed" some distress ink onto a craft mat and begian picking the colors up and dropping them in letting the water do the work. Once I had covered all of the butterfly I went back over to make certain areas darker. I then went in with some blue distress ink to cover the rest of the background. When it was dry I then stamped the sentiment and added the strip of patterned paper down the side.
Thanks so much for stopping by and I hope you will have time to join in our challenge!
Happy Crafting!
Lisa
Friday, April 3, 2015
Hangin' With My Peeps
Hello and Happy Friday! Lisa here today to share a cute little Easter Card, perfect for this weekend...
Supplies:
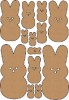
To create this card I started by embossing the little Bunny Peeps in various colors. Now the yellow bunny embossing powder was created by mixing several powders together. I then layered some patterned paper, stamped the sentiment, and adhered the peep. Ta - da! Super clean and simple and let's not forget cute!!!
I hope you have a wonderful weekend and that you'll get a chance to play along with our latest challenge: Hippity Hop
Thanks so much for stopping by and Happy Crafting!
Lisa
Supplies:
I hope you have a wonderful weekend and that you'll get a chance to play along with our latest challenge: Hippity Hop
Thanks so much for stopping by and Happy Crafting!
Lisa
Friday, February 6, 2015
With Sympathy
Hello! Lisa here today and I am sharing a way to make your stencil patterns softer... Sympathy cards are sometimes the hardest to make, but are sometimes needed. This card uses some stencil and embossing, but all of it is toned down for a softer effect...
By simply added the vellum, the whole card takes on a softer feel. To create my stenciled panel I started by going over the stencil with purple distress ink. I then flipped the stencil upside down and went over it with a soft blue distress ink. I then embossed the floral images in gold, and layered it vellum and an embossed sentiment. Tip: vellum is hard to adhere without leaving spots, but use embellishments as I have done to hide these spots.
Supplies Used:
Don't forget to play along in this weeks challenge: Love is in the Air
Happy Crafting!
Lisa
By simply added the vellum, the whole card takes on a softer feel. To create my stenciled panel I started by going over the stencil with purple distress ink. I then flipped the stencil upside down and went over it with a soft blue distress ink. I then embossed the floral images in gold, and layered it vellum and an embossed sentiment. Tip: vellum is hard to adhere without leaving spots, but use embellishments as I have done to hide these spots.
Supplies Used:
Happy Crafting!
Lisa
Wednesday, December 10, 2014
Filigree Frame and Snowflakes
A Blue Lake Prismacolor pencil and baby oil was used to the color inside the white embossed frame image.
Image: SweetStamps - Filigree Frame
Paper: Bazzill - textured white, Beckett Expressions Radiance for image, My Paper Garden blue
Ink: VersaMark
Accents, Adhesive and Enamels: Crystal Snowflake LA126 accents, Fine Detail White, Enamel Embossing Powder Fluid, Aged White enamel,
Accessories: Self Adhesive Pearls - Snow (largest pearls), Spellbinder medium and tiny pearls with Paper Glaze to attach to the card
Tools: Perfect Paper Crafting - Perfect Layers, Perfect Cutting Mat, heat tool
Subscribe to:
Posts (Atom)


-1.jpg)
-1.jpg)
-1.jpg)
-1.jpg)
-1.jpg)