Pages

Showing posts with label key. Show all posts

Monday, March 31, 2014

Altered Frame & Embossed Accents

This project has been sitting on the back burner for a few weeks now, but until recently it didn't really come together. At first I couldn't decide which Embossing Enamels to use, then it was deciding which Accents to use (there are so many choices!) - there was always something not quite right...have you ever had that much trouble getting a project to work?

Today the stars aligned and I love this mini frame!

"Together is my Favorite Place to Be"

I wanted something vintage-ish, clean not grungy. Worn and well loved was what I had in mind...


Let's get our supplies!

Globecraft & Piccolo:
Butterfly & Flowers Accents (A153) (or you could use Tiny Hearts, Flowers, Stars & Flourishes A144 or any other set with a small heart)
Vintage Lock & Keys Necklace (CA125)

Thrifted silver frame
Foam tape
cotton (crochet) thread
scrap patterned paper
heart punch
printed sentiment

The How To:
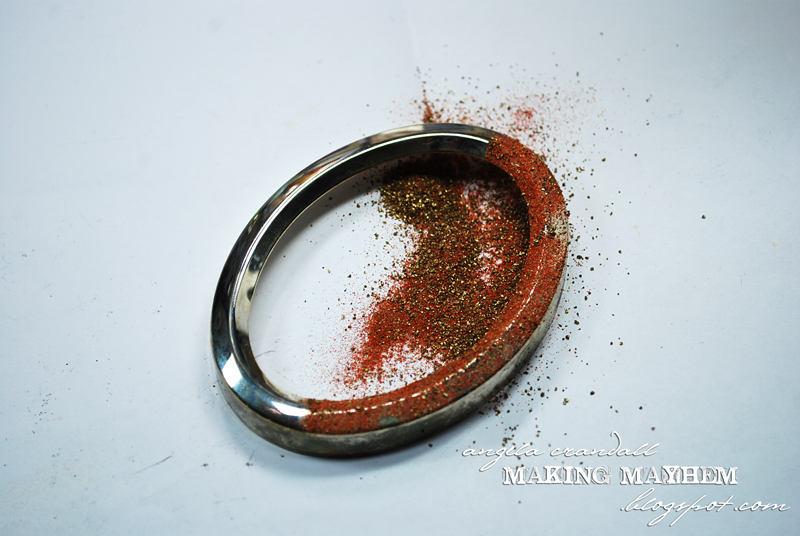
This project is pretty straightforward. Begin by dabbing on some Embossing Powder Adhesive Fluid and then emboss the frame with the Gilded Rose Gold. Don't be too precise. You want to leave areas unembossed. Tip: once the metal frame begins to get hot, you can dip the frame into a pile of the embossing powder without the adhesive.

I didn't have any more tiny hearts, so I used a small flower accent and snipped 2 petals into the shape of a heart. The book board cuts cleanly with scissors.


Using the adhesive fluid and embossing enamels, emboss, the heart, the lock and the key 2-3 times. Tip: to get the texture on the lock - melt 2 layers, while the surface of the lock is still hot, dip the face of the accent into the embossing powder. Heat only just enough to make the powder stick.

Punch out a heart from the scrap paper. Print your sentiment and then trim out the words. (I used a free font: Jane Austen for a little old world writing.) Distress all the edges using Vintage Photo Distress Ink.


Adhere the papers and accents using the Glastique. Use a small brush for the word strips.


 I wanted the frame to have a kind of shadow box effect, so I layered foam strips. (When I was putting the frame together, I had forgotten to account for the thickness of the glass, so I ended up only using 2 strips of foam.) 

String up the key and place one string between the foam strips and the other string over the top. Secure both strings on the back of the white cardstock.

Put the frame back together. That's it!


Stop by every day to see more Design Team inspiration! Don't forget to leave a little comment love and let us know how we're doing!

Inky hugs,
Angi


Saturday, March 29, 2014

Imagine Peace Pendant


For my Globecraft & Piccolo post today I made this pretty pendant. I think visualization can be a powerful tool in your arsenal and I wanted to create something that would make people stop and look. Hopefully, the bright colors  will catch some attention!

The pendant was simple to make and all you need to make one is:
All ready to go!
First you want to emboss your pendant with the Vintage Silver Embossing Enamel 2 or 3 times – take care to roll your bottle of embossing enamel before using as this mixes up the little pieces of powder – and use Embossing Fluid between each emboss.  Before you emboss the pendant the final time, select your rubber stamp (I honestly don’t know if polymer stamps are ok doing this technique) and cover it liberally with the embossing fluid so your stamp won’t stick to the pendant.  You have to be quick doing this step - emboss your pendant the final time, them push your stamp into the still warm Embossing Enamel. Leave the stamp there for a bit; it will pop off when the Embossing Enamel gets cool. 
Texture!!
This creates such a cool effect and texture! 
Then pick out your embellishments for the pendant.  I chose a small butterfly from Butterfly Accents, and embossed that with Royal Sterling.  I wanted to put a heart somewhere but I didn’t have one that I felt was the right size, so I used my small heart punch on some sturdy silver paper.  I then edged the heart with Girls Night Out Embossing Enamel.  I also chose a key from 1” Mini Key Charms and embossed that with Mermaid Tears.  Mermaid Tears is such an unusual color – it reminds me of abalone shells as it is almost holographic.  You really need to see it in person to appreciate the beautiful, subtle purples & pinks that it creates.  When I put the key next to the Vintage Silver, the key took on the color of silver and I wanted it to stand out a bit more so I sprinkled just a bit of the Deep Blue Sky Embossing Enamel onto the key.  It really looks stunning in person but Mermaid Tears is a very difficult powder to catch on film (or whatever you call digital film).

I chose the words Imagine Peace from the Remnant Rubs and applied that directly onto the pendant first. 

 
Once it was applied, I used a tiny bit of Glastique Gloss to cover the sentiment; I just brushed on with a paintbrush.  I fiddled with the embellishments until I pleased with the placement and glued all of them to the pendant.  I dipped my paintbrush into the Glastique Gloss again and brushed a quick coat over the entire pendant.  Let it dry, added a jump ring and I was done.
If you look closely at the key, you can see the Mermaids Tears color on the tip of it.
I love this pendant and what it stands for! I hope you enjoyed your visit to my blog.  Please consider following the Globecraft & Piccolo blog - there is a brand new post every day! Thank you & have a peaceful day ~ Christi
 

I appreciate the comments people leave and I will comment you back!