


A wreath hanging on a front door is not only something that adds a nice element of decor, but it is the welcoming warmth it lends to those who are ready to ring the doorbell. Incorporating Globecraft & Piccolo bookboard charms, embossing powder and 3-D gel enamel to this warm yarn wreath adds a sophisticated vintage charm.
 | |
| Arin Flynn A Piece of Life's Pie |
- G&P Vintage Birdcage Charms
- G&P Vintage Silver Embossing Powder
- G&P Embossing Powder Adhesive
- G&P Glastique Gloss Finishing Glaze
- G&P Napthol Red 3D Enamel Gel
- G&P Siam Silver Embossing Powder
- 14 inch Foam Wreath - FloralCraft
- Yarn
- MDF Letter - Michales Craft Store
- ProMakers (used the fine tip for tracing)
- Felt fabric
- 2 inch red ribbon - Celebrate It
- 5 inch Doily - AliExpress.com
- White 12x12 card stock
- Cricut Die Cut Machine and Cricut Cartrige Flower Shoppe
- Hot Glue Gun
- Heat gun
- Straight Pins
- Scissors
- Q-Tip Brush (3)
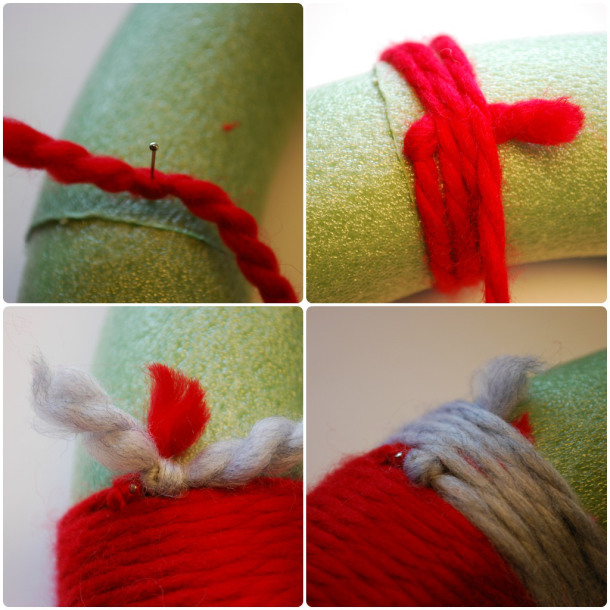
Step 1: Making the Yarn Wreath
Making the yarn wreath is pretty straight forward. Use a 14-inch foam wreath that can be found at a local craft store, straight pins and yarn of your choice. Tie a knot at the end of the yarn string and then stick a straight pin through the knot attaching it to the back of the foam wreath and begin wrapping the yarn around the wreath (you can also alternate colors and patterns, this wreath is just one solid color). Once complete, tie another knot at the end and run a straight pin through it. A 14-inch wreath usually takes around 1 1/2 hours to complete.
Step 2: Birdcage Charms:
Apply Napthol Red 3D Enamel Gel to both bases of the birdcage charms and set aside to set and dry.

Then apply Piccolo Embossing Powder Adhesive to both the detailed birdcages, dust with Piccolo Siam Silver Embossing Powder, shake off the excess and set with heat gun. Repeat this process three times to add more depth and dimension the birdcages.
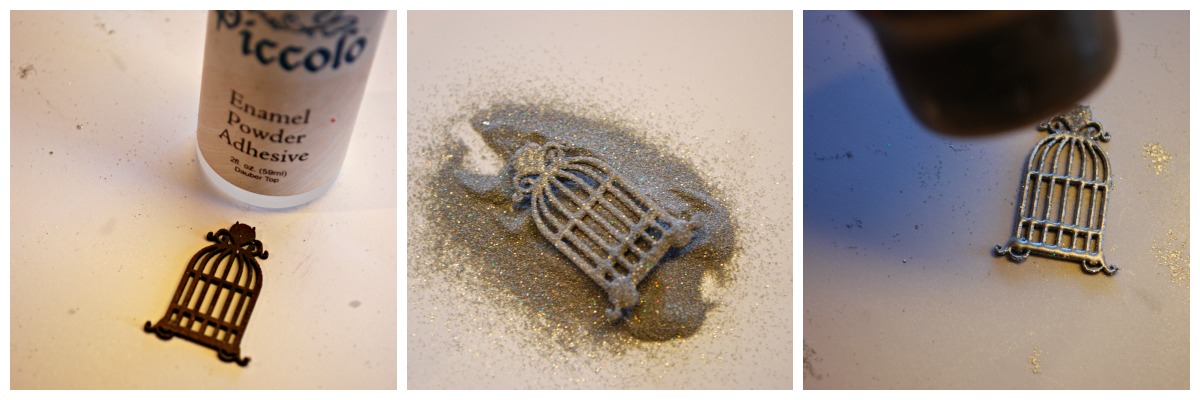
Once both of the bases and detailed charms are dry and set, apply Glastique Gloss Finishing Glaze to the back of the detailed charms and adhear to the base charm. Set aside to dry.

Step 3: Felt Roses
To make these felt roses you can use a Cricut die cut machine and Cricut Cartridge Flower Shoppe (scallop base cut at 4 inches and 6 inches on 12x12 white card stock). You can also use a Silhouette cut or even free-hand these flower stencils. Trace the stencil using a fine tip marker, cut out.

Begin to tightly roll the end of the fel,t rose toward the middle of the spiral. When you reach the end, hot glue it to the bottom of the felt rose. I made three red roses and three grey roses.

To add a bit of bling to one of the roses apply Piccolo Embossing Powder Adhesive to random sections of the rose with a Q-tip and then dust those areas with Piccolo Siam Silver Embossing Powder. Carefully remove any excess enamel powder with a dry Q-tip brush and then set with a heat gun slowly. Take care in the heating process you only want to set the enamel powder, not melt the felt fabric.

Step 3: MDF Letter
This step was super easy and fun to do. Apply Piccolo Embossing Powder Adhesive to the front, inside surfaces and outer edge of the letter. Then dust it with Piccolo Vintage Silver Embossing Powder and shake off the excess. Set it with a a heat gun and allow it to cool for five minutes. I only had to do one layer of the powder because the initial application provided total coverage. Then secure the birdcage charms to the letter using hot glue.


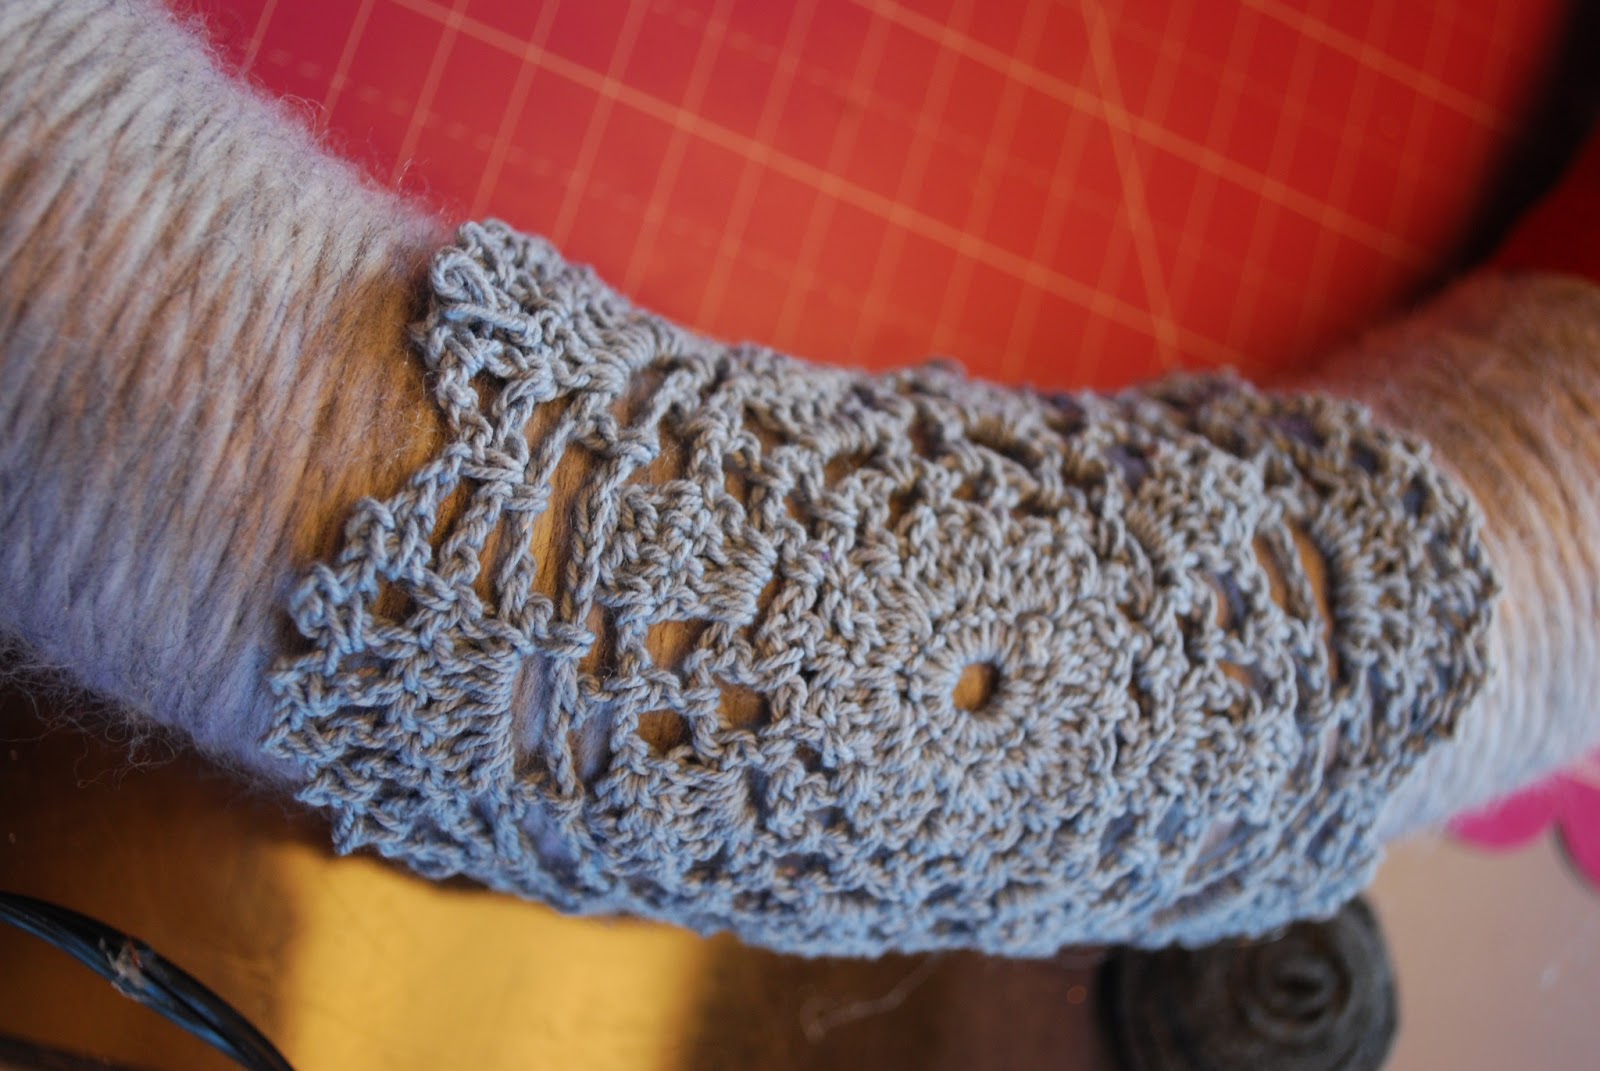
Step 4: Putting Together the Wreath
Once all the elements are complete, assemble the wreath by adding a grey doily to one side of the wreath, securing it by wrapping it around the wreath and hot gluing the ends to the back of the wreath.
Hot glue three roses in a row on top of the doily. Then add the letter to the other side of the wreath.

Add the letter and three more roses to the other side of the wreath securing it with hot glue. Loop the 2-inch x 24-inch ribbon at the top of the wreath and tie a knot to hang.

This wreath was very simple and fun to make. This is a great gift idea for a house warming or wedding. You can see another one of my simple and fun home decor projects using Globecraft & Piccolo products by visiting my blog HERE.
1 comment:
I love the 'B' on here and those flowers are so cute! Great little project for Spring!
Post a Comment