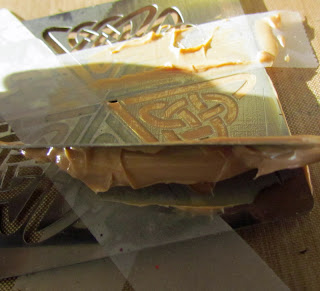
So, here is how it was done:
Materials
Piccolo Square Tag Bezel
Piccolo Embossing Powder Adhesive
Globecraft Mossy Glen Enamel Powder
Globecraft Guilded Rose Gold Enamel Powder
Piccolo Easy Grip Tweezers
Globecraft Vintage Gold Bail
Black Real Silk Cord Necklace With Lobster Claw Clasp
Heat Gun
Dreamweaver Stencil LL381 Celtic Hexagon
Dreamweaver Gold Embossing Paste
Dreamweaver Palette Knife
Removable Scotch Tape
Tim Holtz Alcohol Inks in Cranberry, Espresso, Oregano and Butterscotch
Alcohol Ink Applicator Tool
Directions:
1) Use Embossing Powder Adhesive on Tag Bezel by simply blotting it on the tag board.
2) Cover with Mossy Glen Enamel Powder.
3) Heat embossing powder.
4) Repeat steps 1-3, alternating sides, until you have about 3 layers on each side. As you heat, you will need to hold the bezel with tweezers.
 |
| This is what it looks like after the enamel. |
5) Use the removable tape to tape off a single triangle.
6) Center the triangle over the bezel. Use tape under the bezel to attach it to the stencil.
7) Use the palette knife to place embossing paste on the tape above the opening on the stencil.
8) Use the palette knife like a squeegee and spread the paste across the opening on the stencil. Don't push down hard, but run the knife along the stencil.9) If you have any paste that bled under the stencil, use the tip of the tweezers to remove it.
 |
| This is what it should look like when it is pasted. |
11) Use tweezers to clear out any excess embossing powder.
12) Heat the embossing enamel. Don't get too close. The embossing paste will not be totally dry yet, and will bubble, adding to the weathered look. Also, as it heats, the paste will "damage" the green embossing enamel, leaving bluish white areas around parts of the knot.
 |
| This is what it looks like completed. |
14) Attach the bail and cord.
Thanks for stopping by! Drop by my blog at www.rememberinglifesmoments.blogspot.com for a different take on St. Patrick's Day jewelry with Globecraft.


3 comments:
This is so cool!
This is very cool! Love your techniques!
Lovely piece Laura. This would be perfect to wear to a St. Patrick's Day party! :)
Post a Comment