Pages

Showing posts with label Tracy Freeman. Show all posts

Tuesday, June 3, 2014

Cogs Keyring

Morning all, Tracy here 
One of my favorite Globecraft & Piccolo products are Rectangle Acrylic Charms because there is so much you can do with them...including playing around with your Alcohol markers /inks like I have this week. 

The frame comes with the  Rectangle Acrylic Charms and I have given that a rough coat of Copper Kettle 
The acrylic charm I have coloured using my Spectrum Noirs and then flicked with the blending fluid...I love this effect. I have then used the cogs from the Gear Necklace set and have used Vintage Black Embossing Enamel I then glued them all down using Tacky Glue. 
I made this to be used as a keyring, but it could easily be used as a necklace charm. 

Happy Crafting 

Tuesday, May 27, 2014

Heart card

Morning all, Tracy here. 
I have been using my stencil technique again...original post can be found here 
This time i went for something slightly different and created a coloured base and then stuck the Filigree Heart Accents over the background and sprayed over the card using Black Dylusions and some mica spray.
I then used the Filigree hearts and arranged them on the card. 
What do you think ? 

This picture shows the sheen from the mica. 


Once it was all dry i mounted it onto some black Core'dinations and then onto a card blank. 
Happy crafting :) 

Tuesday, May 20, 2014

Key Charm

Morning everyone, Today i wanted to share a little charm with you that I made 


I have used one of the Royal Key Charms and the two small keys that come with Key to my heart set and embossed them using Copper Kettle & Gilded Rose Gold, I only did a rough layer because i wanted a hammered/aged look to them. I have then used black jump rings to join them together using a 6mm jump ring at the top so it can be secured to whatever you would like to use it on :) 
This is a simple, but fun project and something i will do more of.
Happy Crafting 

Tuesday, May 13, 2014

Cameo...

Morning everyone, Tracy here. 

I have been playing with Cameo Girl Charms and microbeads. 


I removed the middle section of the cameo and cut some Blue Core'dinations card to fit to the back of the cameo. 


I then embossed the frame using Aged White Enamel powder, i used 2 layers. I then adhered the card to the back of the frame using a nice strong glue. 


I glued some Microbeads in the head area and once dry and went over it with Glastique
And here is the finished result. 


This shows the texture of the beads and enamel really well, and i love the effect it gives. 

Happy crafting :) x

Tuesday, May 6, 2014

Enamel Chart

Morning everyone, Tracy here. 
Now we all love Embossing Enamels don't we...I know for me the first time seeing that magical moment the powder turns to a lovely molten enamel I was hooked. 
But the one thing with them is how different they can look once melted, I mean we all know Gold is Gold, but now there is so many beautiful colours and mixes and with the fantastic enamels from Globecraft & Piccolo there tends to be glitters & a couple of different colours...which you cannot really see until they are melted. 
So i can have a quick reference of what the enamels look like once melted I decided to make a colour chart, which is below and you can use it if you wish :) 

I have left some spare circles so you can add enamels too...you could even use it for your 3D Enamel Gels :) 


The circles are the right size for the applicator of your Enamel and Embossing powder. 


Here is my chart filled in, and i am able to also see what enamels i have when ordering :) 


Here is the blank chart, please feel free to save it and use. 


Happy Crafting 
x

Tuesday, April 29, 2014

Adding texture

Morning everyone, Tracy here. 
I wanted to show you today a pendant I have made that is slightly different...
I have used Royal Sterling Embossing Enamel and given 4 thick layers into a Teardrop bezel. Whilst it looked beautiful without me doing anything else i wanted to add some more texture, so whilst the immediately after heating the powder on the last coat I used a script rubber stamp...**PLEASE NOTE** do NOT use any other stamp other than rubber otherwise you risk damaging your stamp...Leave the stamp until the enamel has cooled and then slowly remove....and you then have some beautiful texture. 

 You can just see a hint of blue here, that is because i used some 3D enamel gel in Turquoise  and "buffed" over the surface with it, because the surface was so textured you find the gel sticks in certain areas...it is a lovely effect. I also rubbed some gilding wax in some areas and then finished off with a nice thick layer of Glastique Finishing Glaze  


 This picture shows all the different colours, texture and glaze perfectly. This technique can be used with so many different stamps....and it fun too :) 
Happy crafting 

Tuesday, April 22, 2014

Steampunk Bubbleframe

Morning everyone, Tracy here. I hope you all had a lovely Easter ? 
I have been playing this week with one of the fantastic new Bubble Frames. 


I love how this turned out, and the possibilities are endless with these. 
The list of items used are at the bottom of this post. 


This picture shows just how fantastic the powders are, you can also see the "face" which I used a clock embossing folder on and then distressed using inks, waxes & Enamel powders. 


This one shows the gears and the lock.....you can also see the dimension of the powders. 


I hope my post has inspired you. These frames are brilliant for preserving keepsakes, or photos. 

Items used- 
Bubble Frame
Enamel Powders-
Stamp is Bronte Script from Visible Image 
Stazon Ink 
Crafters Companion A Stitch in Time Embossing Folder
Gilding wax 
Brads

Tuesday, April 15, 2014

Stenciled Card

Morning everyone Tracy here. 
I wanted to show you an that Piccolos have lots of uses, and one of the ones i love is that you can use them as a stencil. 
I have used ATC Bubble Background which i have to confess is my favorite Piccolo at the moment. 


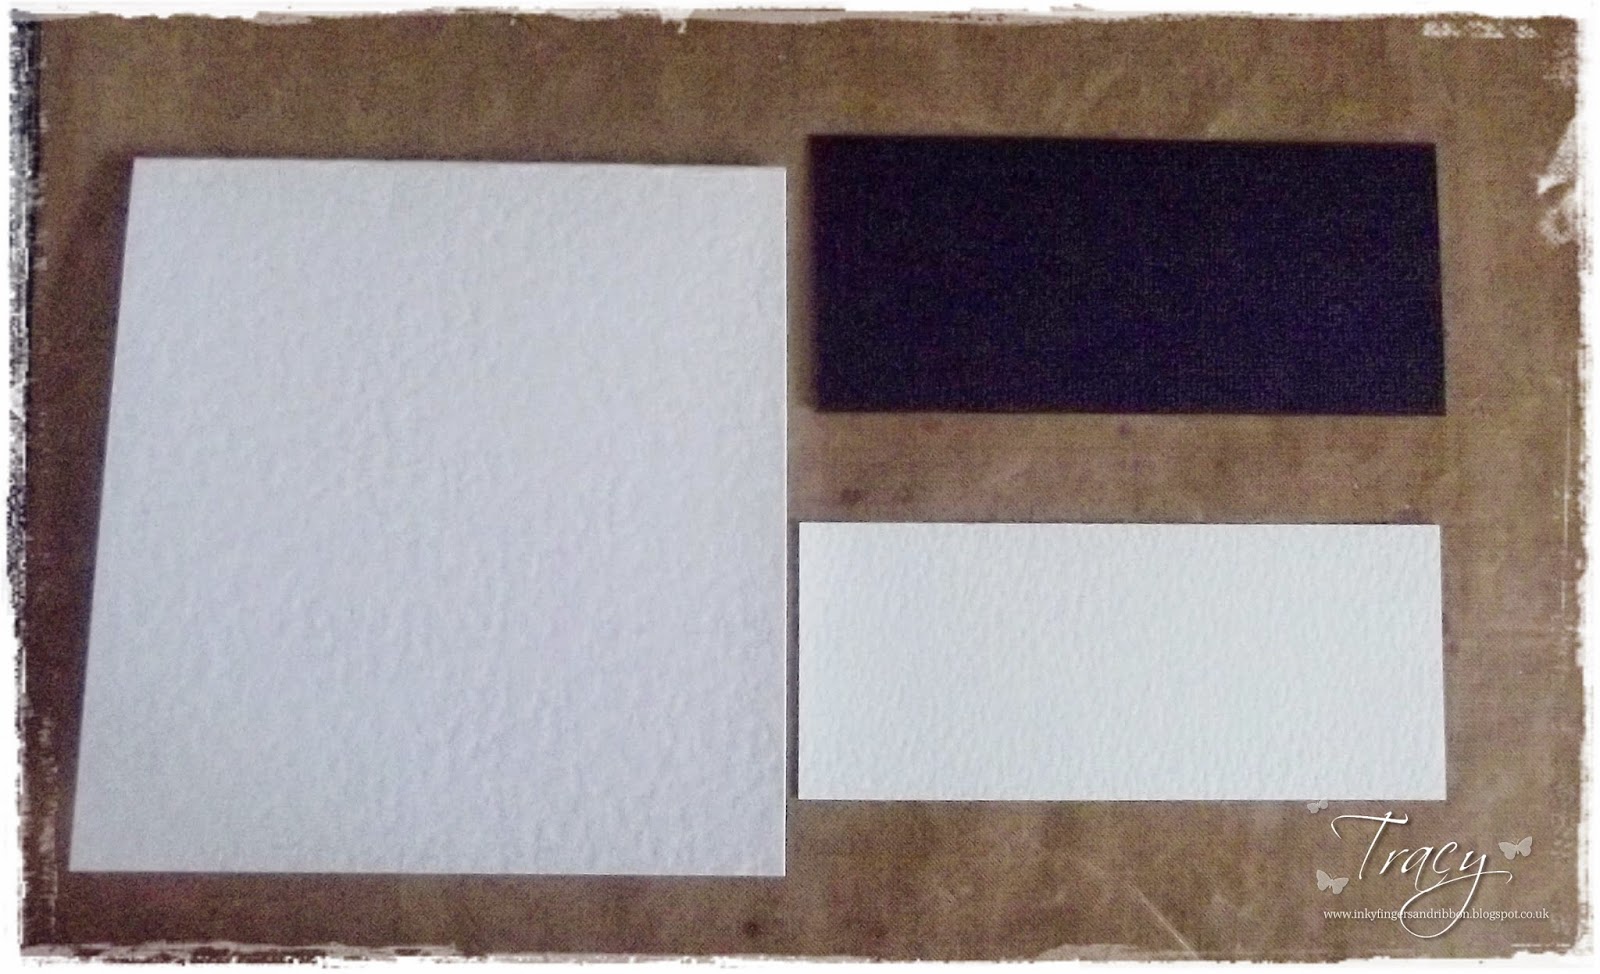
I then took a 4.5 x 5 card blank , a black strip of card cut to 2 x 5 and a strip of watercolour card cut to 1.9 x 5


For the next step you need a temporary adhesive to hold your "stencil" in place, I always use Crafter's Companion Stick and Spray. 


Spray one side of your Piccolo "stencil" and position on the watercolour card. 


Pick your medium you wish to use to add colour, I swear by Dylusions, but it is totally up to you. 


Be as creative as you wish and apply your colour, I run a heat tool over the area before i remove the Piccolo, and then VERY carefully remove the Piccolo, I have found removing the paper from the Piccolo is the best way. 
And of course you now have a pretty coloured Piccolo :) 


Once fully dry rub away any excess adhesive and glue to your black strip and then adhere this to your card blank. I then rounded off the bottom two corners and added a simple sentiment. 
And here is the finished card, you could be so creative with this method. 

Items used: 
4.5x5 Card Blank 
Watercolour Card 
Black Cardstock
Dylsusions Ink Sprays 
Crafter's Companion Stick & Spray 
Sentiment Stamp. 

Happy Crafting 
x

Tuesday, April 8, 2014

Mini Canvas

Morning Everyone. 
I have created a fun Mini Canvas this week that I wanted to share with you

I created the base of the canvas using Distress Stains and then Stamped onto some copy paper and stuck it down with PVA. 
The beautiful heart Piccolo is from the Heart Flourishes Accents set and the Corner flourish is part of the Spring release and is from the  Vintage corner Flourish set
The heart was given a nice thick layer of Black UTEE and the Flourish was given two layers of Vintage Black Enamel Powder, I also sprinkled some of this across one corner of the canvas. 

This picture shows just how gorgeous the powders are. 
Happy Crafting 


Tuesday, April 1, 2014

Hair Barrette

Morning everyone Tracy here. 
I just wanted to show you how versatile the Enamel Powders can be. 
I had a couple of Hair Barrette Slides and using Bahama Aqua powder & 3 of the smallest flowers from Stacey's Stacking flowers I made my very own custom Hair Barrette


I love how it turned out ! I finished it off with a layer of Instant UV resin to give it some extra protection, but just image how you could use the other Enamel Powders & Piccolos to create some fantastic accessories ! 

Don't forget to keep checking back all week to see some of the fantastic creations from the rest of the Design Team. 
Happy Crafting 
x

Tuesday, March 25, 2014

Butterfly card

Morning everyone Tracy here. 
I have a card to show you this week that I have created using Mermaid Tears Embossing Enamel and the lovely Fanciful-Butterflies stamp set from Sweet Stamps. 


To change the colour slightly I used a bright pink pigment ink as a base, I was surprised at how much this changed the colour of the powder, especially on the butterflies. 
The powders worked perfectly with this stamps, which is brilliant because they have some fine detailing. 
I hope I have inspired you to have a play with your Enamel powders. 
Happy Crafting :) 

Tuesday, March 18, 2014

Acrylic Charm using Alcohol markers

Morning Everyone :) 
I wanted to share with you a fun and different charm I made using Acrylic Bezel

I think this is one of my favorite projects, and it was so much fun to do. 
Here is how I created it- 

Firstly items needed are: 
Piccolo of your choice
Spectrum Noir Markers & Blender ink refil 
Stazon ink pad 
Script Stamp
Chain or fixing of choice 
Fine Paintbrush
Meltpot

1. Take your Acrylic Bezel and randomly colour the Acrylic Bezel on one size....you do not have to be neat at all with this stage. 

2. Take your paintbrush and drop 1-2drops of your blending ink refill onto the bristles, Then "flick" this across the bezel, you will then get a mottled effect...if you want more use more ink, if you want less recolour and start again. 

3. Stamp using your Stazon and script stamp, I overstamped but this is totally upto you. 

4. Melt some UTEE in your meltpot and dip your Piccolo to give it a nice even coating....If you do not have a meltpot just use your Enamel powder Adhesive and give your Piccolo 2-3 coats with the UTEE. 

5. Stick into place on your Bezel and allow to dry. 

6. Once Dry give it a nice thick layer of UV Resin and allow to set either in a sunny window, or using a UV lamp. 

7. Once the uv resin has set finish off with your fixing of choice. 

The brilliant thing about this no item will ever be the same due to the refill ink ! 
There is lots of different shapes and sizes of Acrylic Bezel, as well as lots of  Piccolo so you could produce so many different looks with this....Have fun ! 
Happy Crafting 

Tuesday, March 11, 2014

Floral Keychain

Morning everyone Tracy here. 
Mothers day & spring are nearly upon us here in the UK, and when I saw Floral Eggs in the new release I had the perfect idea for them, I decided to make a nice keyring...here is how I did it...

I one of the Acrylic Oval Charms & two of the pansy Floral Eggs

I gave both the eggs two coats of Copper Kettle Embossing Enamel, once I did that I stuck them onto heatproof acetate, the eggs are going to go back to back, so make sure you stick the acetate onto the correct side.  

I then cut around the eggs so they now have a acetate backing. 

Using my Spectrum Noir pens I coloured the flowers & leafs, I did this from the back. 

I then removed the protective film from the Acrylic Oval Charms and glued an egg to each side, making sure they line up. 

I then gave the Oval a coating of Turquoise 3D enamel gel, allowing each side plenty of time to dry. 

Once dry I took some fine sandpaper and "roughed" up the Enamel gel..I wanted this to have an aged look, if you do not want this then ship the next few steps...I then used some Distress stain and rubbed over the gel, wiping off the excess. 


I then used some Gilding Wax around the edges.

Each side was then given a layer of UV Resin to give extra protection and had a key chain added . 
And there you go, a lovely floral key chain. 

Items used- 
Distress Stain 
Gilding Wax 
Spectrum Noir Pens 

Happy crafting 

Tuesday, March 4, 2014

Ruby red Bow earrings

Morning everyone, it is Tuesday which means it is my turn to show you what I have been creating. 

One of my favorite sets Is

It is such a versatile set, and I do love those bows ! 
I am not a jewelry maker...in fact I have never made any, but to me those bows are screaming out to be made into earrings. 
I had some old broken up earrings and decided to use a little gem spacer with these. 
What do you think...

I instantly knew I had to use Ruby red slippers embossing enamel powder, and i am so glad I was right. 
This was such a simple and fun project and ideal if you are looking for some different earrings....and with all the different colours of embossing enamel just think how many different pairs you could have ! 

Items used- 
Upcycled Gem spacers 

Don't forget to check back the rest of the week to see the rest of the teams beautiful projects. 


Tuesday, February 25, 2014

Mini Canvas

Morning everyone, Tracy here. 
I have been creating with some of the new release this week, and have created a mini canvas. 

This was so fun to do. I coloured the canvas using Distress inks and then stamped along the bottom using Tall Grassy Flowers Stamp, i then dabbed adhesive fluid across the grasses and sprinkled a mix of Mermaid Tears Embossing enamel & Aged White across and heat set, I then took two of the new 3D Enamel Gels  and randomly dotted them to give them the look of flowers. 
The birds are from the Lil flowers, Leaves, Birds & Bows set and I have given them two coatings of UTEE in White and then rubbed some gold wax over them. 
The sun is from one of the new Piccolo Sets, Spring Accents, I did something slightly different with the sun.I cut it so it would fit in the corner  & then used my black Spectrum Noir and Coloured it so it was all black (including the edges), I then gave it a thin layer of 3D Enamel Gel In Daffodil Pearl, whilst it was still wet I sprinkled some Aged White over it and heat set, I then took the 3D Enamel Gel In Daffodil Pearl and put another layer on and waited 5-10 mins before wiping some of the gel away...I really love effect this has given and will certainly be using it more in the future. 
I hope you like my mini canvas, don't forget to check back each day for some wonderful creations from the rest of the fab team. 

Items used- 
Mini Canvas
Distress Inks


Tuesday, February 18, 2014

Vintage style French Bubble Frame


Morning everyone, Tracy here. 

Have you been and checked out the new Spring release ? there is some fantastic items in the release, so if you haven't checked it out, then what you waiting for ! 

Onto what I have been creating this week. 

I have used one of the fab Bubble Frame kits, the one I have used is the new French Oval Kit, and it is beautiful ! 
I wanted to go with a vintage/shabby style with it...


What do you think ? I was really happy with how it turned out. 
On the actual frame I have painted it with Off white paint, and then used a Crackle glaze, once dry I used Distress stain, which i rubbed all over and then buffed off. 
The edges of the frame and French oval I rubbed some gold wax. 

Inside the Bubble I have used the new Stacey's stacking flowers, which are brilliant and so versatile ! I used Aged White Embossing Enamel & Copper Kettle Embossing Enamel on the flowers and trimmed them so they sat around the edge of the frame, I also "lifted" some of the petals to give some dimension to them.
I have also used one of the butterflies from the Butterfly Accents set and one of the flourishes from Medium Flourish Accents set, i embossed these using Bahama Aqua Embossing Enamel

Here is a closer look at the butterfly...
You can also see the crackle and the beautiful frame better in this picture. 

I hope you like what I have been creating this week, don't forget to check back everyday and see what the rest of the team have been creating, and why not head on over to our Facebook page and share what you have been creating too. 
Happy crafting. 

Tuesday, February 11, 2014

Enamel Dots

Hi all Tracy here, I hope you all had fun with the giveaway...don't forget to stop by the Facebook Page to keep up to date with all the latest news...and trust me there is some AMAZING products coming so you will want to keep up to date. 

On to this weeks make from me. Now I am sure there is lots of you, who like me love Enamel dots, they look great on everything don't they ? 
Just look at how they bring this card to life. 

  
Now what if I told you that you can make them yourself, to any size or shape you want ? 
Well with 3D Enamel Gel you can !!!! and the best bit is....its so easy ! and works out so much cheaper than the premade ones. 
All you need to do is get yourself a craft sheet/Teflon sheet 
and let your imagination run wild, you can create dots like I have here.....


Or you can create hearts, write words or even make enamel swirls ! I always leave mind to dry overnight just to make sure they are completely dry, then I curl the craft sheet and peel them away. 
You can even do a batch lot (which is what I do) and store them for future use. 

Here is a little close up of them on the card....

How ace are they ? and just think of everything you can create ! 

I have used the following Enamel Gels- 


I hope I have inspired you, we would love to see what you create with the 3D Enamel Gels. 
Happy Crafting x