Showing posts with label Aged White. Show all posts
Wednesday, December 17, 2014
Snowflake Ornaments
The snowflakes in this post are from Globecraft & Piccolo which is now owned by SweetStamps, I just love this Elegant Snowflake that measures 2 15/16" (not quit 2 7/8") across.
Enamel Embossing Powder Fluid is the adhesive applied to the bookboard avoiding the center where the decoration will be attached.
It's then covered with Micro White Enamel Powder and heat embossed. I used this simply because it's very fine and give a good white coverage.
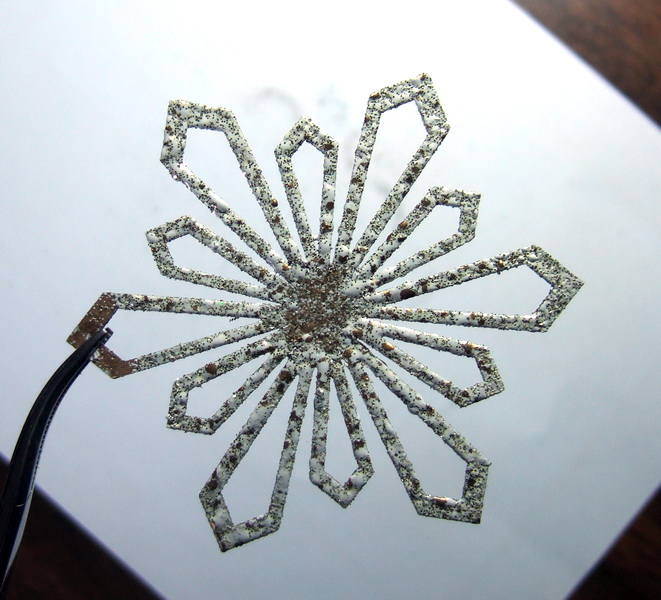
I then apply the adhesive again and cover with Aged White Enamel Powder and heat emboss. This is very thick embossing powder with gold and glitter added and I must say the photographs do not do it justice.
I repeated the process on the opposite side of the snowflake then added the pearl on metal accent using Aleene's Paper Glaze for adhesive (gifted to me without a company name).
A strand of metallic blue embossing thread was used for the hanger.
This is the Crystal Snowflake (largest snowflake in the set measuring 2 1/2") paired up with the larger stars from Tiny Hearts, Flowers, Stars & Flourishes bookboard set.
I used the same adhesive and powders as described in the description of my first snowflake above.
I also avoided the center as much as possible when applying the adhesive and powder but as you can see in the left photo below I placed the star on the snowflake before pouring on the powder to avoid heavily covering that area.
For the star I used Enamel Powder Deep Blue Sky. and only on one side, it was also attached to the bookboard center with Aleene's Paper Glaze.
The photo on the right shows how I held the snowflakes to emboss the 2nd side. Once embossed I went back to cover the area held by the tool and could hold the opposite side of the snowflake with my fingers to heat emboss. You can't lay it on a surface or it will melt the first coat of powder and stick to whatever surface it's on.
The following items can be found in the SweetStamps store:
Saturday, June 21, 2014
Too early for holiday ornaments?
I say NEVER! For this Globecraft & Piccolo post I decided to beat the heat by making a holiday ornament. Using one of the Ornament Kits (in addition to the kits found on the linked page, there is the DIY Portrait Ornament and the DIY Landscape Ornament) make it SO easy and really fun, but my favorite is using one of the 2 DIY kits, like I did here. I wanted an icy feel to my ornament, hoping that keeping cool could be a bit of mind over matter!
![]() |
| The final ornament - pretty, but I'm still hot! |
What I Used to Make My Project
Fishing Line or Craft Filament (I used jewelry cord, clear)
![]() |
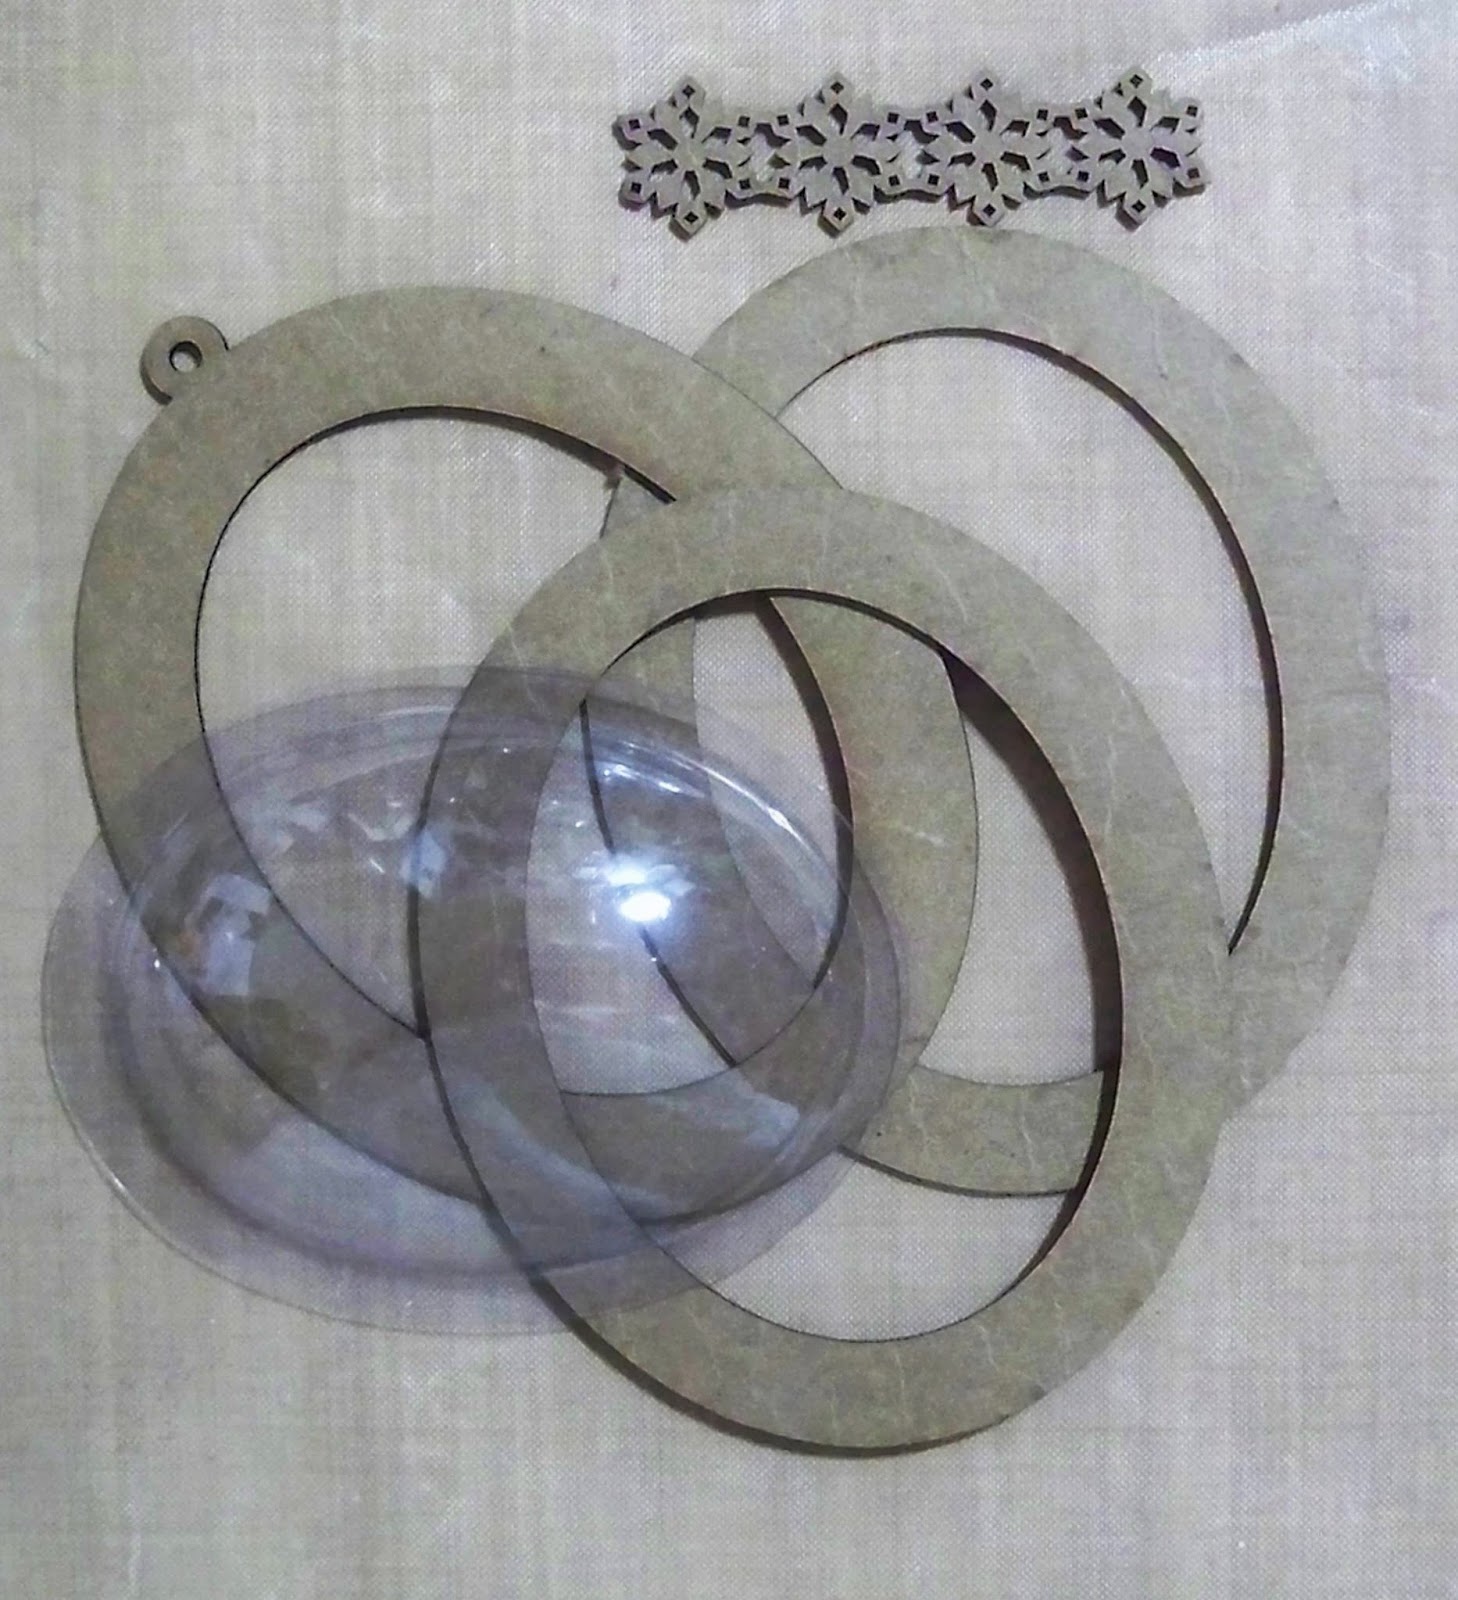
| The kit with the piece from Bejeweled Snowflakes |
First thing I did was cut my long snowflake border from the Bejeweled Snowflake Set in half – there are 8 little snowflakes on each strip, so I just snipped it into 4. Then I applied the Embossing Fluid and embossed the strip with Aged White Embossing Enamel, both front and back.
Then I embossed the inner circle of the ornament – the inner piece is the
![]() |
| Inner bezel with snowflake piece |
![]() |
| All the pieces embossed, attached & ready to assemble (except the globes) |
While my hanging piece was drying, I embossed the 2 outer rings with Mermaid Tears, being sure to roll the Embossing Enamel to shake up the enamel. The Globecraft & Piccolo Embossing Enamel is hand blended in the USA and each color is so unique – the Mermaid Tears is such a pretty mixture of colors! I did one side of each of the outer rings, but I did emboss each side twice. Then I glued the globes and the rings to the inner ring, lining it up and clamping them together with bulldog clips. I let it dry overnight and I was done!
![]() |
| Another look at the final product (hard to get those bubbles to photograph!) |
Also, another great use for the bubbles is to use them as "shields" - when you have items drying, perhaps with Glastique Gloss, you can place a bubble over the item and that helps to keep the cat hair, human hair, Embossing Enamel and all the other floaties out of your finish. Thanks so much for stopping by – I appreciate your comments and sharing of my posts so much! Hope you have a fantastic weekend! Christi
Thursday, June 5, 2014
Angel Words (new items)
Good morning. Teresa here again with todays fun offering.
I love fonts. And I love word art. So when I first saw the new words that GlobeCraft was introducing, I was thrilled.
I immediately knew I was going to make a canvas.
Let's Shop ----
Blessings Word Accent
Celebrate Word Accent
Cherish Word Accent
Create Word Accent
Dream Word Accent
Enjoy Word Accent
Family Word Accent
Friends Word Accent
HappinessWord Accent
Inspire Word Accent
Laugh Word Accent
Love Word Accent
Smile Word Accent
Aged White Enamel Powder
Mermaid Tears Enamel Powder
Pure Platinum Enamel Powder
Vintage Silver Enamel Powder
Vintage Gold Enamel Powder
Embossing Enamel Adhesive
Extras
16x20 prepped canvas
Paint and Paintbrush (I used latex in Whitecap grey)
Glue (I used a quick dry tacky glue)
Lace (this was a vintage tablecloth edging)
Buttons/Rhinestones for accents
And here we go.
This is a prepped canvas and would be completely ok as is, but I lean more towards warm tones so I painted mine my favorite Pantone Color (Whitecap Grey) which is actually more of a cream color than a grey.
After the paint dried, I took my words and the lace edging and worked out my layout directly on the canvas.
(the above photo was taken with my phone - I intended to use it only for my reference, but then decided that this was a good tip to take a digital image so that you do not forget what you decided to do)
Glue your edging to the canvas with the tacky glue. And set that aside to dry.
I had chosen the 5 different enamels listed above and I wanted a random effect. So I gathered my words and sorted them into 5 stacks. Then embossed the words. Some got only one coat and some got two. That is personal preference on the look you are trying to achieve.
Here are the Powders that I used (matched to words).
FAMILY - Mermaid Tears
BLESSINGS - Pure Platinum
LAUGH - Vintage Silver
CREATE - Vintage Silver
DREAM - Vintage Gold
CELEBRATE - Mermaid Tears
ENJOY - Aged White (2 layers)
LOVE - Mermaid Tears
SMILE - Aged White (2 layers)
HAPPINESS - Pure Platinum
CHERISH - Mermaid Tears
INSPIRE - Vintage Gold
FRIENDS - Mermaid Tears
Using your reference picture (or notes), glue your words to the canvas and set aside to dry.
Add your embellishments. I used mother of pearl buttons on the canvas and the lace accent and some flat acrylic rhinestones on the "i" in the words that contained that letter.
That detail above is of the vintage silver powder - I LOVE the hammered metal look it has.
There you have it. An Angel Words canvas, ready to gift or display.
Friday, March 28, 2014
Sweet Little Flower Pendant
Hello my fine feathered friends! Aimee here with a super sweet, shabby chic-ish pendant to share with you.
This came together so quickly- literally 20 minutes and it was finished. It takes longer for the E600 glue to set than it does to create this cutie!
Supplies:
Piccolos LA106 Lacey's Stacking Flowers
Enamel Powder Adhesive Fluid
Enamel powders: Aged Pink & Aged White
Glastique- both matte & glossy
E600 glue
Cord necklace
Glue on bail
Toothpick
Clamp or clothespin
Heat gun
Bling or pearl for flower center (this flat backed pearl is from Close To My Heart)
Paintbrush
Let's make it!
1. Punch out three sizes of flowers.
2. Coat each flower with adhesive fluid. Coat largest & smallest flowers with Aged Pink and the middle sized one with Aged White. Heat them up to melt the powder and activate the adhesive.
3. Coat the two pink flowers with matte Glastique and the white one with glossy Glastique.
4. Start stacking! Use E600 glue to adhere the flowers together and use a clamp or clothespin (or even place under a heavy book) to hold them down for a few minutes to ensure a good hold.
5. Glue the bail onto the back of the flower stack using E600. Be sure to clamp it down for a couple of minutes to ensure a good hold!
6. Add your flower center, string onto a necklace, and wear it! :)
Subscribe to:
Posts (Atom)